
Halloween Extravaganza Day One: Super Heroes
/Up first we are taking a look at some Super Heroes - total AWESOME dude!
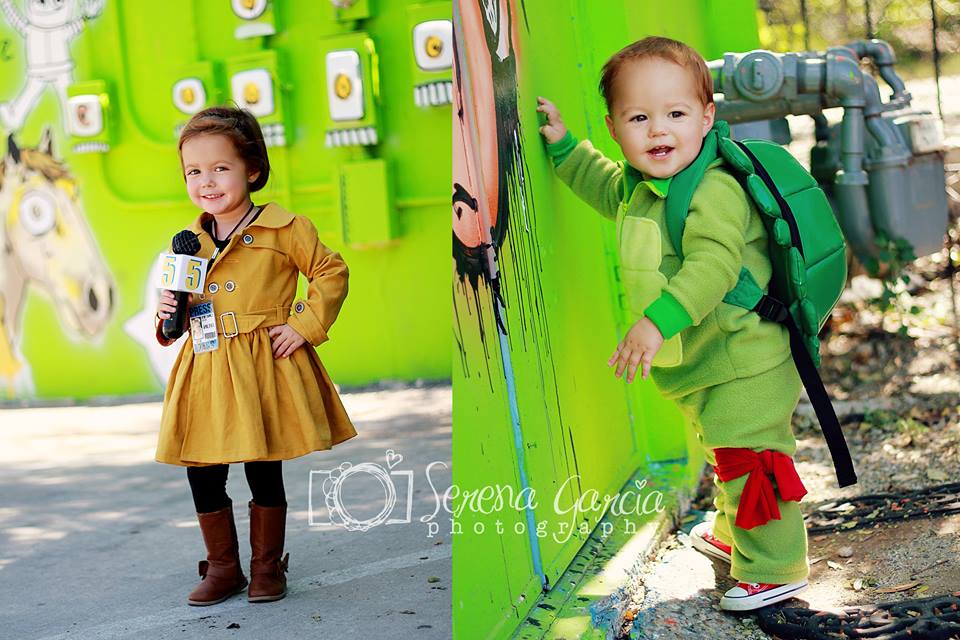
That's right, we have the Teenage Mutant Ninja Turtles and their trusty reporter April O'Neil along with Super Man - sadly Lois Lane was not available for photos at this time ;o)
Join us all week for great inspiration and tutorials, and make sure you link up your own costumes HERE for a chance to win some amazing prizes!
------------------------------------------
"...Teenage Mutant Ninja Turtles, turtles in a half shell, turtle power..."
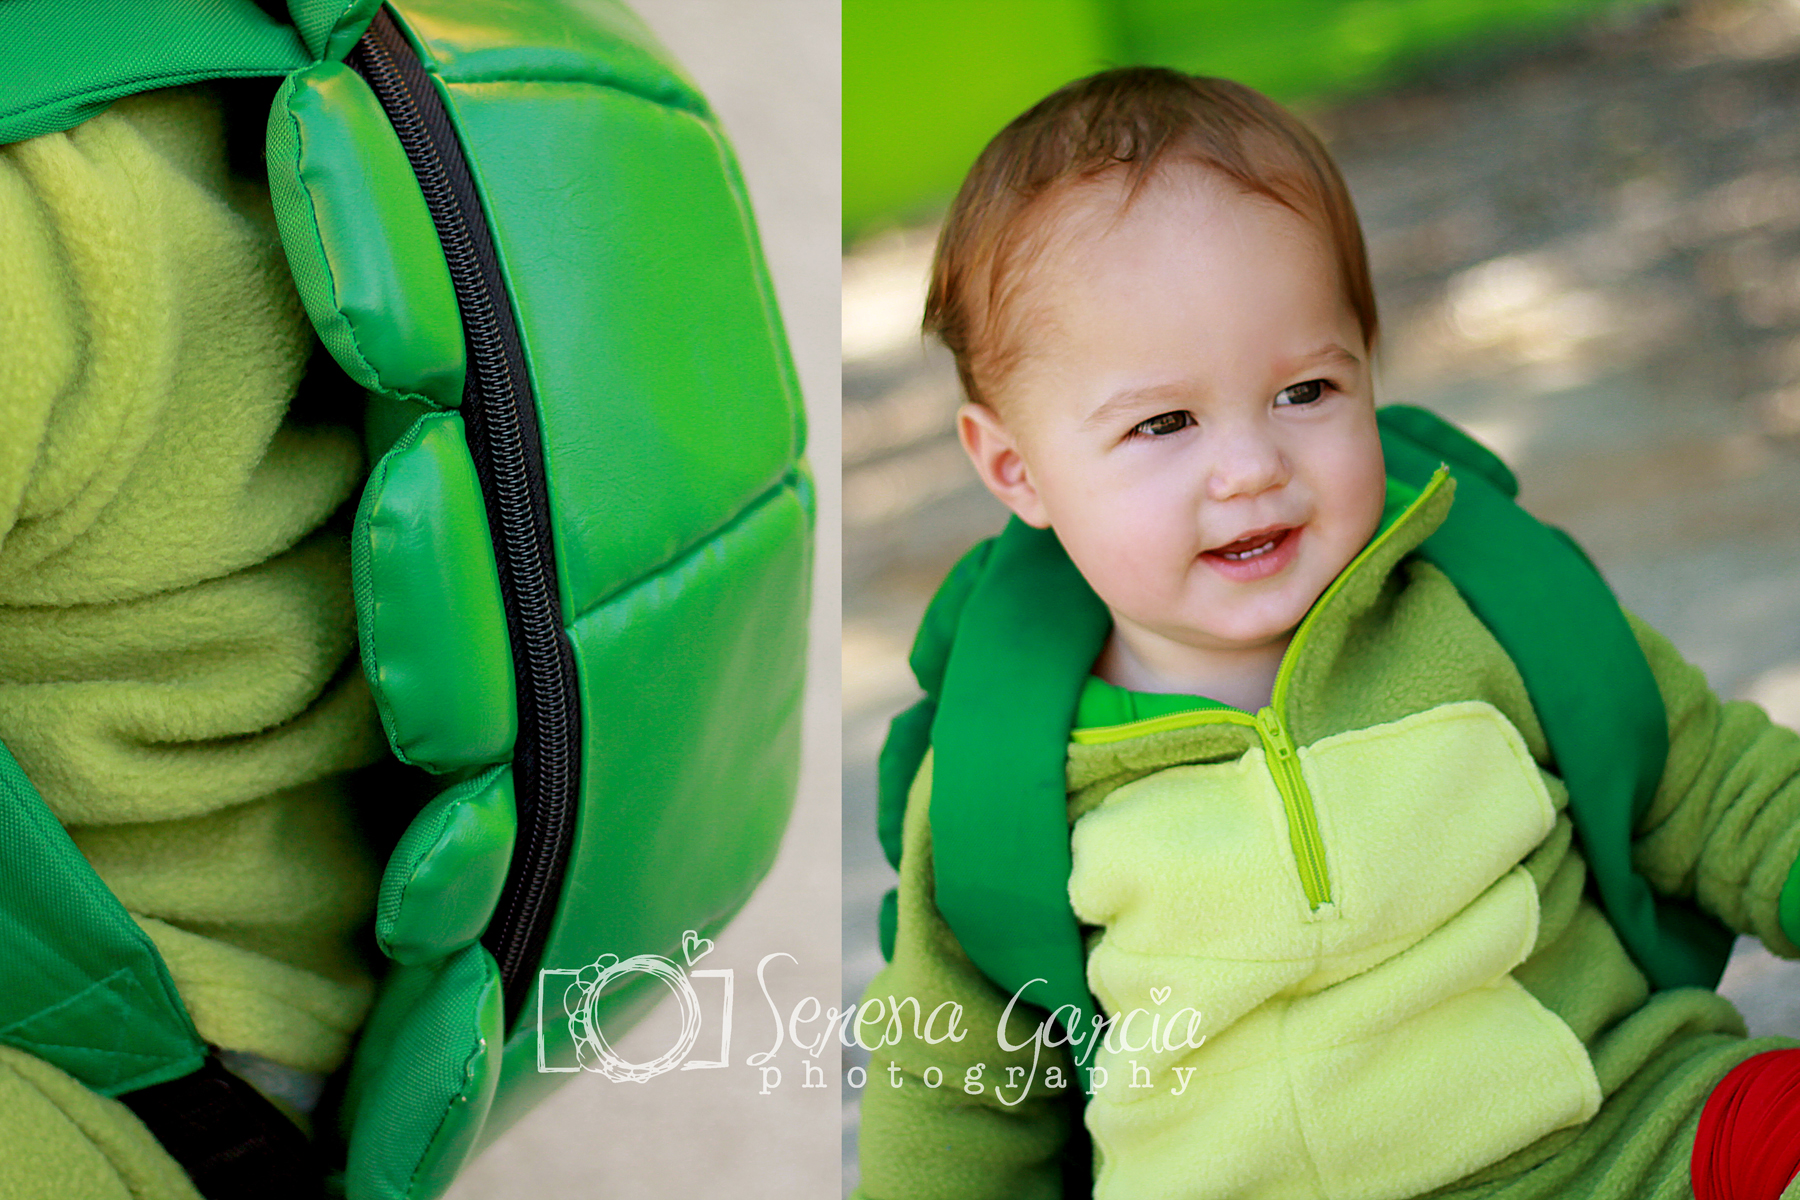
I bet all you 80s babies are singing along with me! My son is Raphael and my daughter is April O'Neil, could it get any better? The hubbs and I had fun with these costumes this year. My plan, as always, is to get the most use out of whatever I make. I don't like spending a fortune on a piece that will only be worn once or buying a cheap costume from the store and it tear after one use. So I start a project with the thought that my kids can wear it over and over again. The Raphael 'costume' is wearable as a sweatsuit for the winter and the April O'Neil 'trench coat' can be worn throughout the year as a staple piece in my daughter's wardrobe.

Patterns used:
-Pine Lake Pullover (Peek-a-boo Pattern Shop), for the Raphael top.
-Material: fleece for main piece and jersey knit for cuffs.
-Taylor's Pajama Pants (Create Kids Couture), for the Raphael bottoms.
-Material: fleece.
-Pippa (Izzy & Ivy Designs), for the April O'Neil trench coat.
-Material: Linen Look by Joanns (color: Wood Honey). I found the buckle piece at Hobby Lobby.
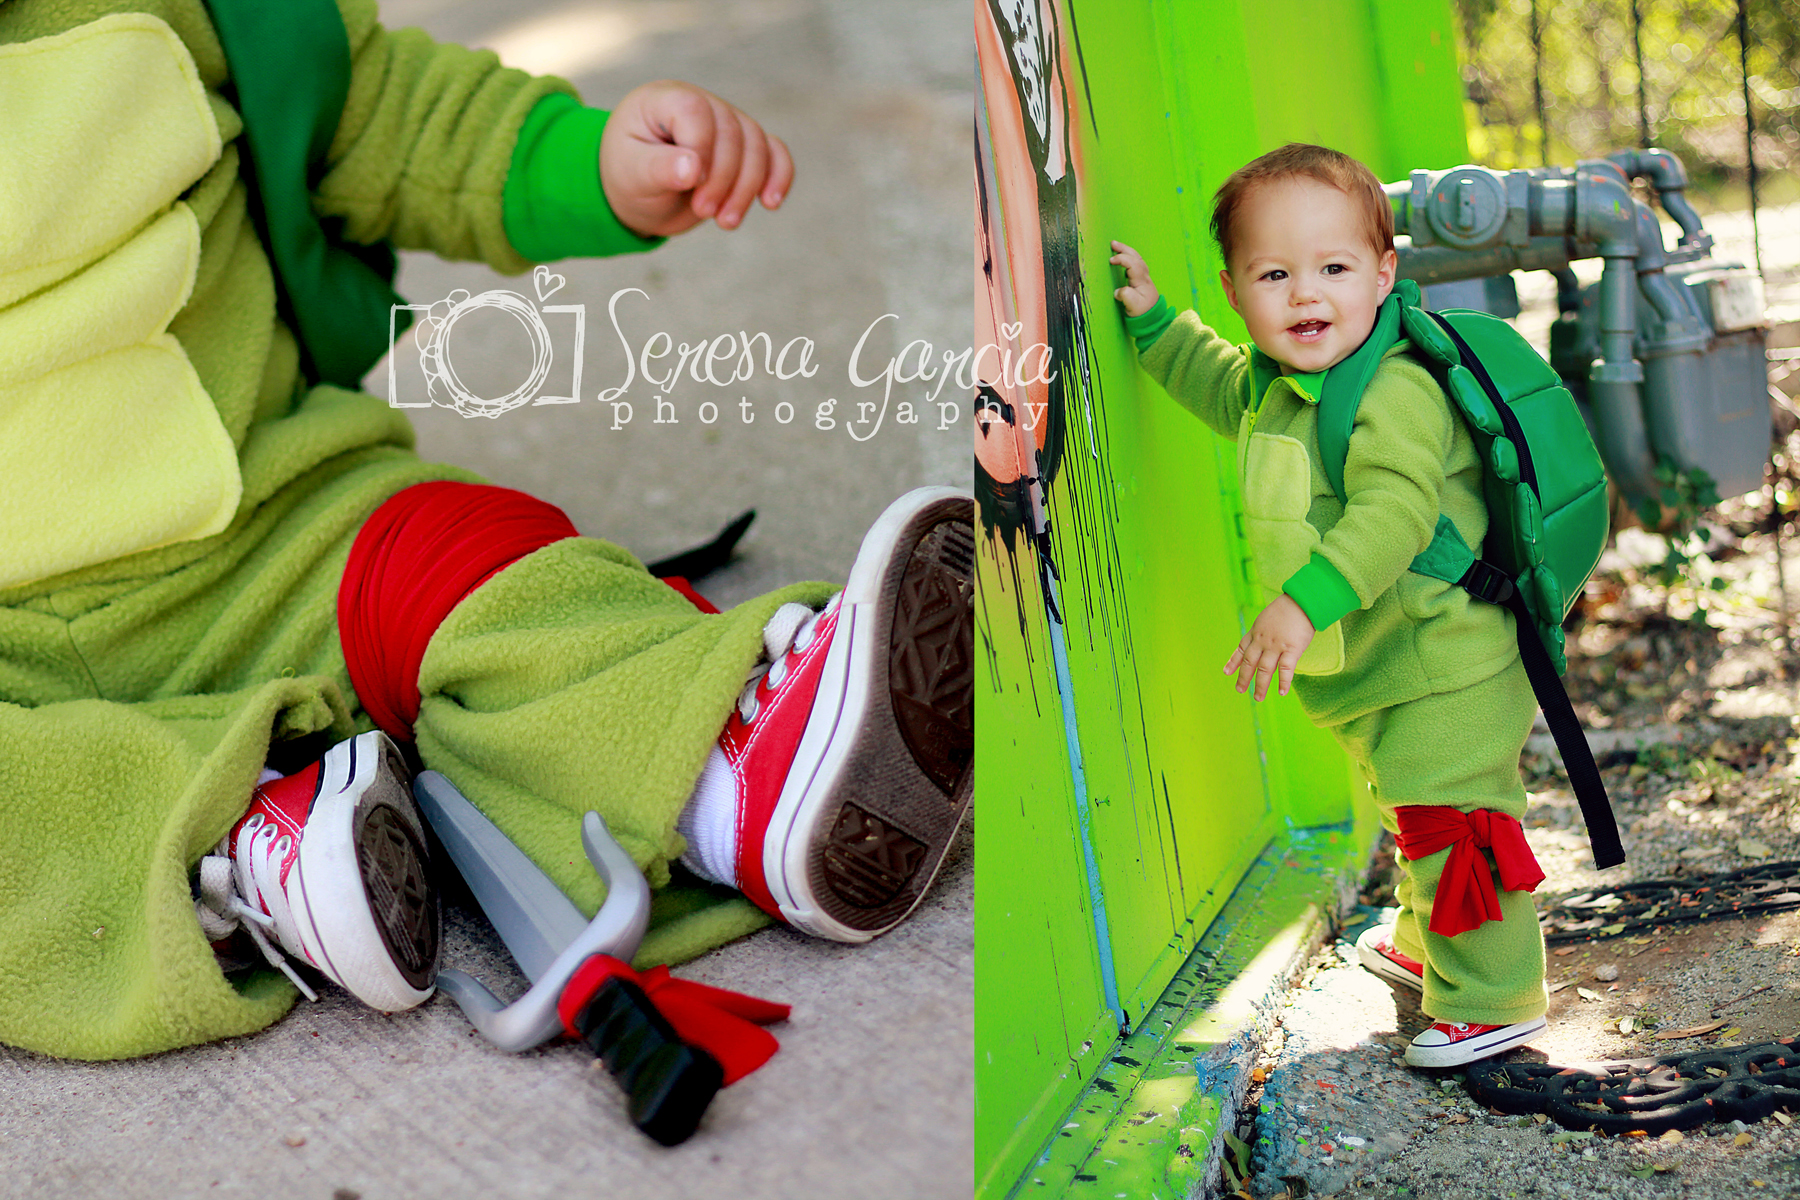
Raphael Costume modifications/props:
-Took away the pocket (Pine Lake Pullover).
-Appliqued the breast plate to the front of the sweater before starting the pattern. It's easier to add applique without having to maneuver around already sewn in arms, etc (Pine Lake Pullover).
-Good ole Wal-Mart has the daggers 2/$0.98! I just added a little strip of red jersey knit for color.
-Felt mask and backpack were bought together.
-Red jersey knit material cut in strips for knee patches, just tied on.

April O'neil modifications/props:
-I wanted it to look more like a trench coat instead of a pea coat, so I added a back flap as well as side front flaps.
-Shortened bodice by 2" and lengthened the skirt 4" so that it was a little bit of a higher rise.
-Added belt loops, fold like biased tape to size, and a belt.
-Mic was constructed from a PS3 Move controller, black fabric sewn with elastic casing for top with added silver paint stripes, and a paper box folded with tutorial from Pinterest.
-Reporter costume not complete without the press pass! Added photo to a printable and laminated.

----------------------------------------


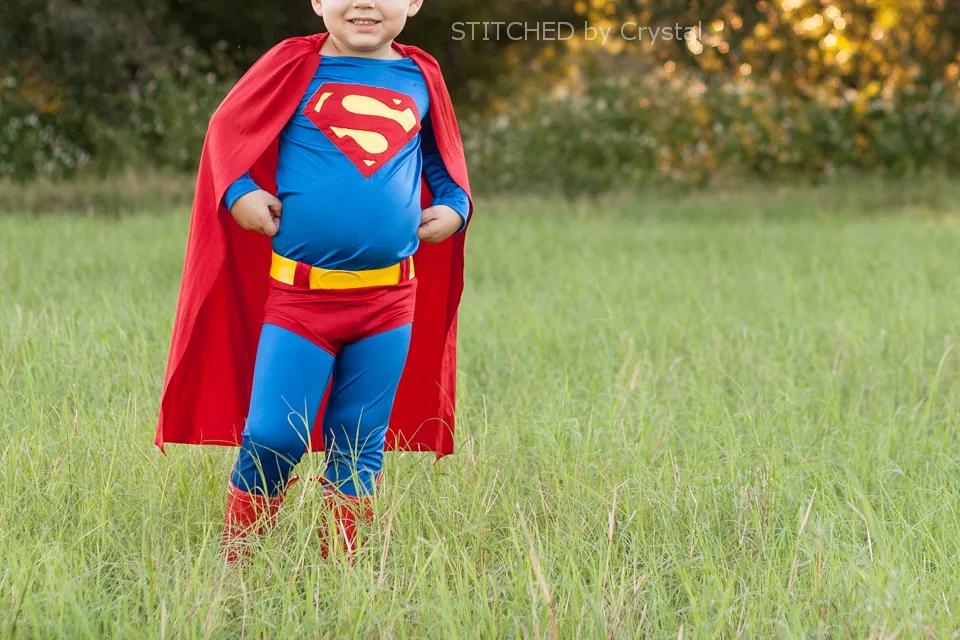
- Draw the “S” on the glue side of the interfacing. You can sketch one out or print one and put it behind the interfacing and trace it.
- Iron the interfacing to the wrong side of some yellow lycra
- Then place some red lycra on top of the yellow, I used a basting spray you can find in the quilting section of your fabric store to keep the fabric in place.
- With red thread in your sewing machine, sew around the “S” you drew on the interfacing.
- Carefully separate trim the red lycra away from the background, leaving just the yellow showing behind the “S”.
- Trim around the diamond shape.
- Pin the “S” in place on the shirt front and sew around the edge to keep it in place.
- Sew up your shirt according to the pattern instructions.


