
Creating a high/low skirt effect on a skirt pattern
/Hi everyone! Nacole here to share a simple modification you can do to ANY pattern to create a high low skirt effect.
Now here in the south we love tank tops and shorts on a hot day, however my sweet little lady refuses to wear shorts so its pants or dresses only. Some days you don't want a long dress on and want to go short to enjoy the breeze. With the high low skirt you can have best of both worlds.
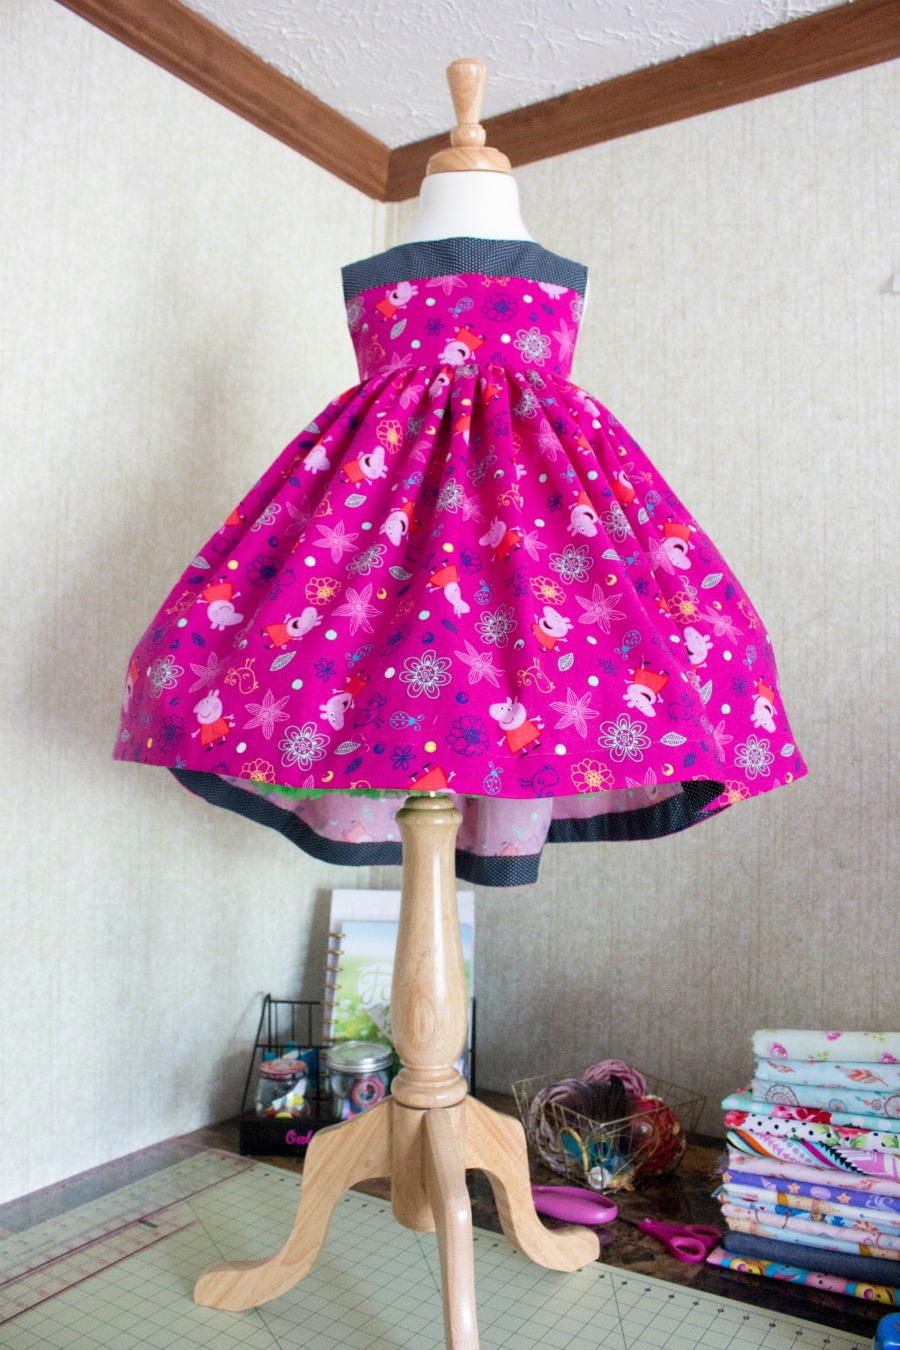
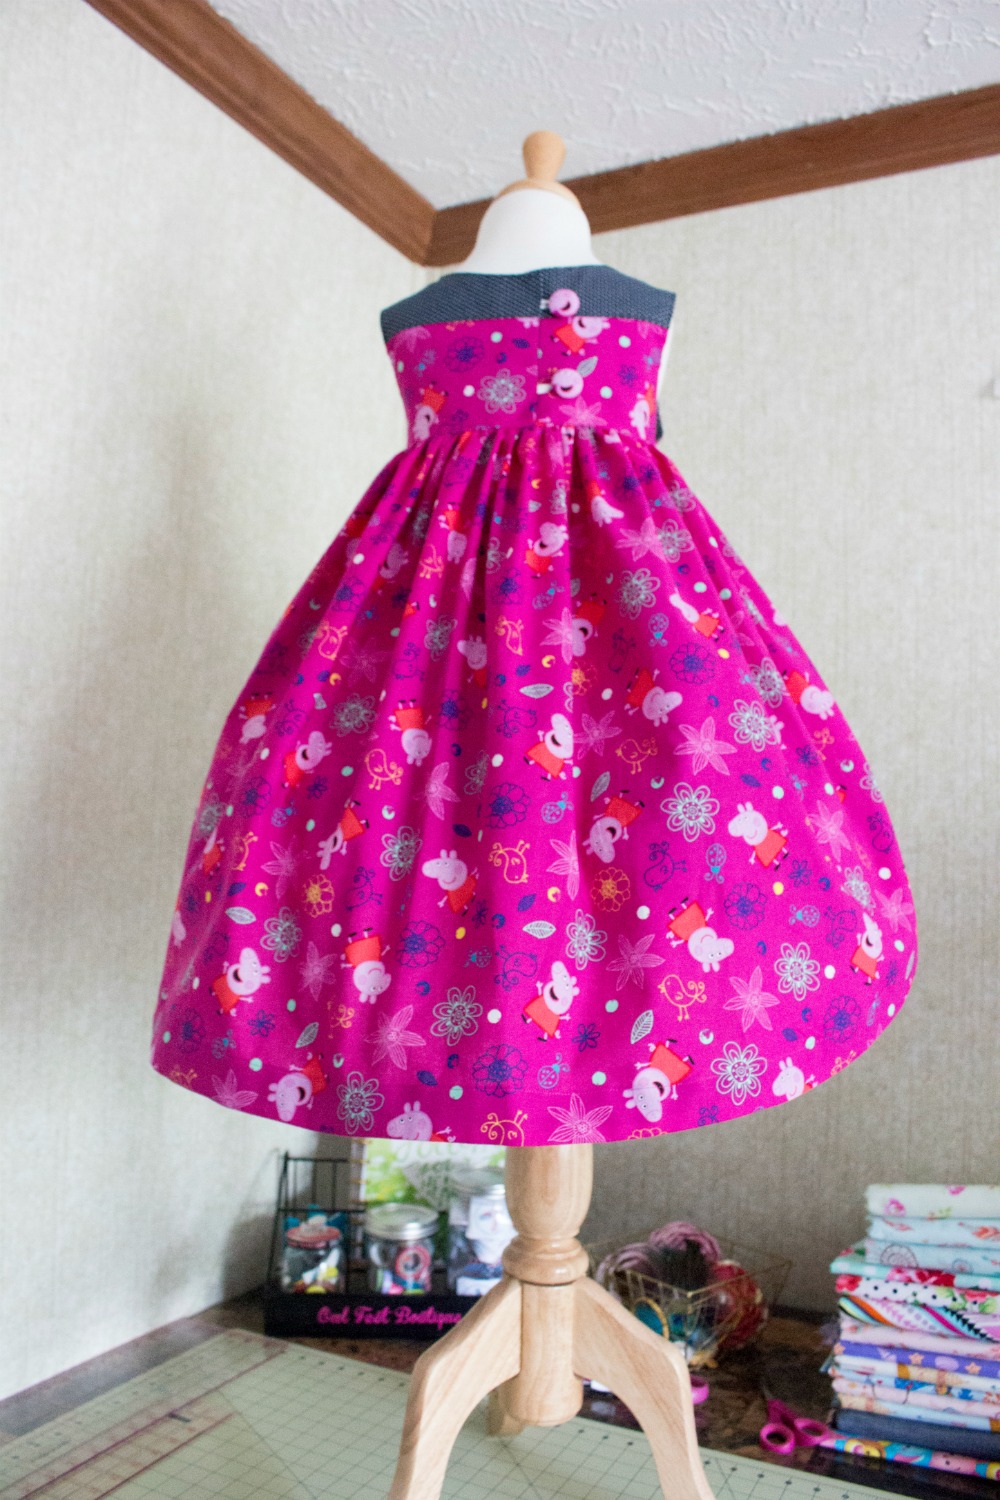
For today’s tutorial I'm using my all time favorite pattern and designer. The Lazy Susan by Brownie Goose is my go to pattern for a simple classic dress that can be modified in SO many ways!! It's a vintage length so it was perfect for this modification. My daughter picked out the fabrics for this tutorial at Beyond Fabric a local sewing shop. She just loves Peppa Pig!
Let's begin :)
Grab your pattern and cut out bodice, lining and 1 skirt piece as per pattern. Also Include the following cut for a contrasting band if you want to add one to your dress.. I used a 3” width hidden contrasting band on the inside of my skirt. Cut 2 3”x SW strips.
For your “low” portion of your skirt cut it 5 inches longer than the pattern calls for.
To create the high low effect for the back skirt piece I just freehand a slight curve.
1. Place skirt back on fold.
2. Measure out .5” into the skirt and mark. (I use this for the SA so that the curve down is subtle and makes it easier to hem and or add the band.)
3. Take your fabric marker of your choice and start to draw a slight curve off the .5” line you drew all the way down to the bottom of the fabric. I like tend to keep a good 8 inches of the bottom straight however, It's totally up to you. Adjust where you see fit and then cut on the markings you have made. It sounds a lot more complicated than what it actually is. I only use my rotary cutter now. I've made 2 other dresses using this modification while just cutting and no drawing.
4. Once you're happy with the curve of the back, place the front skirt and back skirt side by side they should be the same length then start to have a slight curve down. As pictured in picture 4
Time to get sewing! Take your pieces to your machine and get to crackin. Follow the pattern instructions for the construction of the bodice.
When it's time to start construction of the skirt follow the following steps then complete the way you normally would.
1. If you decide to add a hidden contrasting band iron those in half and stitch them to the skirt. Right sides together raw edges lined up.If you want just have just a regular hem proceed here. For mine I decided to stitch the 2 band pieces together sew up one side of my skirt and then attach the band to the bottom of the skirt. Either method will give you the same end result.
2. Match side seams, sew together and finish raw edges your preferred method. You should now have your skirt :)
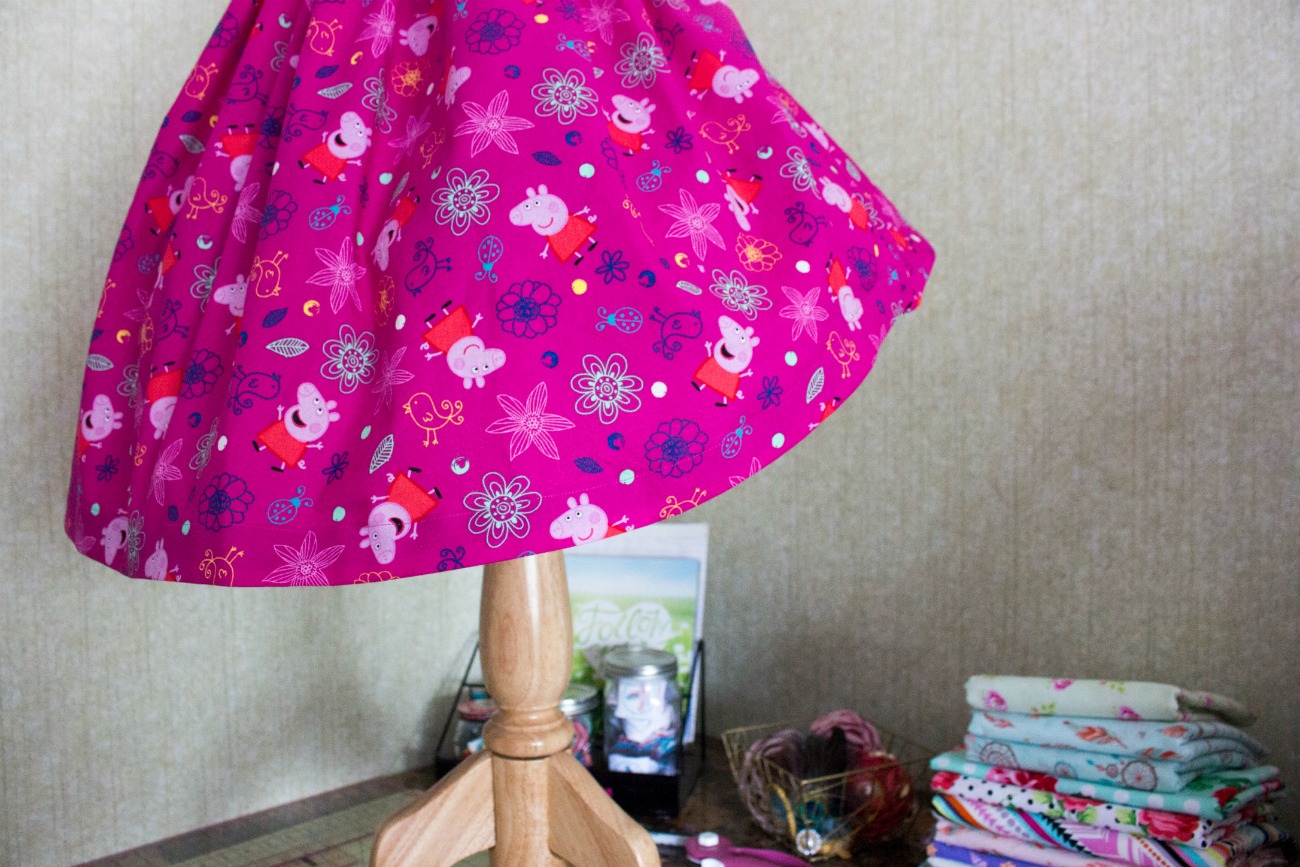
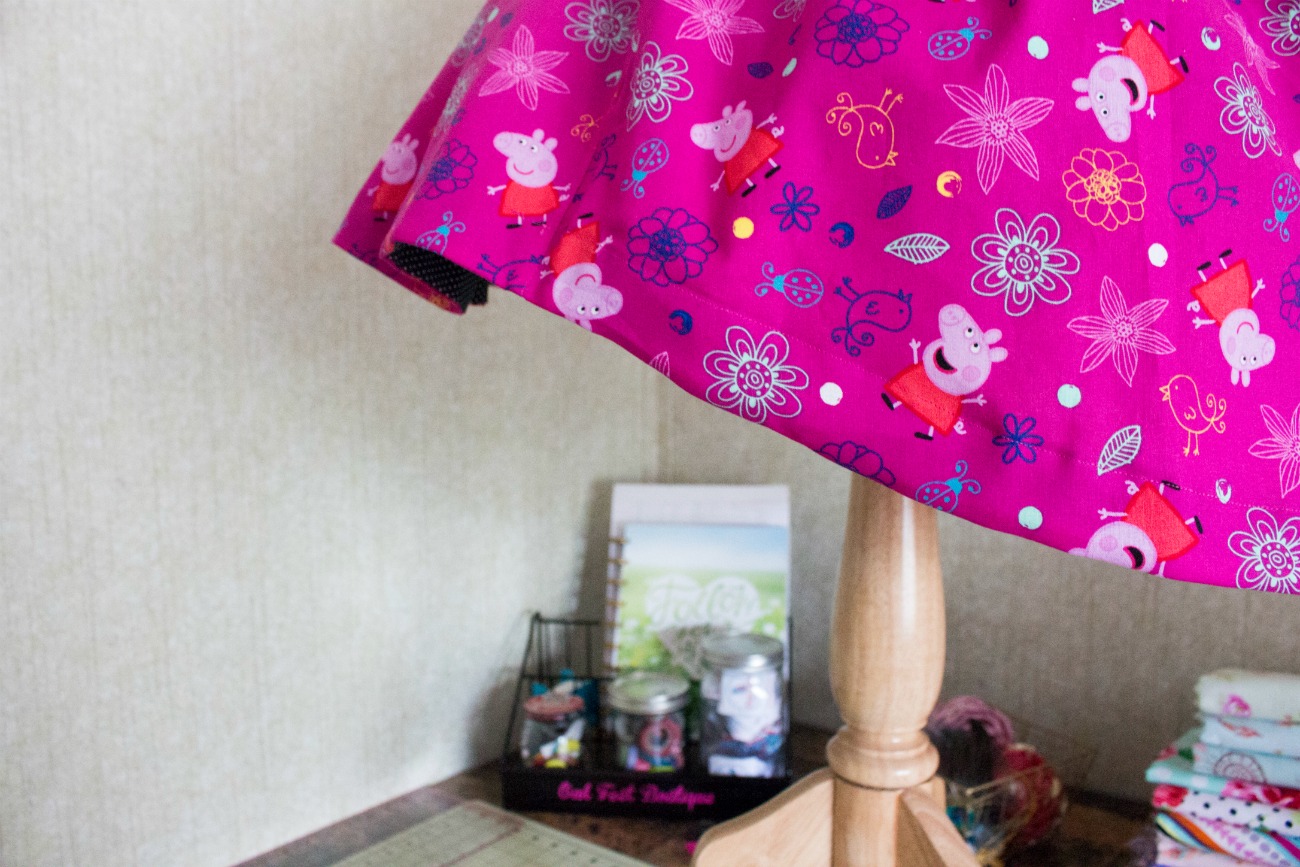
3. At this point you can either have a“ Hidden” contrasting band which is sewn to the wrong side of the fabric enclosing the raw edges when you fold it to the back OR an actual contrasting band on the bottom. Which ever you decide will still give you the same high low effect. I personally love the look of the Hidden band as you can see the inside of the back skirt piece from the front and it just adds a clean (no serger stitches show) fun look from the front! Iron the band which ever way you choose. Stitch in place.
Step back and look at your high low skirt you made without pattern pieces and smile big.!
From this point on you follow all instructions in the pattern to complete the dress
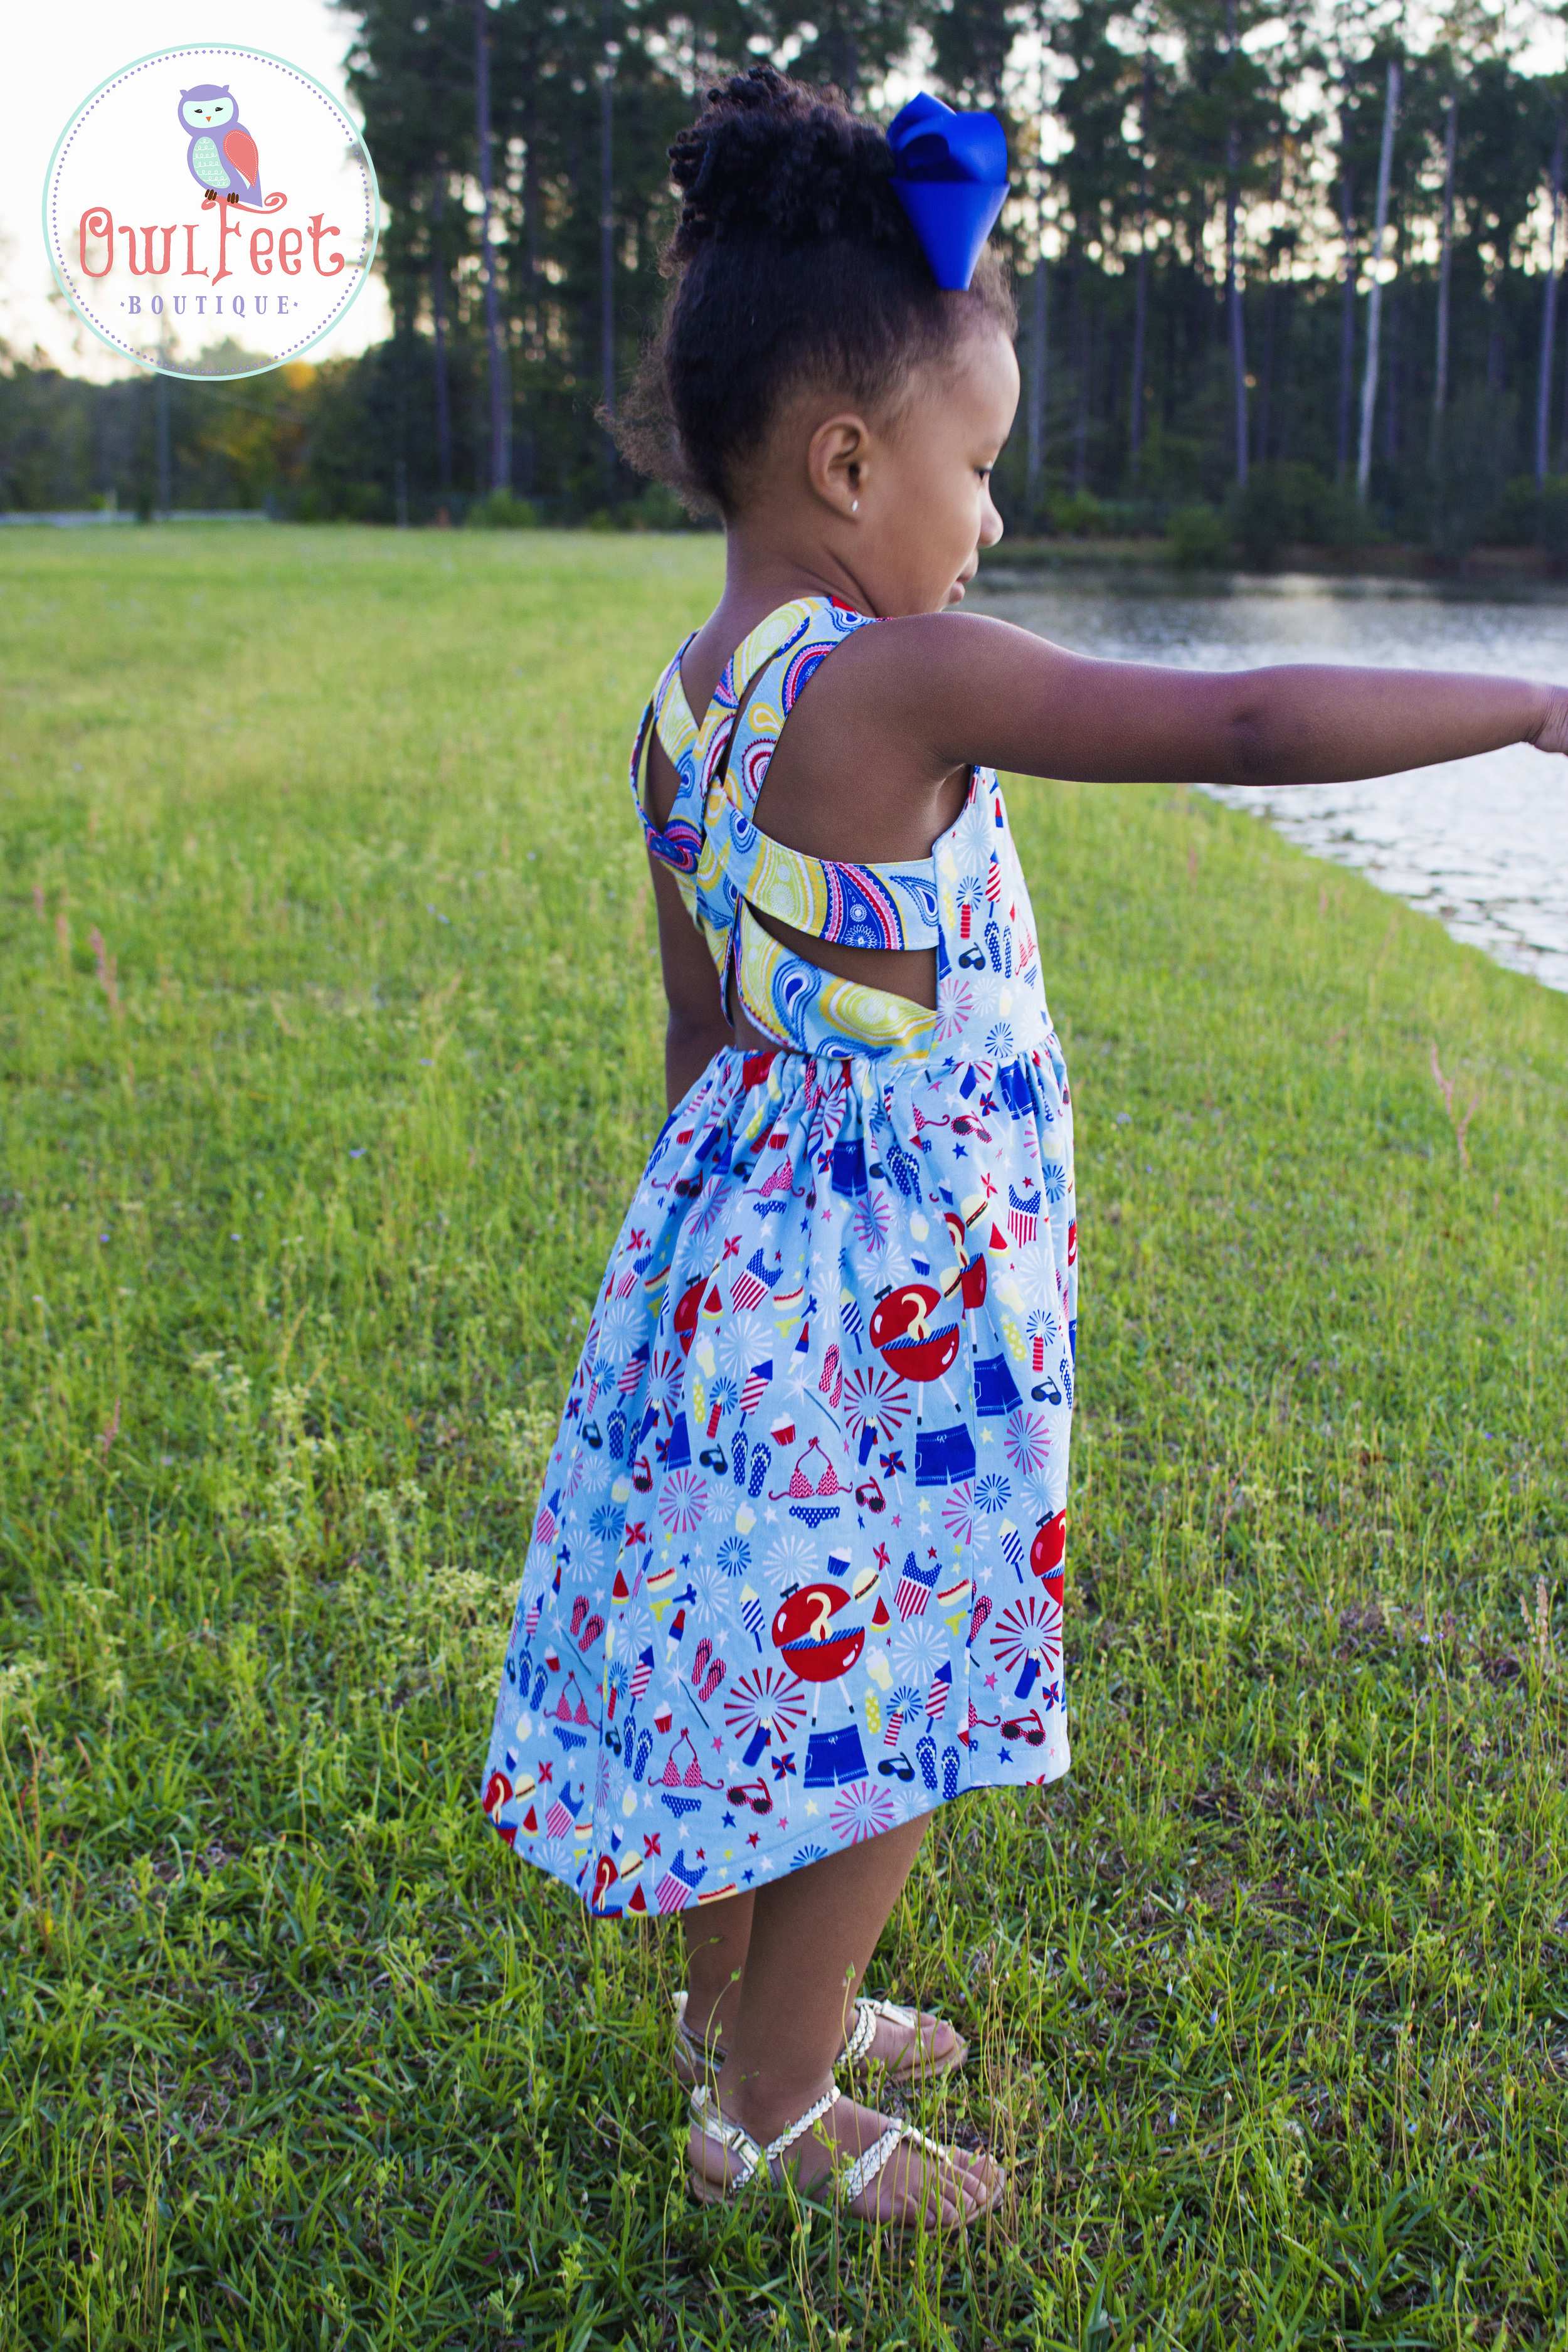
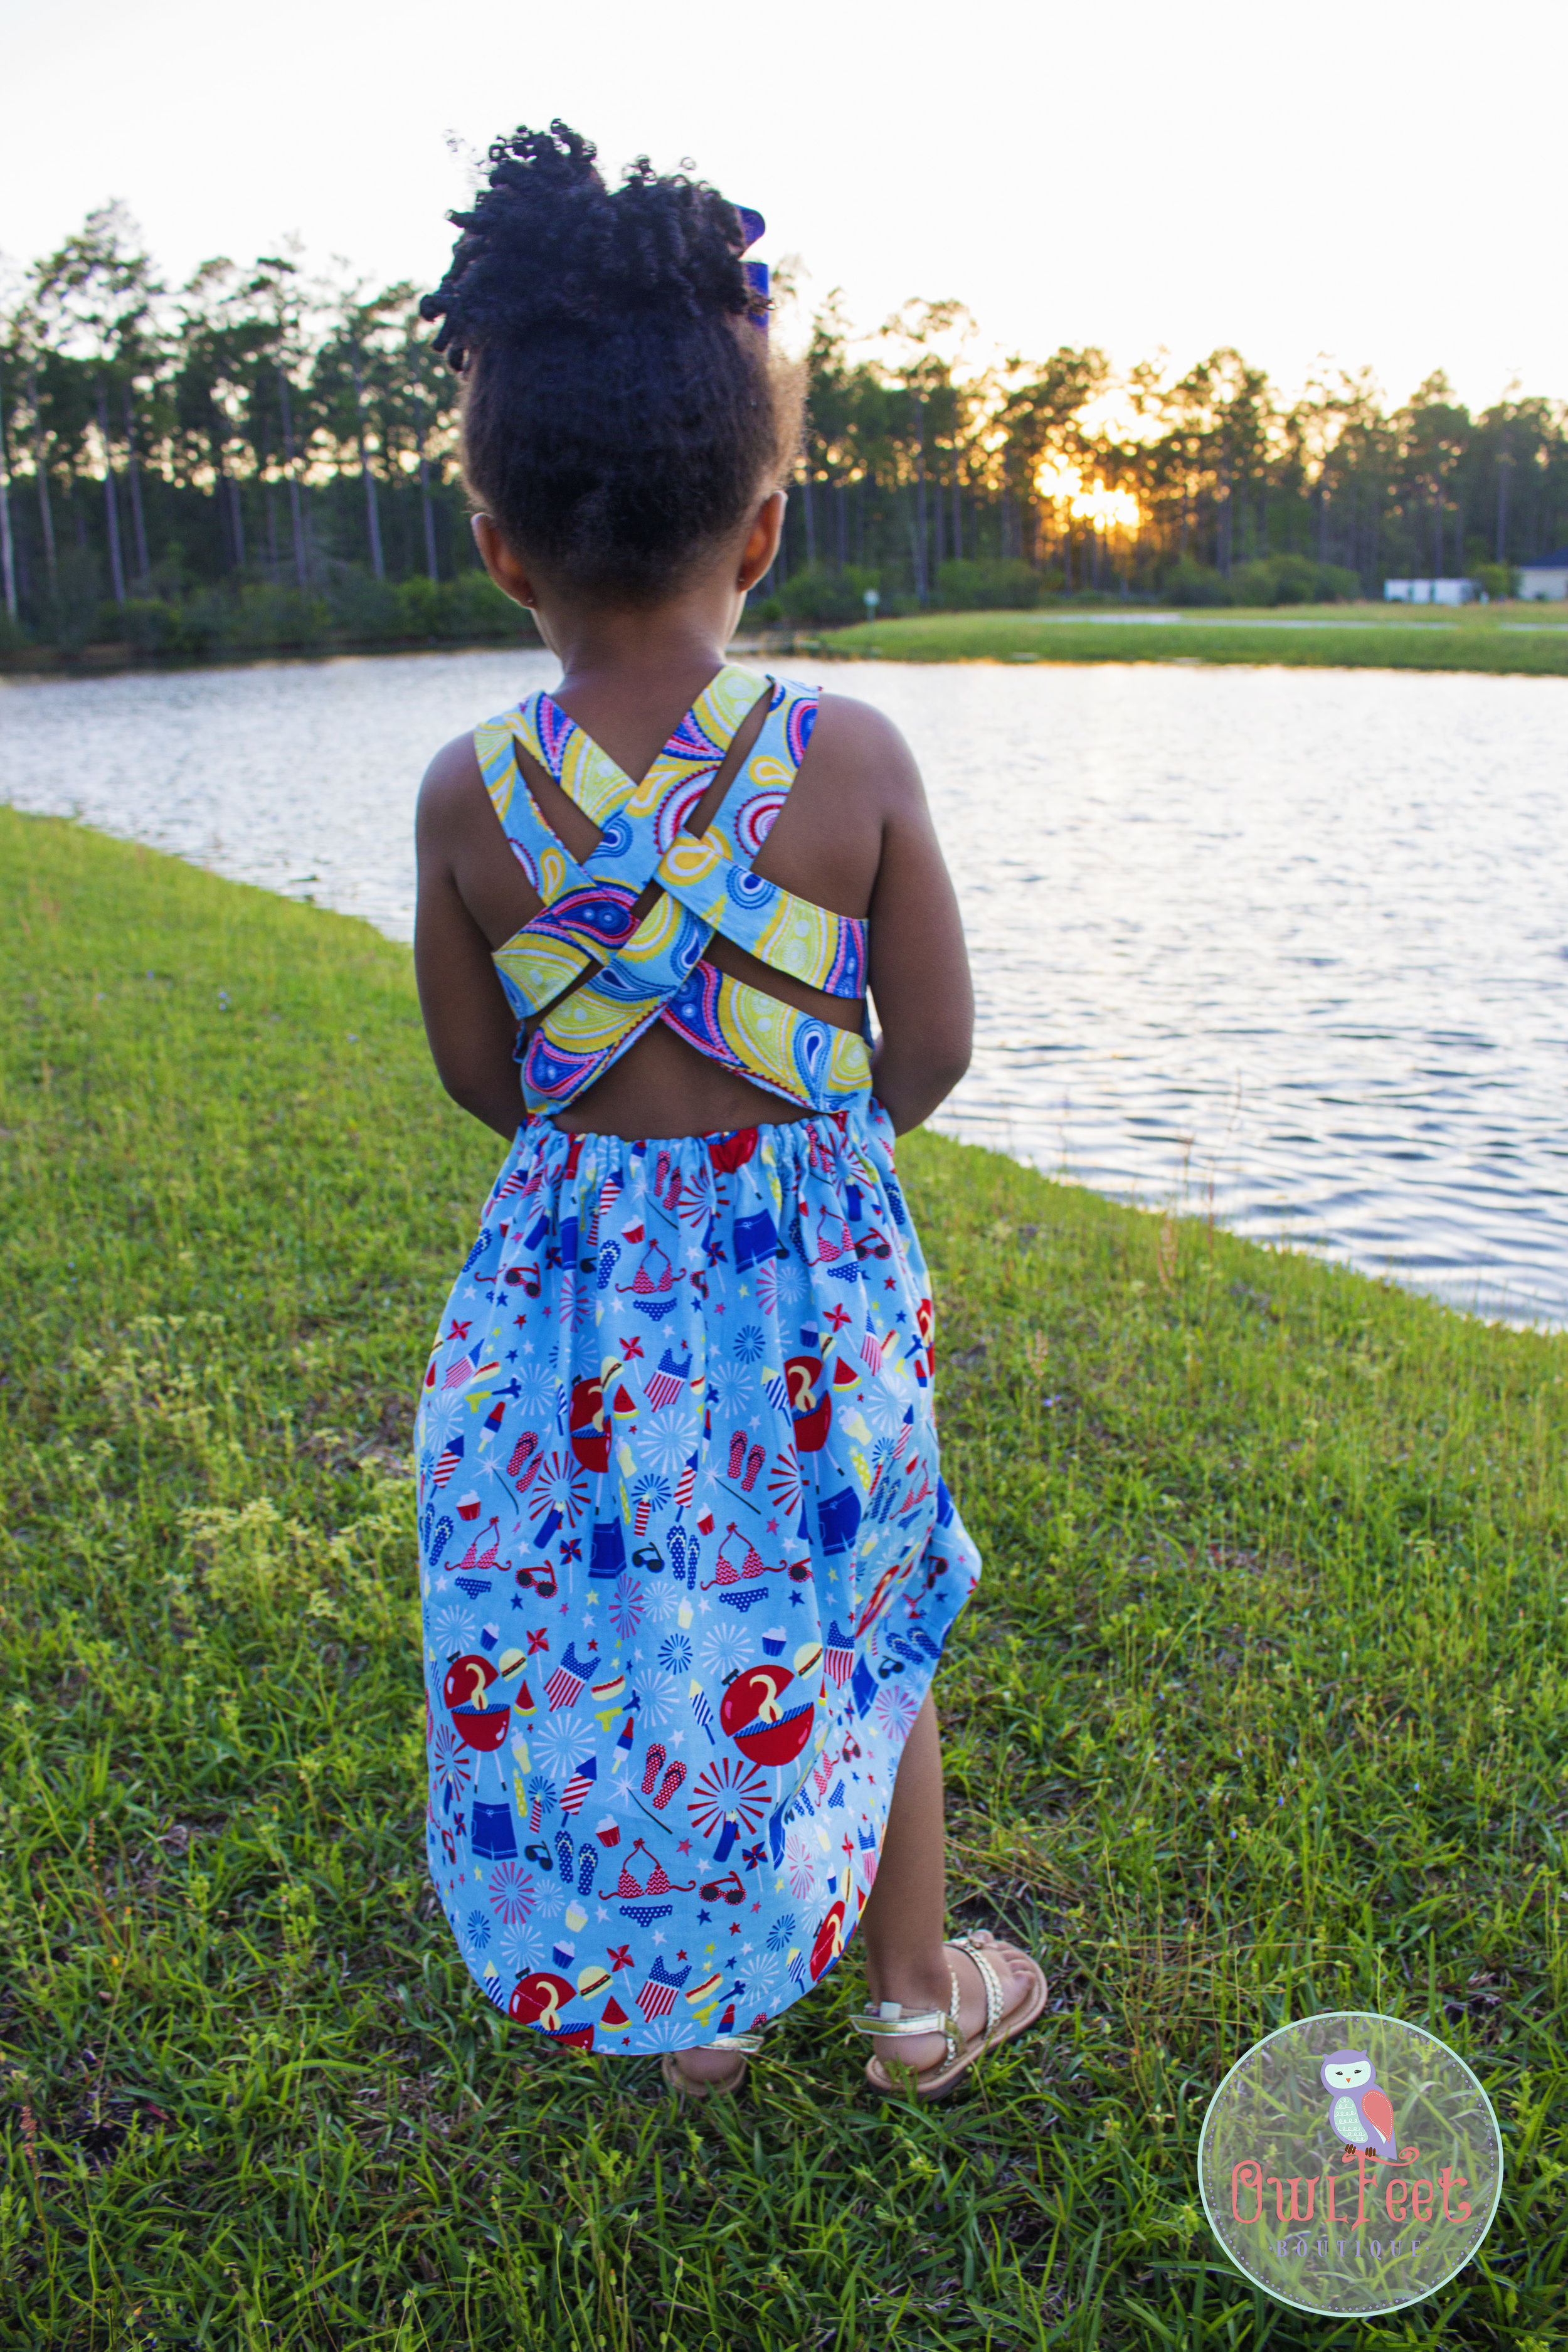
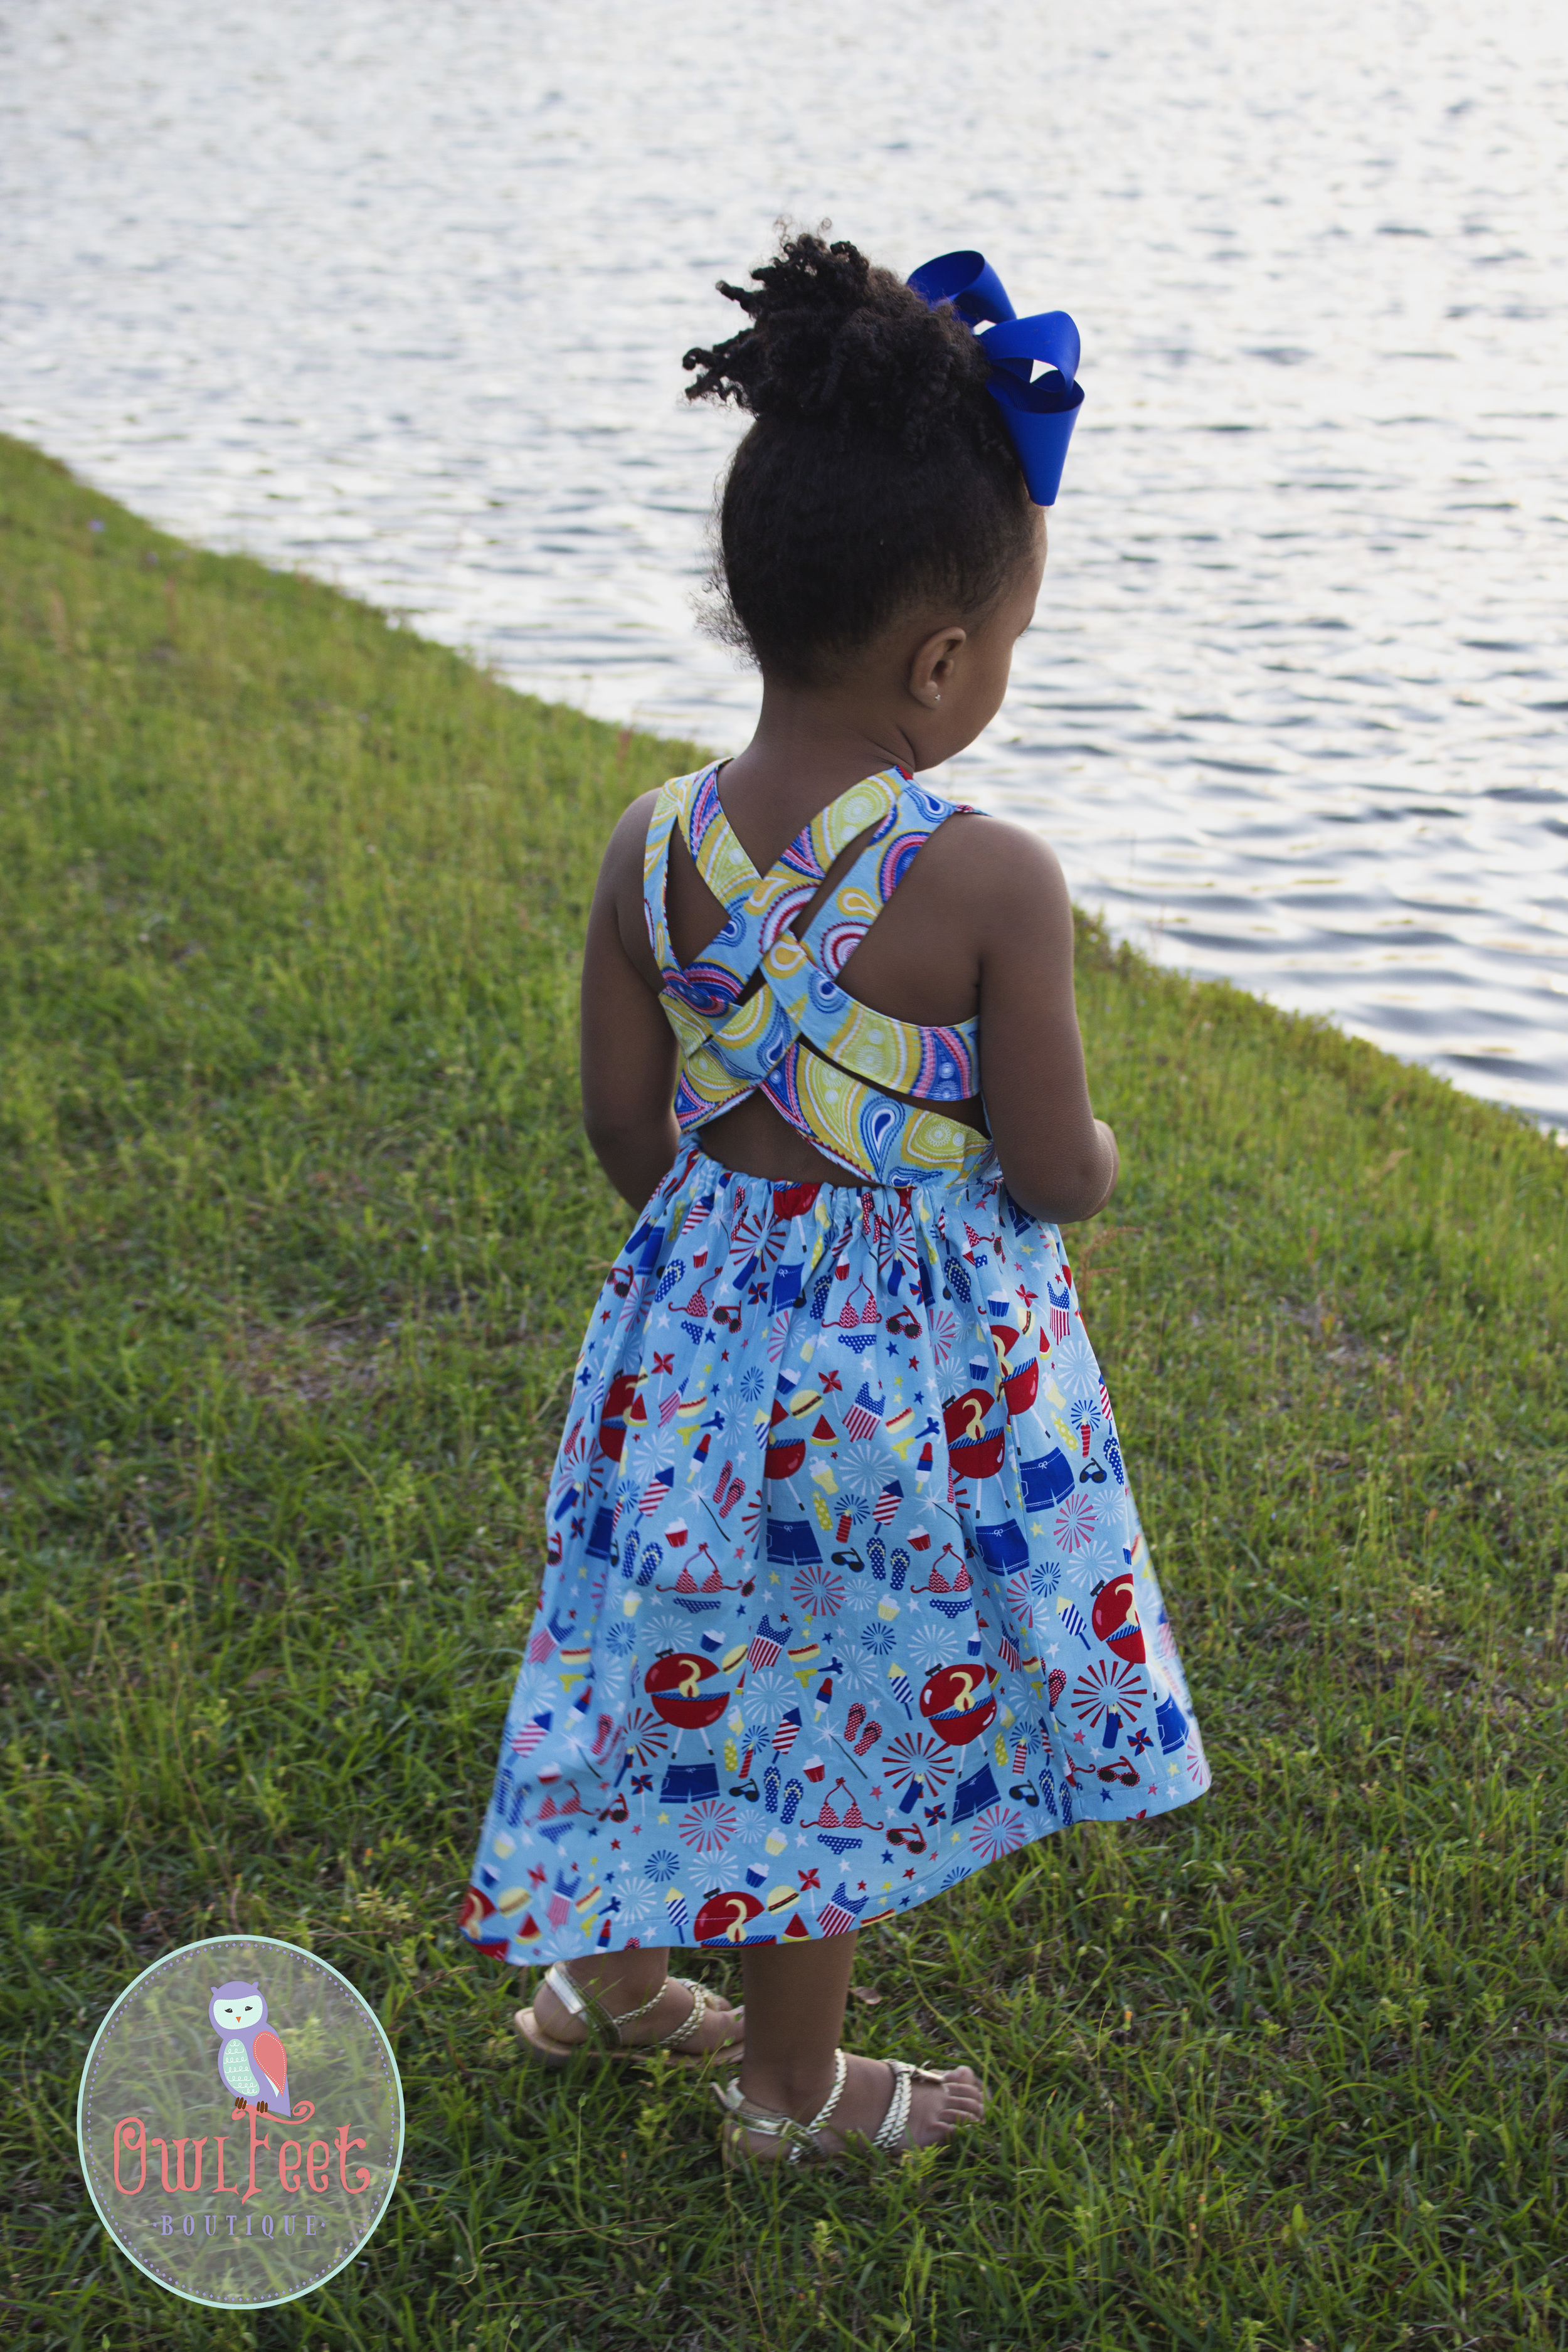
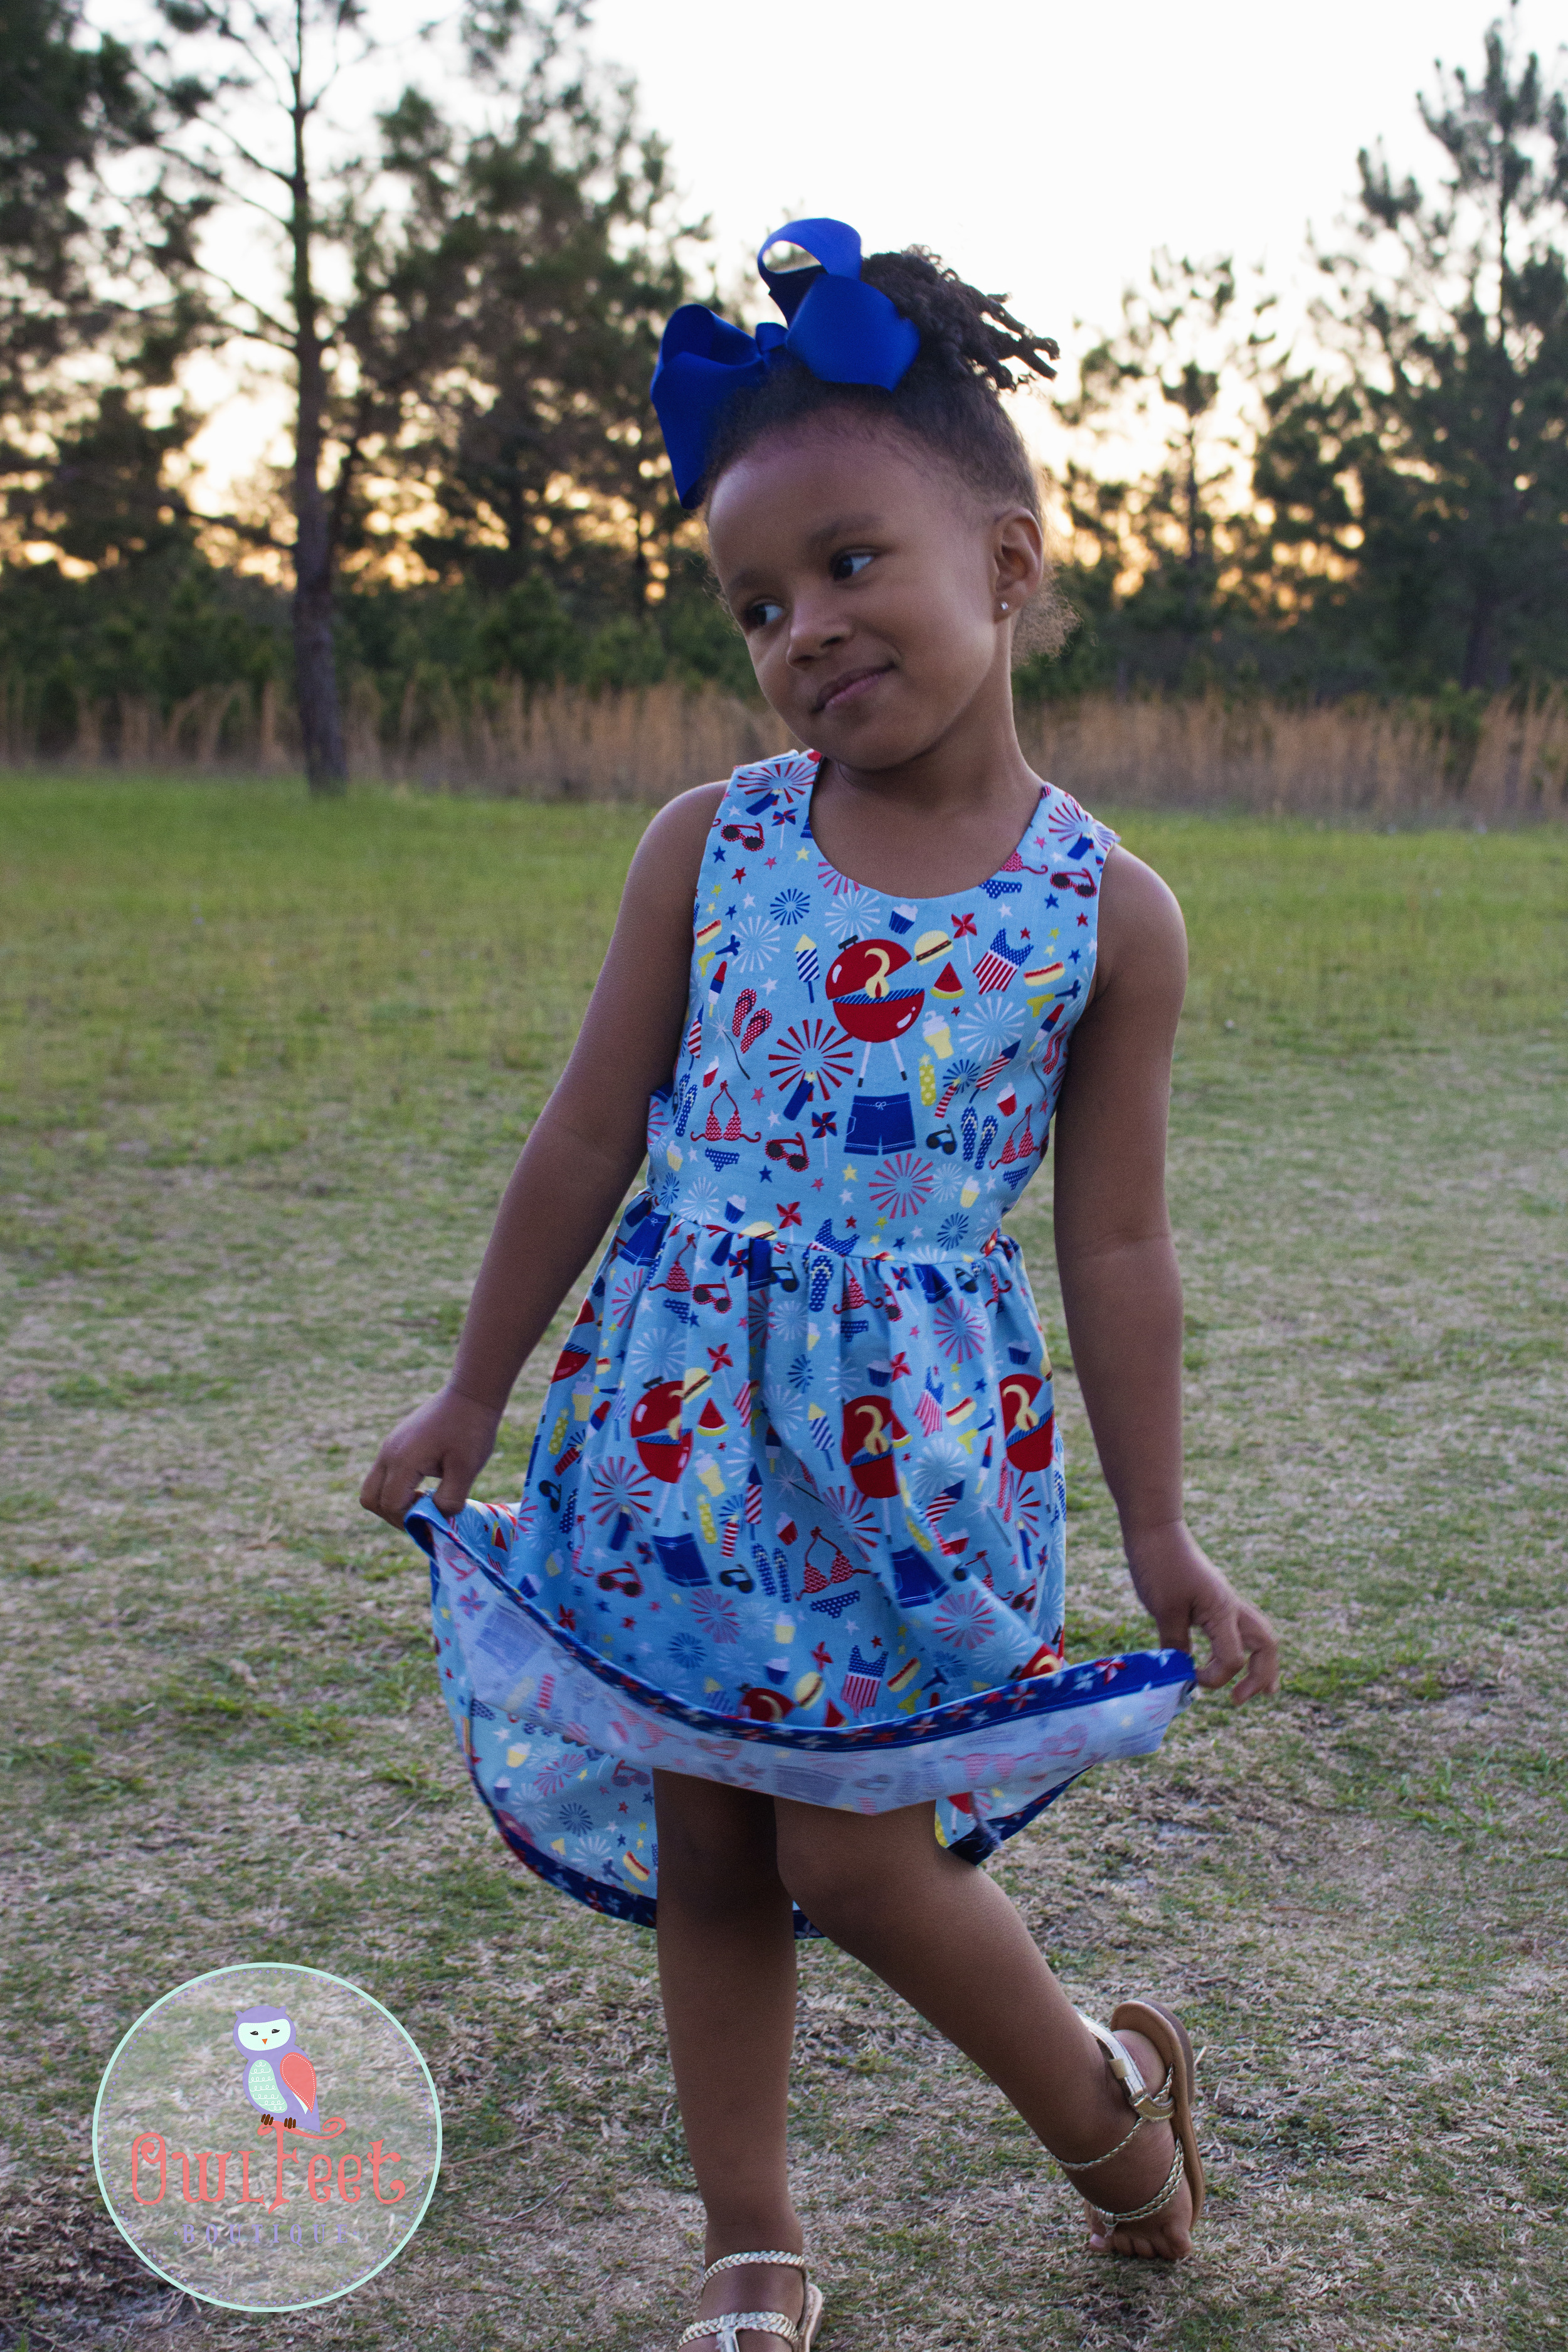
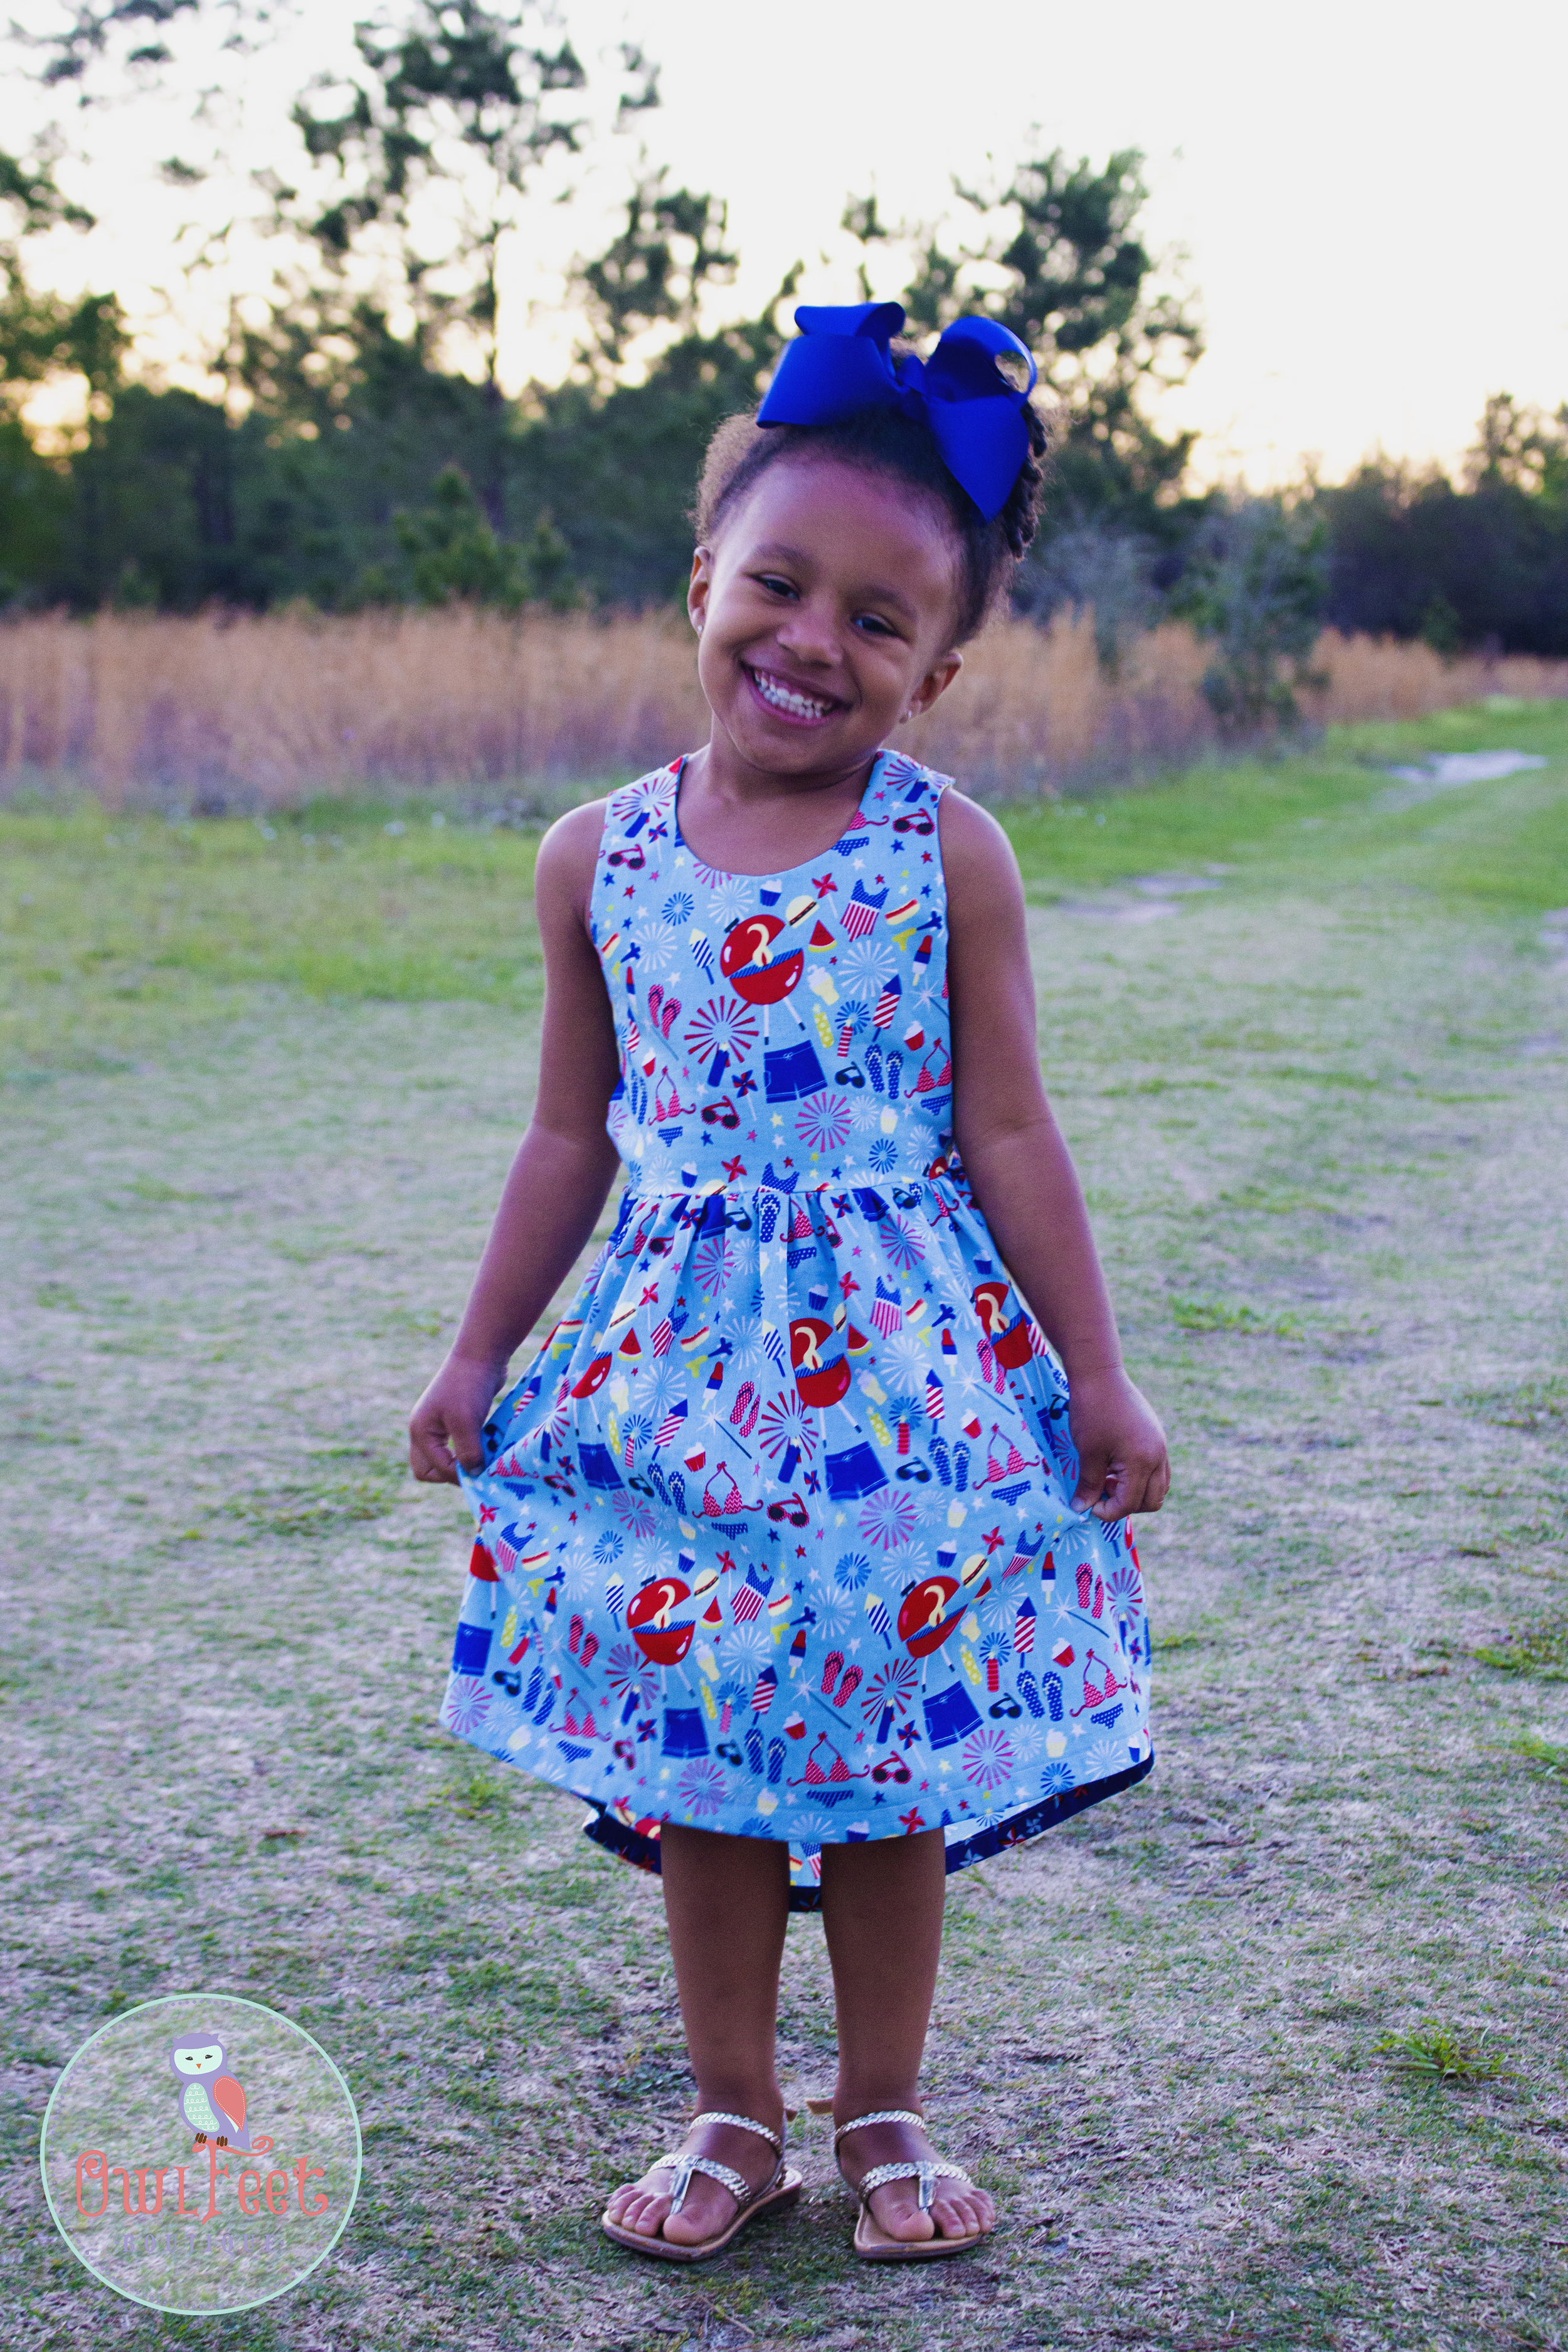
Tada! You have a High low skirt on your favorite dress pattern. ANY pattern can be modified for this simple look. Here are some finished pics and modeled pics :)
To show that you can do this to ANY pattern here is another pattern I modified using the same steps. Here is the Summer Dress Bubby and Me Creations . I love how it turned out!!! See what I mean about the fun look of the hidden contrasting band!

I hope you have enjoyed reading and would love to see your creations!! Please share them in the Pattern Revolution Group .. Happy sewing! - Nacole


