Classic Oxford by Peek-a-boo Pattern Shop
/Welcome back readers, today we are looking at the Classic Oxford by Peek-a-boo Patterns. I love oxfords on my boys for any time of year; we do short sleeved in summer and long sleeve in winter, and they are my go-to holiday wear dressed up with a tie, vest, or blazer. Peek-a-boo's pattern fits the bill on every level - classic style, two sleeve options, and a size range of 3m-12y that ensures you can get quite a bit of longevity out of this pattern! Amy of Peek-a-Boo is one of our amazing affiliates, and she is offering THREE of our readers a chance to win their very own copy of this great pattern! So make sure you enter below. But for now sit back, relax, and enjoy the double cuteness from Becca and Crystal!
- This review was completed by a 3rd party objective reviewer who received a complimentary copy of the pattern in order to complete the review. Neither Pattern Revolution nor the reviewer received any additional compensation for this review.
Take it away ladies.....
--------------------------------------
Some shirts are just SAD. They spend years in a closet, collecting dust as their design and fit go further and further out of style. Like I said: SAD.

This one needs a whole box of tissues STAT
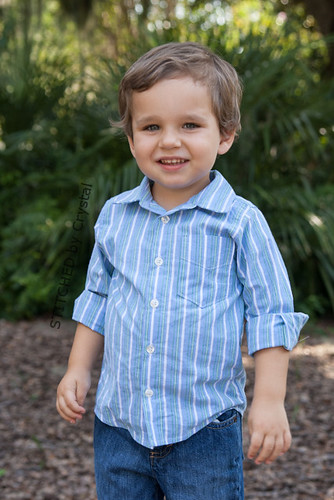
These shirts scream "MAKEOVER!", and with the Classic Oxford from Peek-a-boo Pattern Shop, you can give them just that!

Aaah, looking better already!
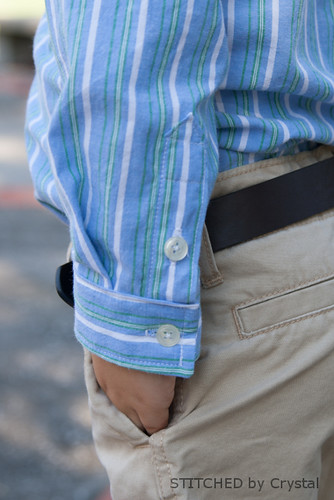
The Oxford allows for all kinds of personalization! Short sleeve? Long sleeve? Roll-up convertible sleeves? And, if you're looking to add a little extra something to your shirt... you can incorporate some fun theme-or-age-appropriate accents! With pig skin season upon us, I chose my husband's favorite football team:


I made this 6 month version for my 5 month old son, and opted to size up with the hopes that it would fit most of football season. I was nervous, because his chest size was smaller than the 3 month measurement listed, but hubs insisted. I'm glad he did, because this fits him now, and it's quite snug in the arms. The pattern does note that this shirt runs slim, so if you're sewing for a boy with a sturdier build, give yourself plenty of "wiggle room". Be sure to size up 1, or 2 full sizes.


The pattern is marked as intermediate, and I think that's a very appropriate ranking for this shirt. It was definitely a stretch for this beginner! I loved the challenge though, and it's probably the most well constructed piece I've made. I went realllllllllly slow, read and re-read the pattern to be sure I understood each step, and my vanishing quilter's pen was my best friend attaching the cuffs and collar.
A beginner is better suited for the short-sleeve version. Avoiding the plackets will secure your sanity! Those of you ambitious enough to try them anyway, definitely use some scraps and try them out a few times first.

Bonus tip: If you're sewing convertible sleeves in the infant sizes, move the button tab UP towards the shoulder seem (pin it there if you have to) while you sew the cuff onto the sleeve. This here dumby stiched both of hers into the cuff and didn't realize until I went to sew the button/holes! Yikes.

Also, the back-pleat was supposed to be outward facing. Who knew?? #youmightbeabeginnerif...
The Cons:
- Complicated construction, best for intermediate sewers (though the instructions are clear, and the images are helpful!) Maybe a bonus youtube video would clarify the placket instructions for us novices?
- Lots and lots of buttons and holes. They're not so much hard to do, as a tedious task on a teeny tiny infant's shirt!
- A tight squeeze on my little man. Size up!
The Pros:
- A boys pattern you will get YEARS of use out of! Great for all ages, and all seasons.
- Limitless customization possibilities! Try an accent yoke, interior cuffs, and button tabs for some seriously unique boys wear. (Be extra aware of print placement if you do!)
- No need to dip into your fabric stash (or sew a few extra button/holes down the front of the shirt!) if you can re-purpose an old button-down!
And then, of course, there are..

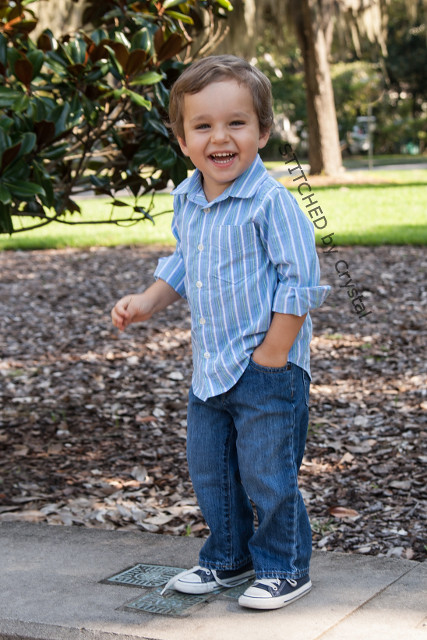
RESULTS! And ladies and gents, you can't argue with those!

Becca DuVal is a lifestyle photographer based outside of Richmond, Virginia. She juggles life with two kids, two rescue dogs, and her super-fine husband. She's a hard-core DIY-er who loves sewing, crafting, and tackling home decor projects far outside her skill level.
Blog | Facebook | Twitter | Instagram | Email: becca@beccaduvalphotography.com
--------------------------------------------