
Design Your Own Princess Sew Along - DAY 4
/Day 4, our final day is here! Woohoo, can't wait to see all of your pretty outfits! Don't forget to check out Pattern Revolution's Facebook group page to post photos and questions, you'll have a chance to be win some awesome prizes from our sponsors. You have until Aug. 12 to upload there!
Day 4:
- Construct skirt/bottoms and attach to bodice.
Princess #1 - Tinkerbell
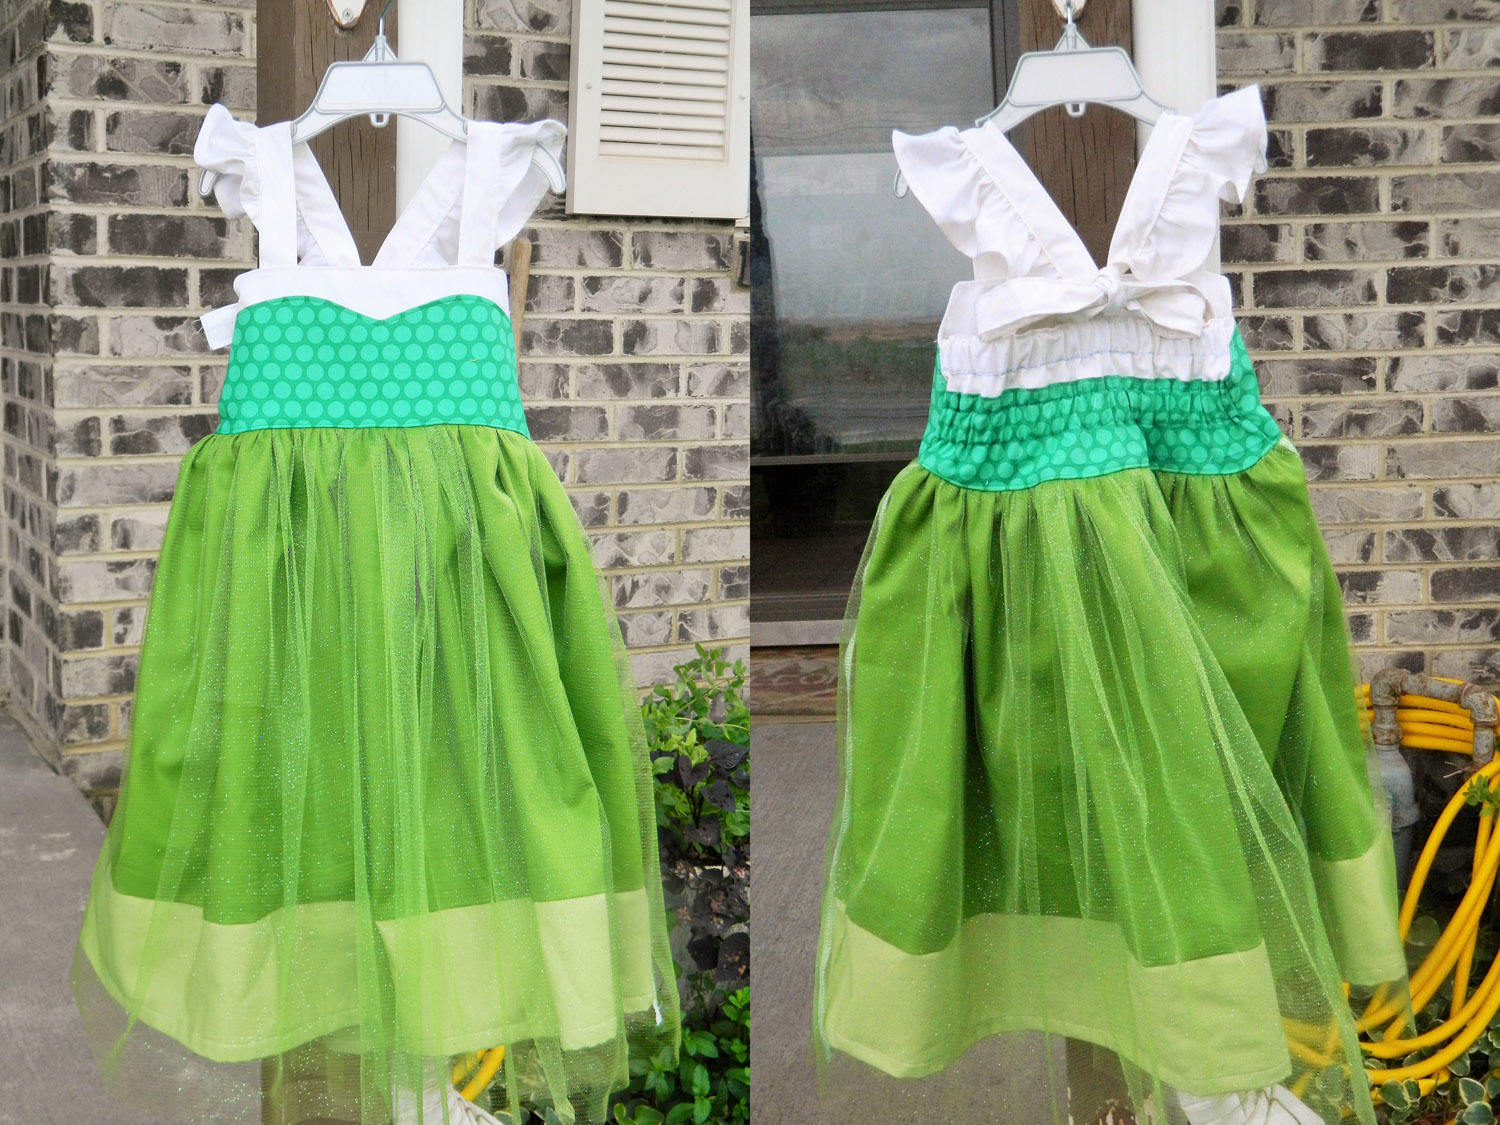
Pattern: VFT Cosette Created by: Serena

Since I did the square skirt with the circle cut out at the waist I just laid each square on top of eachother (turned 45 degrees) and cut out the circle and then gathered to fit the measurements of the bodice. I made sure to have one of the dark green points lay directly in the middle of the front bodice and back bodice so that it was gathered evenly. Hem up both skirts and then you're ready to twirl!


Princess #2 - Elsa
Pattern: M4M Molly Created by: Lisa
On the final day of my Elsa dress I made no changes to the original pattern and directions. It came together nicely and my daughter loves it. We originally purchased another snowflake fabric for a cape, however she decided to leave it out
Princess #3 - Anna
Pattern: Boo! Grace Created by: Lisa
For my Anna dress I completed the dress following the directions as written. The only addition I made was the vinyl pieces on the front of the bodice. There are plenty of tutorials on Pinterest you can use for adding the flowers or get the FREE Templates from Stitchwerx HERE.
Princess #4 - Belle
Pattern: M4M Molly Created by: Sarah

Now for the part that makes the Molly into Belle! I started out by sewing the side seams and finishing the seams in both of my skirt pieces. Then I used a rolled hem on the bottom of each.
I set aside the shorter piece (cut to the pattern length) at this point. Working on the longer piece, I sewed a basting stitch (longer stitch length, lower tension) along the ironed in folds I made on day 2 and also on each side seam. Then I cut 6 pieces of ribbon to a few inches shorter than my original skirt (it was 18.5’ so I cut my ribbon to 15”, I just eyeballed it but you’ll want it shorter so the middle of the gathers had room to droop).

Once my piece was gathered to the length of my ribbon, I used wonder tape to place the ribbon along the gather and then sewed the length of the ribbon to attach the gathers onto the ribbon (this is to provide stability to the gathers.)


After I gathered and attached ribbon to the six areas, I attached the gathered overskirt and the original length skirt (as in underskirt) to the bodice as directed in the pattern.

And that is it! Super easy Belle. Hope your little princess enjoys it as much as mine.
Princess #5 - Frozen Fever!
Pattern: All 3! Created by: Nicole

I take my 2 main skirt pieces and stitch one side seam together. I repeat the process on my band. I then will take my band while it is flat and run it through the serger along the bottom hem edge. I then will memory press my hem in place. I love to memory hem flat so I don’t have to worry about ironing in a round and burning myself and creating an uneven hemline. After I have finished ironing I will line up my seams on the side seam of the skirt with the band and stitch. I always stitch on my sewing machine then move to my serger. I like to know I have created my proper SA allow on my machine before finishing my seam. If you’re more of a rockstar than I am and feel more confident with serging then go ahead and do what works best for you. I just take the extra time to make sure everything matches up- if anything is off I can quickly unpick that area and fix it before doing all my finishing work.

After I have that seam finished I will push my seam up so after I sew the side seam up the seam is in the right direction for me to top stitch in place.. I will now repeat the process on the other side. Making sure my seams on my band line up properly, that I have my memory hem flat. Then stitch into place. This is the perfect time to check to make sure your band pieces line up nice and evenly before finishing your seam. If anything is slightly off just unpick and redo the seam. Now you are ready to top stitch your band in place and also stitch your hemline in place. Once that is finished all that is left is to gather the skirt. I had a few more steps to do before I could gather my skirt up. I added a tulle overlay to my skirt fabric. I made it the exact same length as my main skirt. Tulle you can leave un-hemmed, do a narrow hem, or rolled hem.

Secret on the rolled hem...because the weave is so delicate on the tulle you will need to get plastic. I use a plastic bag You will cut it into strips laying a piece of plastic under the tulle then one on top. Then you will serge through the layers. After you are finished just lightly pull the excess plastic off the seam and admire the strength of your rolled hem. You can use other materials than plastic bags, I have used wax paper, parchment. I just like the plastic I can just pull it away from the finished stitching. I do this trick on all delicate weaved fabrics. Some only require the top layer to be covered with the material of choice to help add more structure and support to the weave of your fabric. I recommend you play around on scraps find the settings that work best for you on the rolled hem and the material that works best for adding more support and structure to the finished rolled hem.

Once you have your tulle overlay completed to the desired look you are going for I will baste stitch my overlay to my main skirt before gathering them together. Line up your seams and run a ⅛ sa to baste them together. Then either use your serger to gather, ruffler foot on your machine, or run 2 basting stitches and gather by hand.

Once your bodice is completed it is time to attach your skirt/s to your bodice. Adjust any gathering you need to at this time. Pin in place aligning the sides all together. I again will machine stitch in place. I find it highly helpful anytime I do a overlay skirt to ensure everything got into my seams correctly. After I am done stitching I will flip it over and inspect the entire area carefully to make sure now raw edge is playing peek a boo. If you find an area with a raw edge unpick the seam, and fix it. Once you are happy with the result of the skirt to the bodice, finish your seam off with the serger than all that is left is to top stitch your seam.
You are completely finished with your dress. I wanted to add the flowers you see in Ice Queen’s dress. So I found a few free flower patterns on Pinterest and got out my glue gun and made some cute flowers. I decided to buy flat back pins and glue my flower pieces to the flat back then I could just pin in place. I did this because I didn’t want to have to worry if my material I used with my flowers would hold up in the was and you have more creative placement each time your daughter wears her dress on where to put all the flowers. If you prefer to stitch the flowers to the dress than by all means do so if you use fabric over wool felt, craft felt, or any other materials. I did the pins- if my daughter didn’t want flowers then I had the option to remove them.
I hope you had fun sewing up your own Frozen Fever inspired dress with me. I can’t wait to see what you create.
Thanks,
Nicole
Thanks for all your participation! Can't wait to see what you all have come up with, we'll pick winners next week, you have until Aug. 12th to upload to the Pattern Revolution Facebook group page for your chance to win.
Serena


