Free Stay Dry Drooler Bib Pattern and Kam Snap Press Giveaway
/
Free Stay Dry Drooler Bib Pattern and Kam Snap Press giveaway courtesy our I Like Big Buttons and Pattern Revolution.
Read More
Pattern Revolution Blog- PDF Pattern Sales and Promotions, Free Sewing tutorials, techniques and advice.
Free Stay Dry Drooler Bib Pattern and Kam Snap Press giveaway courtesy our I Like Big Buttons and Pattern Revolution.
Read MoreEvery morning it is a struggle to dress my feisty 2 year old. All her pretty sashes hang untouched in the closet, while the dresses they go with get worn over and over. I love the look of a pretty bow, but my baby wont hold still long enough to tie it nicely, and in the miraculous event that she does, she unties it and removes the sash a few minutes later. GRRRR!!! Tell me I'm not the only one with this problem???
And so I fiddled around in my sewing room and came up with just the right answer.
There are 3 pieces to the baby proof sash. The Bow, the Bow Center, and the Sash.
Supplies: Sash and bow fabric, thread, sewing machine, scissors or rotary cutter, needle Kam Snaps and snap pliers. Kam snaps, by the way, are my FAVORITE things for garment closure for my crazy toddler. Fast and easy, but still secure.
First, you need to determine your sash length and width. Measure your child's waist while wearing the garment, add 2" for sash length. Decide how wide you want the sash, double that and add 1/2". Cut your sash.
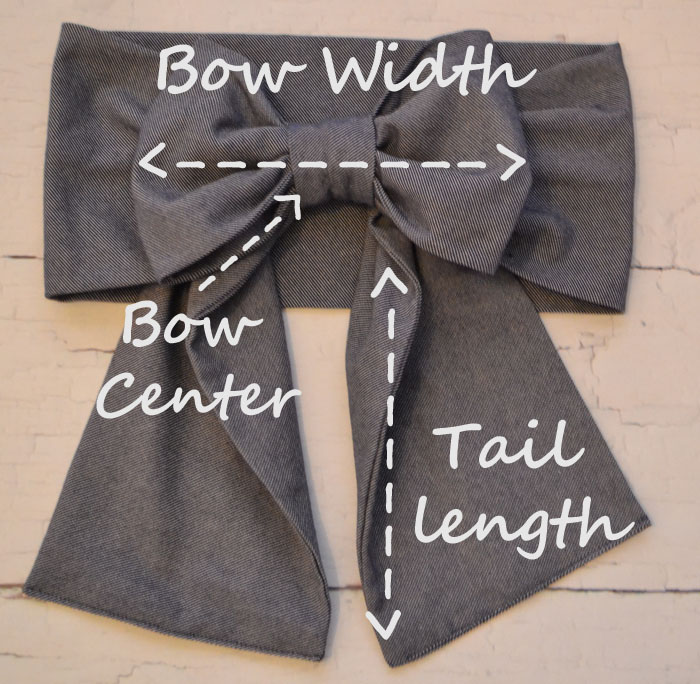
Then, you need to determine the bow width and tail length that you like.
This is all a matter of preference, and you can experiment until you find the bow size you like. Some people like big floppy bows, others like neat and tidy little bows. The bow portion of the sash is one long strip. The width of the strip should be the same as the width you chose for your sash. The length should be the bow width x 2 plus the tail length x 2. Cut your bow strip. My bow here was 14" wide (yep, that's a big ol' bow!) and 45" long. (Tail length 13" X 2 + bow width 9.5" x 2 = 45")
Your bow center is going to be 6" long, but you must decide how wide you want your bow center to be. Just eyeball it, you really can't go wrong. Then double that number and add 1/2". Cut your bow center 6" long by width x 2 plus 1/2" .
Cut your sash strip and your bow strip according to the above directions, then fold right sides together along the length.
Set sash aside for now.
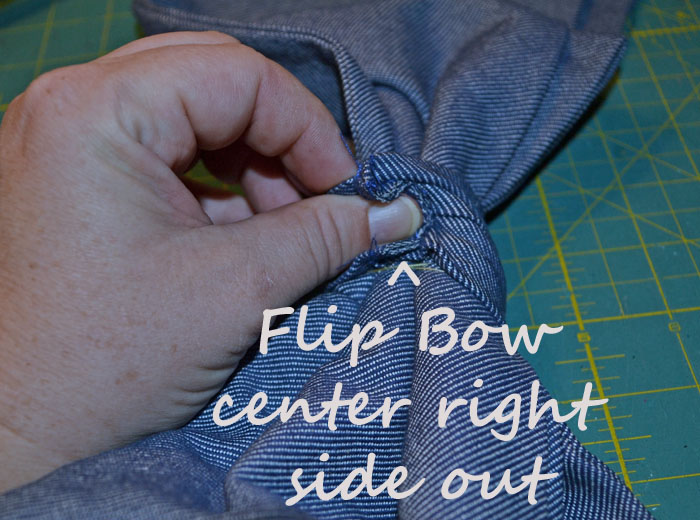
Pin bow ends closed. Then fold your bow strip in half lengthwise with the fold on the left, matching up the ends.
Lay edge of sash on the bow width line and stitch down using a straight stitch, making sure to backstitch at beginning and end. This closes the 1 sash end and attaches it to the bow.
Time for a tiny bit of hand stitching.
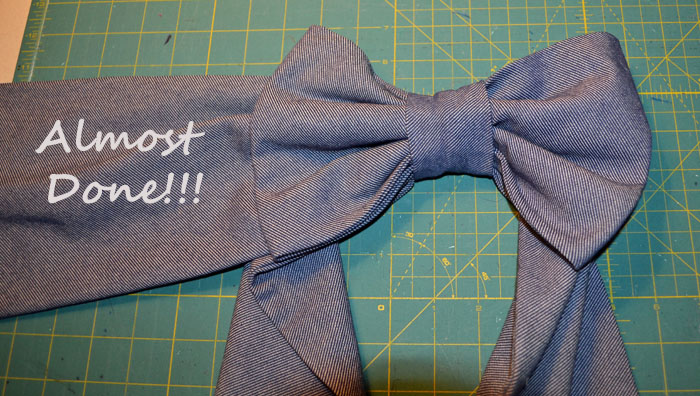
Time to make the bow center.
That's it! You did it! Snap it on your baby girl. No tying, no nothing. Snap and go!
Welcome to Pattern Revolution! We're a collective of women focused on encouraging and educating the modern sewist. Our team is made up of moms, shop owners, hobbyists, and masters of the trade. Our skill levels and project interests may vary, but our love of electronic PDF patterns are the same. Read more about the future of sewing patterns, or dive right in and let our posts inspire you

Disclosure of Material Connection: Some of the links in the posts on this site are “affiliate links.” This means if you click on the link and purchase the item, Pattern Revolution will receive a small affiliate commission. These commissions help keep the lights on at Pattern Revolution and we appreciate all of our readers for using them to purchase when possible. A complete list of our affiliates can be found on the "Sponsors and Affiliates" page. Pattern Revolution also receives a copy of the patterns featured on this blog free of charge. All reviews and options are the those of the reviewer alone and they receive no compensation for their review. Pattern Revolution only recommends products or services we use and believe will add value to our readers. Pattern Revolution is disclosing this in accordance with the Federal Trade Commission’s 16 CFR, Part 255: “Guides Concerning the Use of Endorsements and Testimonials in Advertising.”


Use your Cricut Maker 3 to craft a personalized Halloween welcome sign.