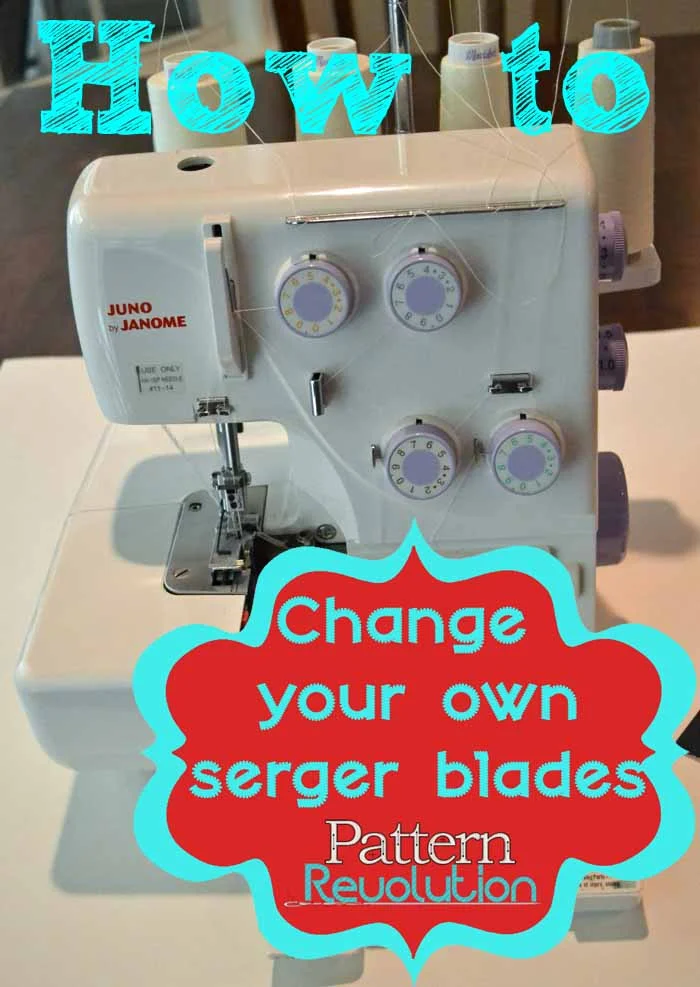
How to change your own serger blades

How To Change Your Own Serger Blades

There I was, happily serging along, trying to get one more outfit done before leaving for vacation, when all of a sudden I heard that dreaded sound, "crunch!" Ugh, I ran over a pin, AGAIN. It doesn't happen often, but when it does, it isn't pretty...you probably know exactly what I mean. This time it was especially ugly, because instead of using my awesome ultra thing quilters pins, I had a few cheapies mixed in there, and they don't snap right in half like the good ones do, in fact, my machine came to a grinding halt and my handwheel was jammed. BAD.  After a few cuss words and a sprained thumb, I was able to work it free and remove the carcass that was jamming my machine, but it just wasn't cutting the same anymore. GREAT! I nicked my blade. 

At first I wasn't quite sure what to do. I called my local dealer, $100 for service and new blades. Ugh, there goes my  vacation money! After taking a closer look at my machine, I decided to use Google to find a part number because I can remove 3 screws on my own and I knew the parts had to be available somewhere. I stumbled upon Ken's Sewing Center and after asking around in some of my online sewing groups, I found that they had a great reputation, so I decided to give them a try. Their website was easy to navigate and I easily found just what I needed to fix my problem. Within a week,  I got my parts in the mail and set to work. I took less than 10 min to change my blades, saved me a lot of money doing it myself, and my machine is as good as new!

Want to learn how?

The first thing you need to know is when to change your blades. Each manufacturer has their own recommendations for each model, but to be perfectly honest, I was LONG overdue according to my User Manual and my machine was working just fine. So, how do you know when it's really time? Well, the same way you know when a pencil needs sharpening, or your scissors are dull, it's just not the same! If you can't cut through multiple layers with ease, if your machine keeps jamming, or your scrap keeps getting caught up in your threads, it's time to change blades.

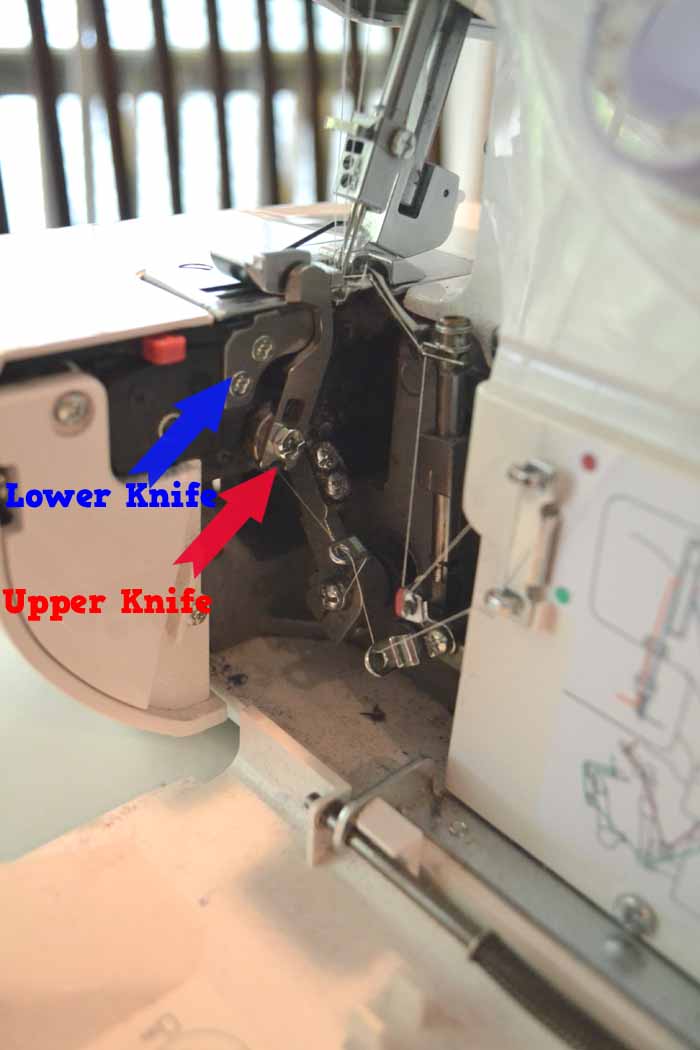
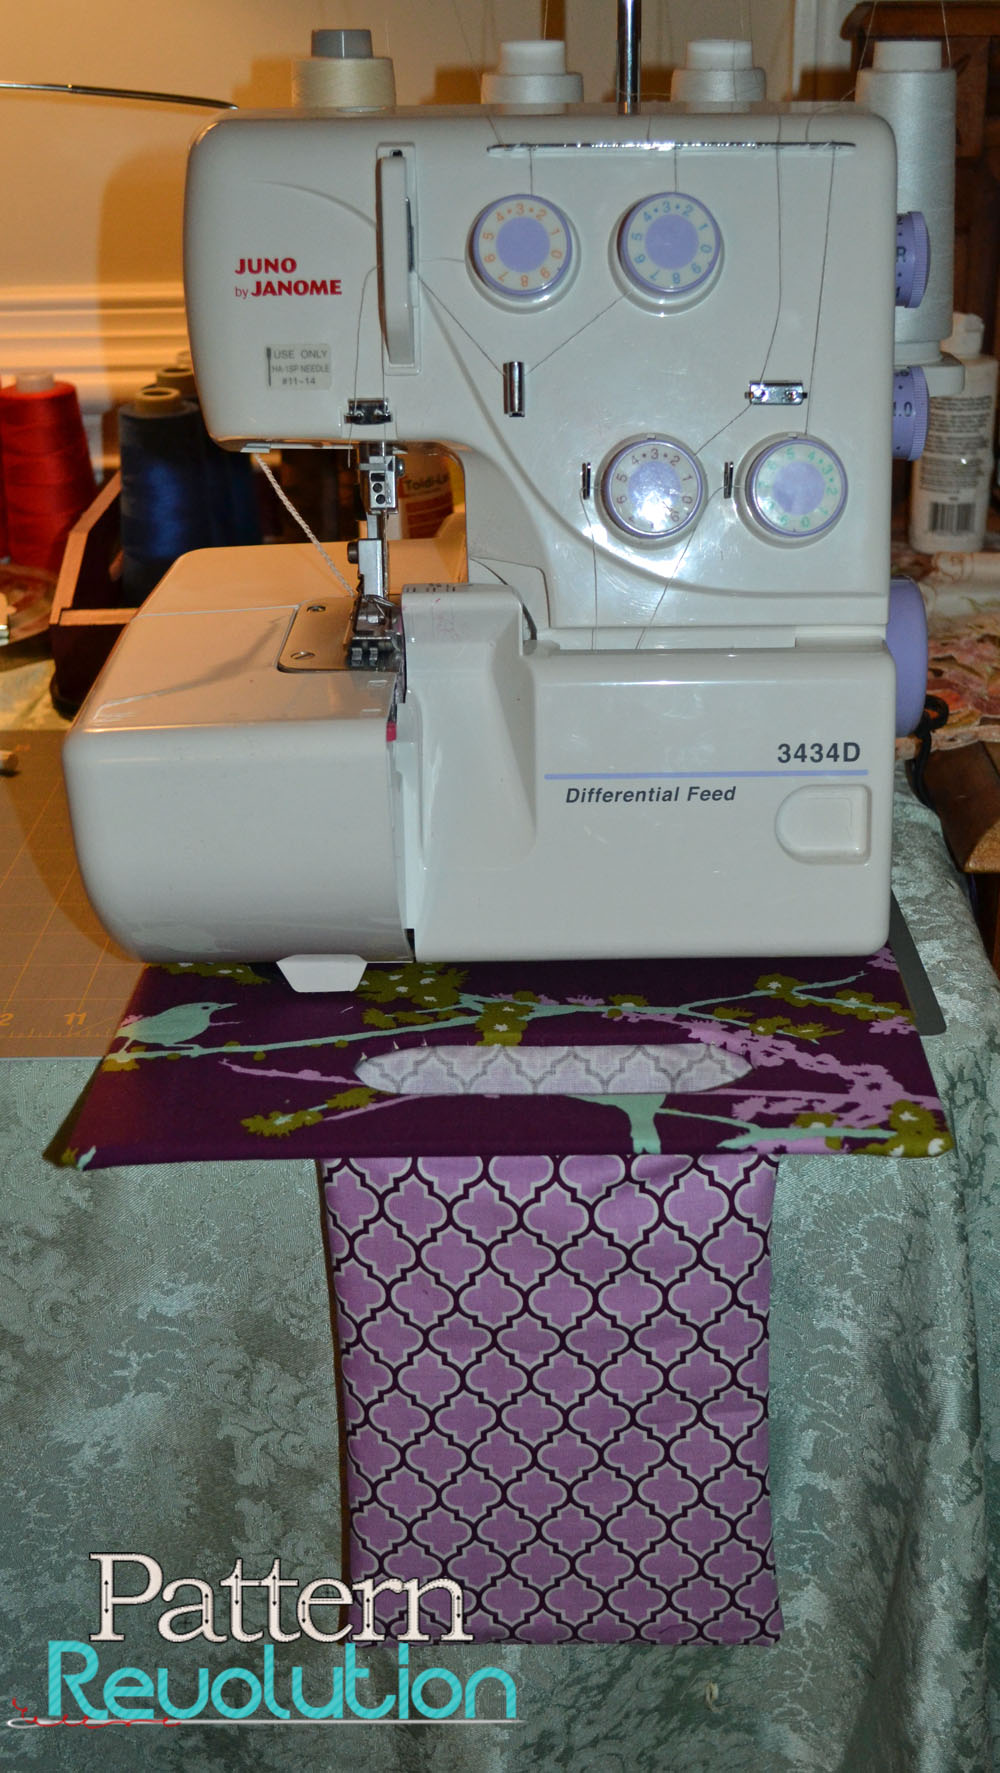
Next you need to get friendly with your machine. I have a Janome 3434D. Take a look at your blades, they may look different than mine. 


002sergertute.jpg

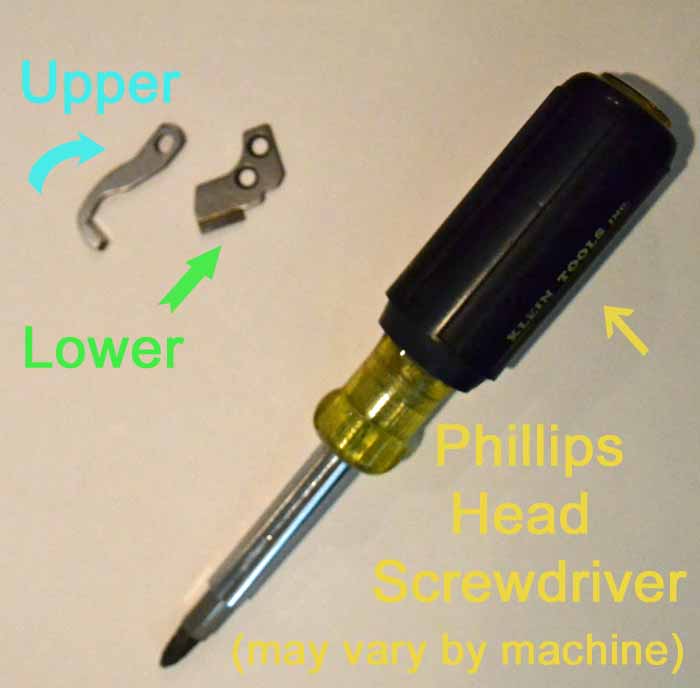
Next, get your tools and spare parts ready.  

008sergertute.jpg

Make sure your machine is off and unplugged.  Disengage your upper knife and find the screws for the lower knife.

013sergertute.jpg
021sergertute.jpg
022sergertute.jpg
012sergertute.jpg
023sergertute.jpg
024sergertute.jpg

Yes, it really is that easy! I swear, it took less time to change the blades than it takes to thread the darn thing! Before you turn it on and start serging, turn the handwheel slowly several revolutions to check to see if you have properly installed the blades.  

025sergertute.jpg

You don't want your upper knife too tight or too loose, and it has to be at the correct angle to the lower blade and foot plate. Once you've made a few revolutions by hand and all is well, turn on your machine and test it out on some scrap, make adjustments if needed. 

I hope you found this tutorial to be helpful! Be sure to share it with all your sewing friends, and definitely to go "Like" the Ken's Sewing Center Facebook Page, and let them know Pattern Revolution sent you!  They offer sweet deals on a regular basis on everything from sewing machines to accessories. Sign up for members only specials HERE. You can get 10% off an order now using code: k1213, and you can also get free shipping on orders $39.99 and over. SWEET! 

Thread Catcher Tutorial

032threadcatcher.jpg

For too long, my sewing room floor has looked like this. There's always a pile of scraps and threads on the floor next to my serger, and of course, the mess doesn't stay there...it gets tied up in my rolling chair wheels or tracked through the house by my little ones. I know, I know, how hard is it to pull a trash can next to me while I sew??? Not hard, and I do that sometimes, but I still miss the mark half the time and have a pile on the floor regardless.

Well, I've finally decided it's time to clean up my act. I've enlisted my husband to help, not because I can't do this all on my own, but because he spent his entire day swinging in the hammock in the backyard drinking his precious homebrew, and it's about time he does a little something today to earn his keep. Don't worry,  I just fed him a great pot roast dinner to help soak up some of that beer...can't be using power tools while tipsy, can we?

Serger Thread Catcher Tutorial

Serger Thread Catcher Tutorial

Here's what you'll need to complete this project: 

  • 1 piece of lauan plywood 1/8- 1/4 inch thick cut to size.
  • 2 scraps of material (one to cover the base and one to make the catch bag) 
  • E6000 glue or some other really great adhesive
  • Heat N bond
  • Sewing machine and thread

The first thing you need to do is measure the base of your serger. 

Mine measures 10" x 10".   I want my base to be 10" X 13". Yours should be the base of your serger X the base + 3". 


Measure your base and cut to fit.

Measure your base and cut to fit.

Next you need to mark the hole placement.

My hole is 1" in from the edge, 5" wide and 2" deep. It is 1" off center to the right. 

2.jpg

Trace your hole, round the corners. Use a drill to make a hole big enough to get a jigsaw in, then use the jigsaw to cut out your hole.

Tell your husband he can go back to the hammock.

011threadcatcher.jpg

Now it's time to get your fabric ready. I cut my fabric 3" wider than my base all the way around, so mine is 13" x 16". Cut yours 3" bigger than your base dimensions.

012threadcatcher.jpg

Now it's time to whip out one of my favorite products of all time-- Heat N Bond.  Cut your Heat N Bond to the same dimensions as your fabric. 

014threadcatcher.jpg

Iron the Heat N Bond to the wrong side of your fabric. I put craft paper down over my ironing board to protect it. 

015threadcatcher.jpg

Peel the paper backing off and place the fabric over your base.

016threadcatcher.jpg

Pull the long sides tight and tape in place temporarily.  

017threadcatcher.jpg

Iron the fabric to the top of the base to secure.

018threadcatcher.jpg

Trim a mitre into the 4 corners to reduce bulk. Then fold the bottom up. 

019threadcatcher.jpg

Iron to secure, then repeat with the top flap, be sure to miss the tape on the sides. Remove the tape and Iron the long sides in place. 

020threadcatcher.jpg

Mark the width and height of your hole and use an excto knife to cut through the fabric. 

023threadcatcher.jpg

Trim any fabric on the backside that is covering the hole. Make several small snips all the way around and pull the fabric towards the back. 

024threadcatcher.jpg

Pull each snippet tight toward the back and iron in place. 

025threadcatcher.jpg

Now you should have something like this. Next, take your second fabric scrap. Cut it to 24" X 6". Fold the right sides together matching up the short sides.

026threadcatcher.jpg

The fold will be the bottom of your bag. Sew up the sides stopping 2" from the top, be sure to backstich at beginning and end. 

027threadcatcher.jpg

Get out you E6000, turn your bag right side out and open the bag at the side seams. 

030threadcatcher.jpg

Put your adhesive all the way around your hole. First place the top lip of the bag over the adhesive and smooth the fabric, then open and place the bottom lip over the bottom portion of the hole. 

031threadcatcher.jpg

Leave it to dry. Go join your husband in the hammock, but only if it's sturdy enough for two. Come back in the morning and this is what you'll have: 

033threadcatcher.jpg

One totally awesome thread catcher!

Enjoy, and happy sewing! 

Robin

Join the Ruffle Revolution!


I'm sure you've probably heard of the famous Evelyn Griffin of Lil' Liza Lou.

What??? You haven't???

Well then, you must not be a member of the incredible Facebook Group PDF  Pattern Sales And Promotions. I think each of our 4,029 members knows her by name, and some even consider her to be our patron saint. One day, not long ago, Evelyn Griffin was experimenting on her serger. Like many seamstresses, she had been struggling to gather miles of ruffles for her beautiful handmade creations, and it struck her, "There must be an easier way!!!" I think we've all heard rumblings here and there about gathering on a serger, but I know, for me, change is scary. So, whether it is out of fear or laziness or both, I keep on doing the same old same old-- gathering my ruffles by hand with upholstery thread. No more! Evelyn's original post to the group about gathering on her serger now has 529 comments and she has changed the lives of many seamstresses already--I will be next on the list. I promise to get out of my old school, boring but oh-so-comfortable box and try this time saving technique, and I hope you will too! 

Here's a tutorial Evelyn has put together for gathering on a Janome Juno 3434D. She also is including settings for some other popular models at the bottom of the post. If you are already a pro at this, and your model is not listed, please share your model and settings in the comment section for others.

Oh, did I mention...she even made us a video?


Evelyn Griffin:

I have had my Janome Juno Serger, now, for almost 2 years. I love using it for rolled hems, and, for that reason alone it is invaluable. Today, I learned something new with it. I learned how to gather ruffles with it. (Insert Ohs and Ahs). Gathering ruffles is a VERY time consuming process. My previous method entailed first hand gathering the ruffles, which were never even, and I spent HOURS trying to get them evenly distributed, and then, sometimes the gathering threads would pull back through the stitches which means you have to redo the whole thing... Never EVER again. I changed all my serger settings, and it turned out PERFECT. Here are my 25 Minute (including cutting) Ruffle Pants. (Pattern Info HERE). 


ruffpant1

Here's a little basic how to

ruffpant11

Turn top screw 3 times counter clockwise

ruffpant8

Needles Tension to 9, Loopers tension to 4

ruffpant9

Disengage knife and set to serge

ruffpant10

Differential and Stitch length to highest settings


Perfect 1:2 ratio.

ruffpant4
Doesn't that look nice? :)

Watch Evelyn's video....


Settings for other popular models:
Brother 1034D Settings- 
3:1 Ratio-
Dif Feed: 2
Length: 5
Width: 4
Needles: (from left to right)
7, 7, 4, 4

2:1 Ratio-
Dif Feed: 2
Length: 5
Width: 4
Needles: (from left to right)
5, 5, 4, 4

PAFF
Tensions- 7,7,4,4

Babylock Imagine- Set Stitch Length Dial to 4, and Differential Feed to 2, and B. 

I hope you find the courage to try this! Every machine can be a little different, so don't get discouraged if it doesn't work on your first try. Just get a pile of scraps and keep experimenting! There are tons of Youtube videos on the subject, and you can always Google your make and model + ruffling to find your solution. 

Join the Ruffle Revolution!

Once you've mastered it, you're going to need some extra ruffly patterns, so go try one of  these:
Lily Bird Studio-Purchase HERE


Tie Dye Diva- Purchase HERE

Jocole- Purchase HERE

Ellie Inspired- Purchase HERE


Post your success stories in the comments or join PDF Pattern Sales and Promotions to become a part of and incredible sewing community!


Happy Ruffling!