
Halloween Sewing: Dizzy Tremaine featuring patterns by Duchess and Hare, Made for Mermaids and Little Lizard King
/I can’t believe it is that time again to start planning Halloween costumes. Every year I tell myself to start in September but, then September is super busy with back to school stuff it just never happens. So I’m always thankful to be given a deadline so I can be weeks ahead of the game.
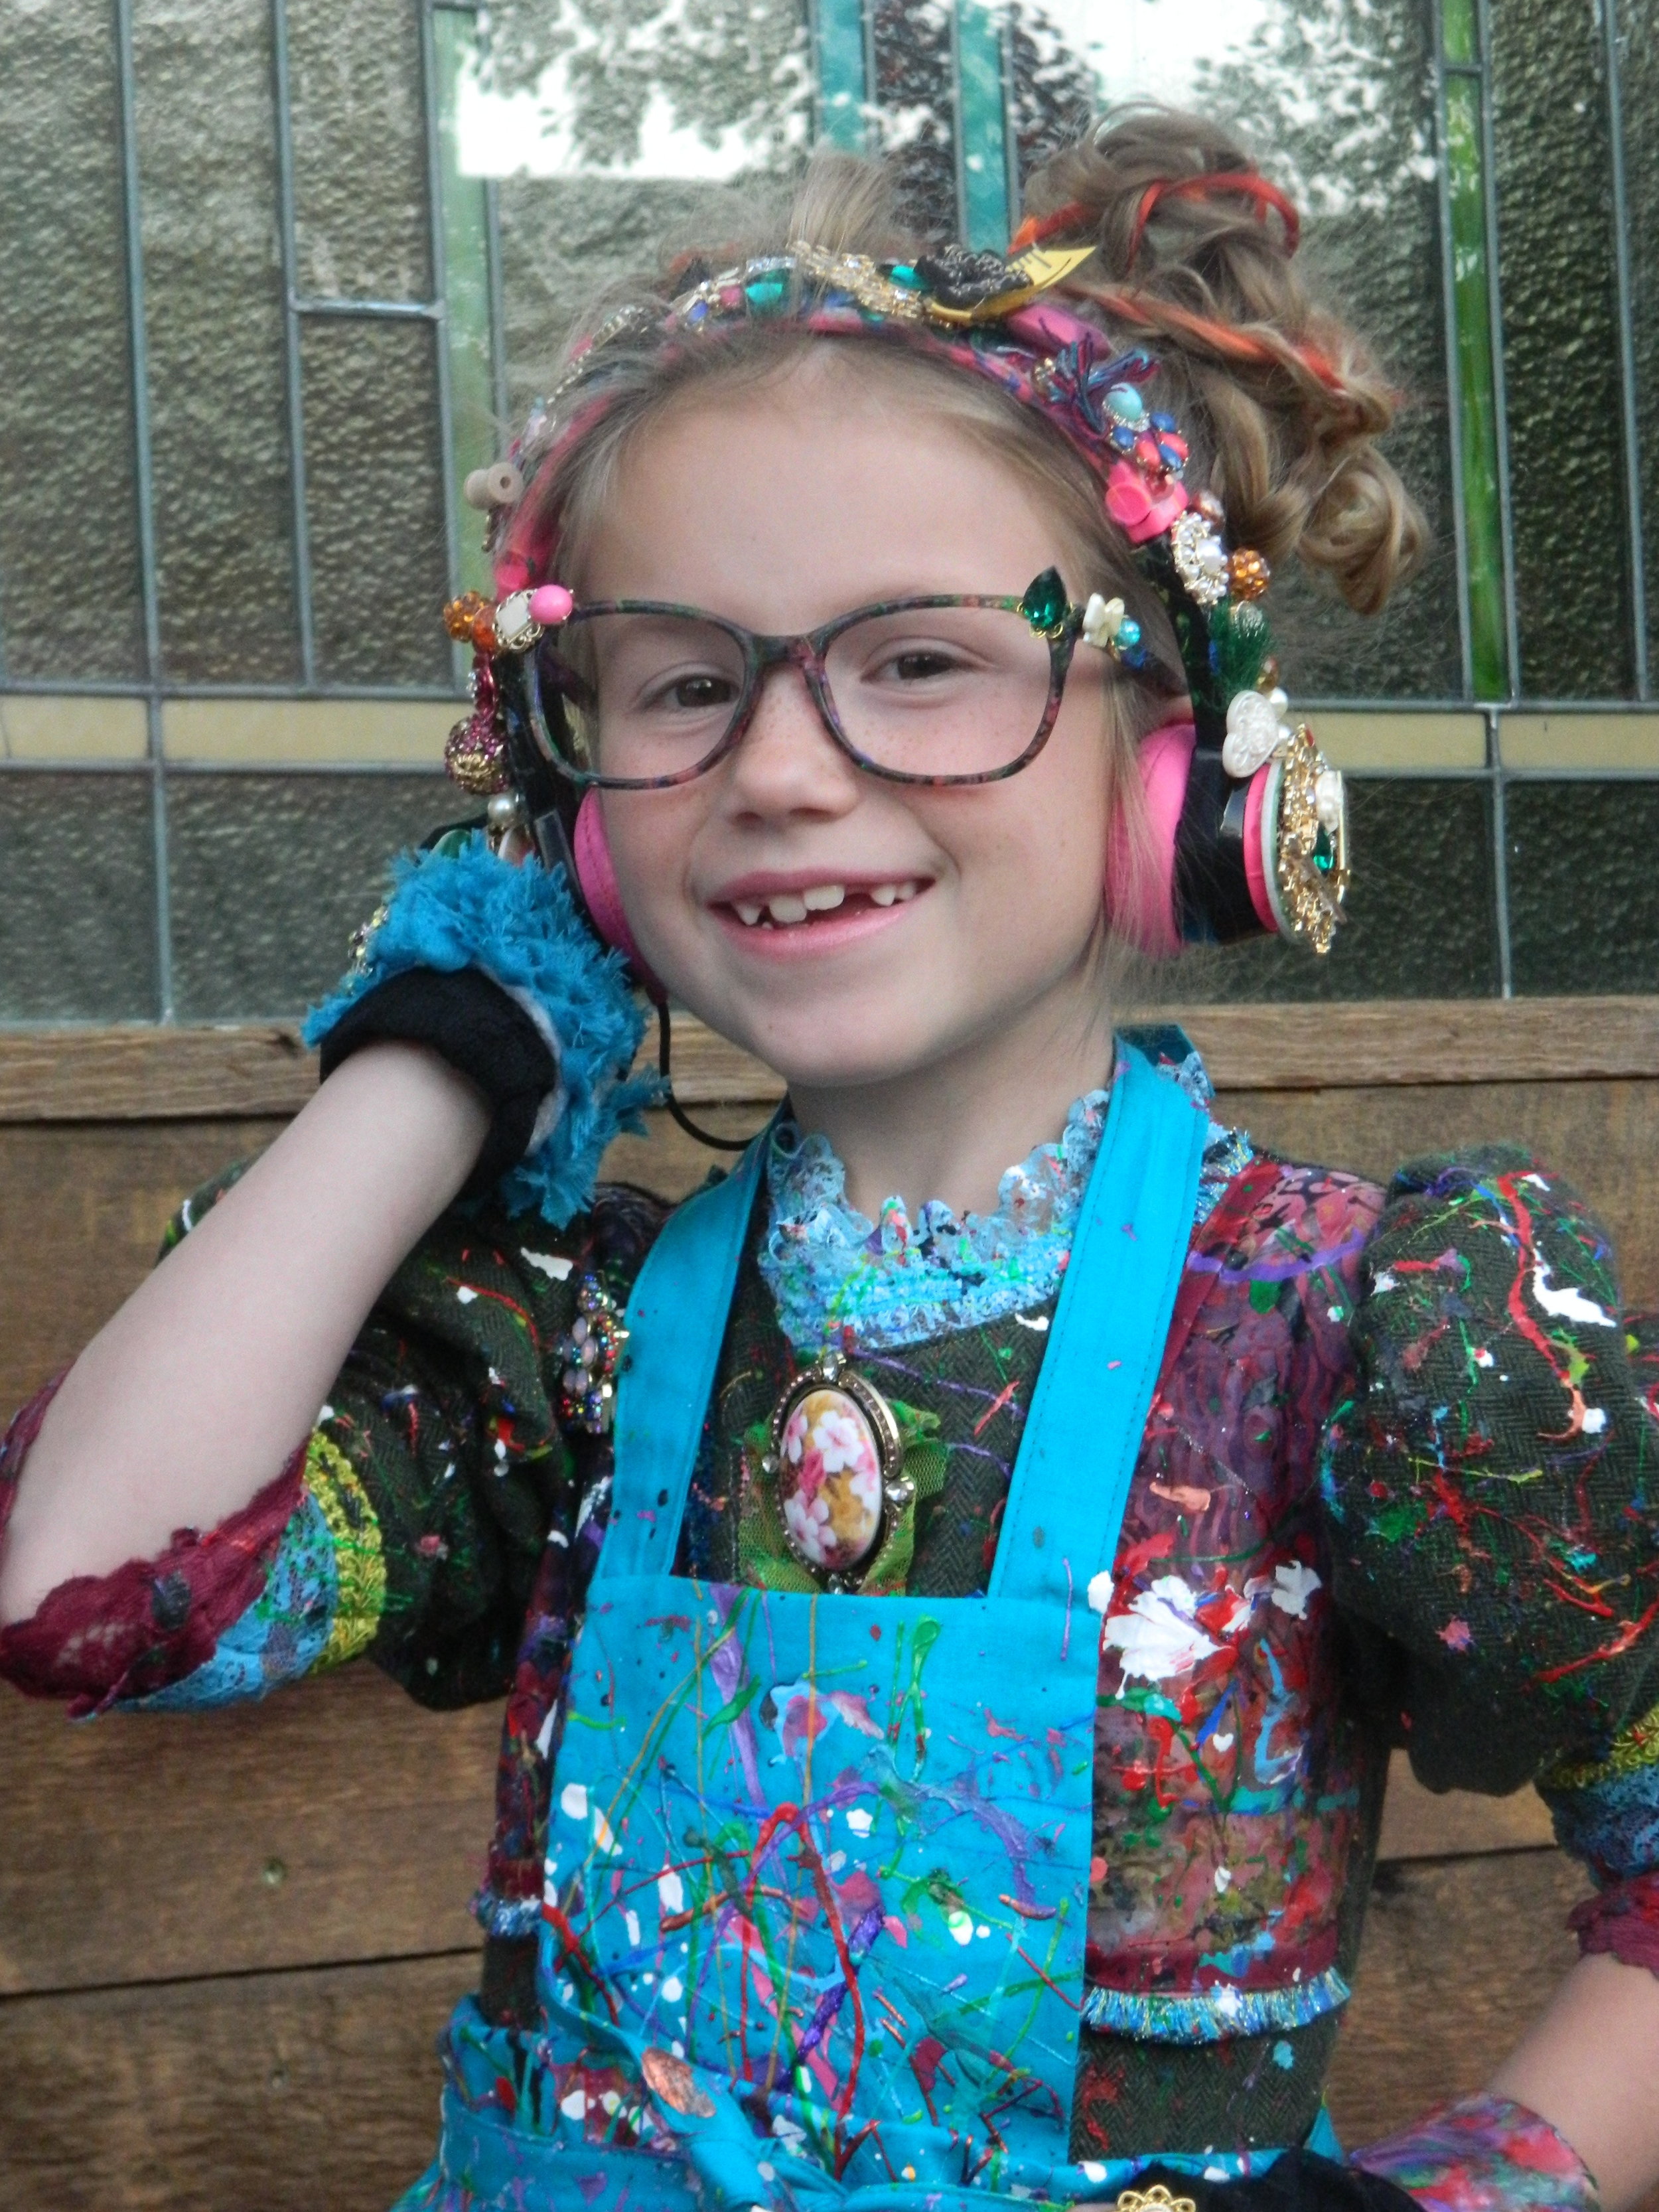
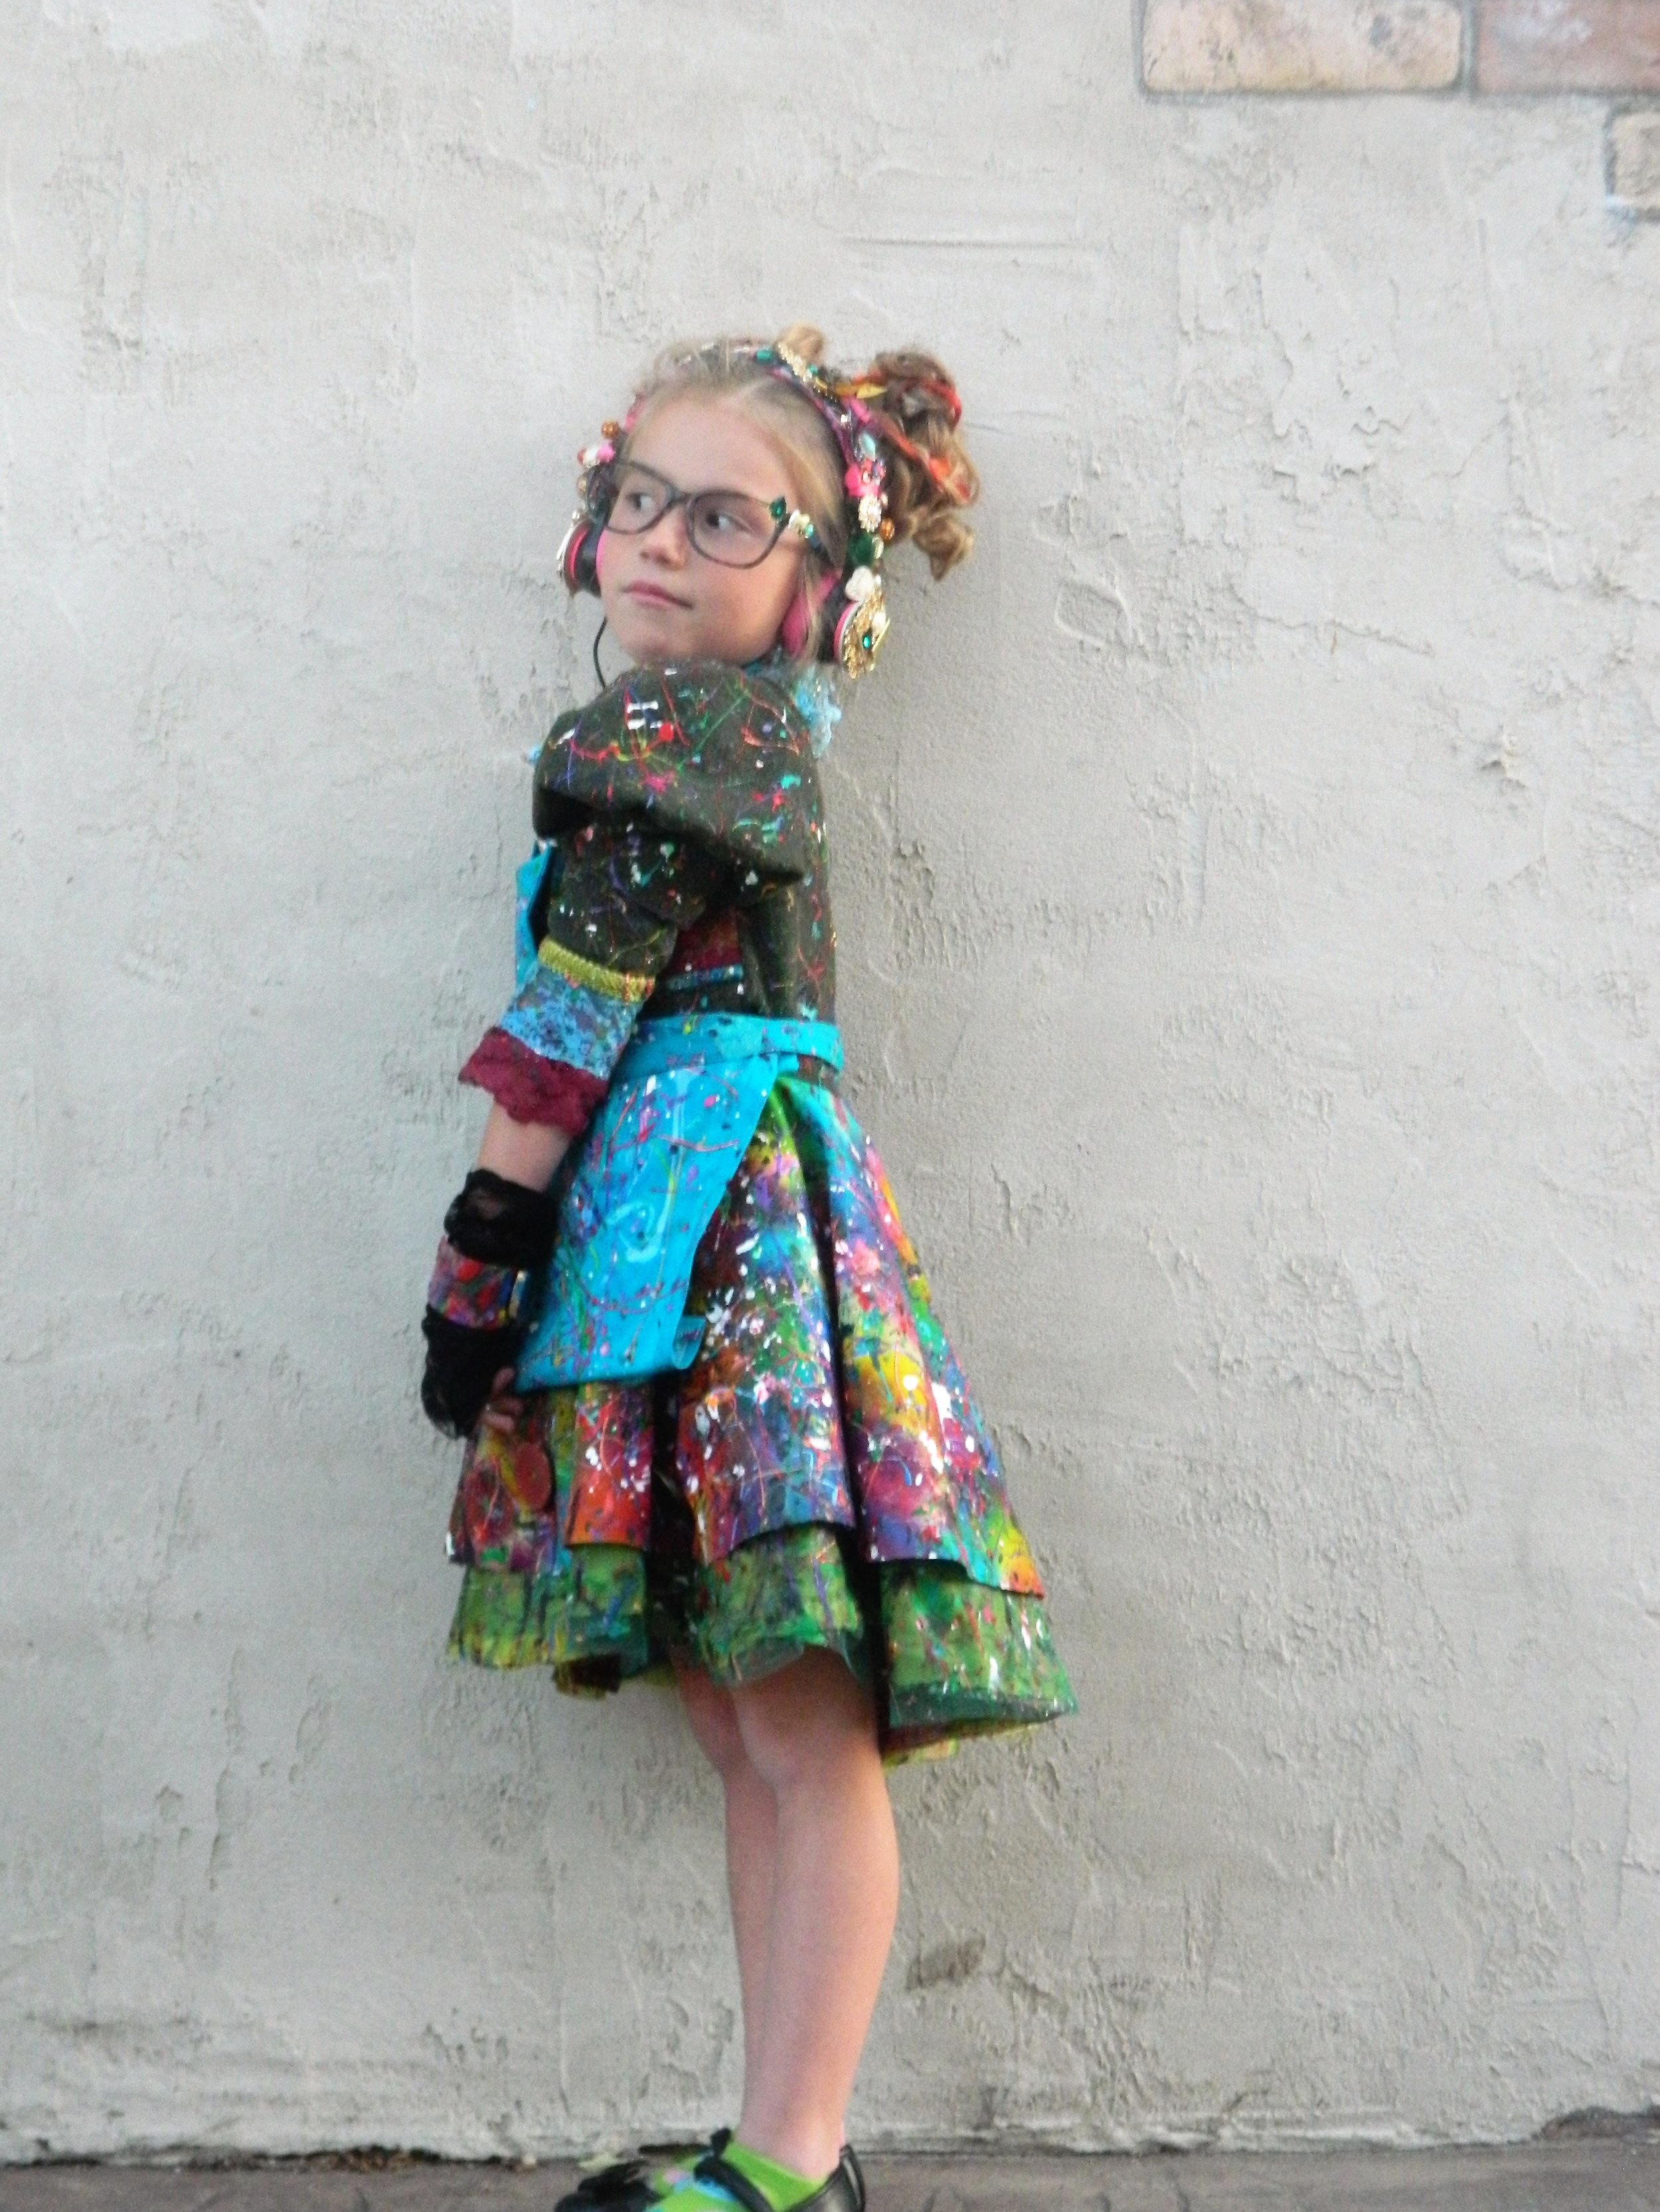
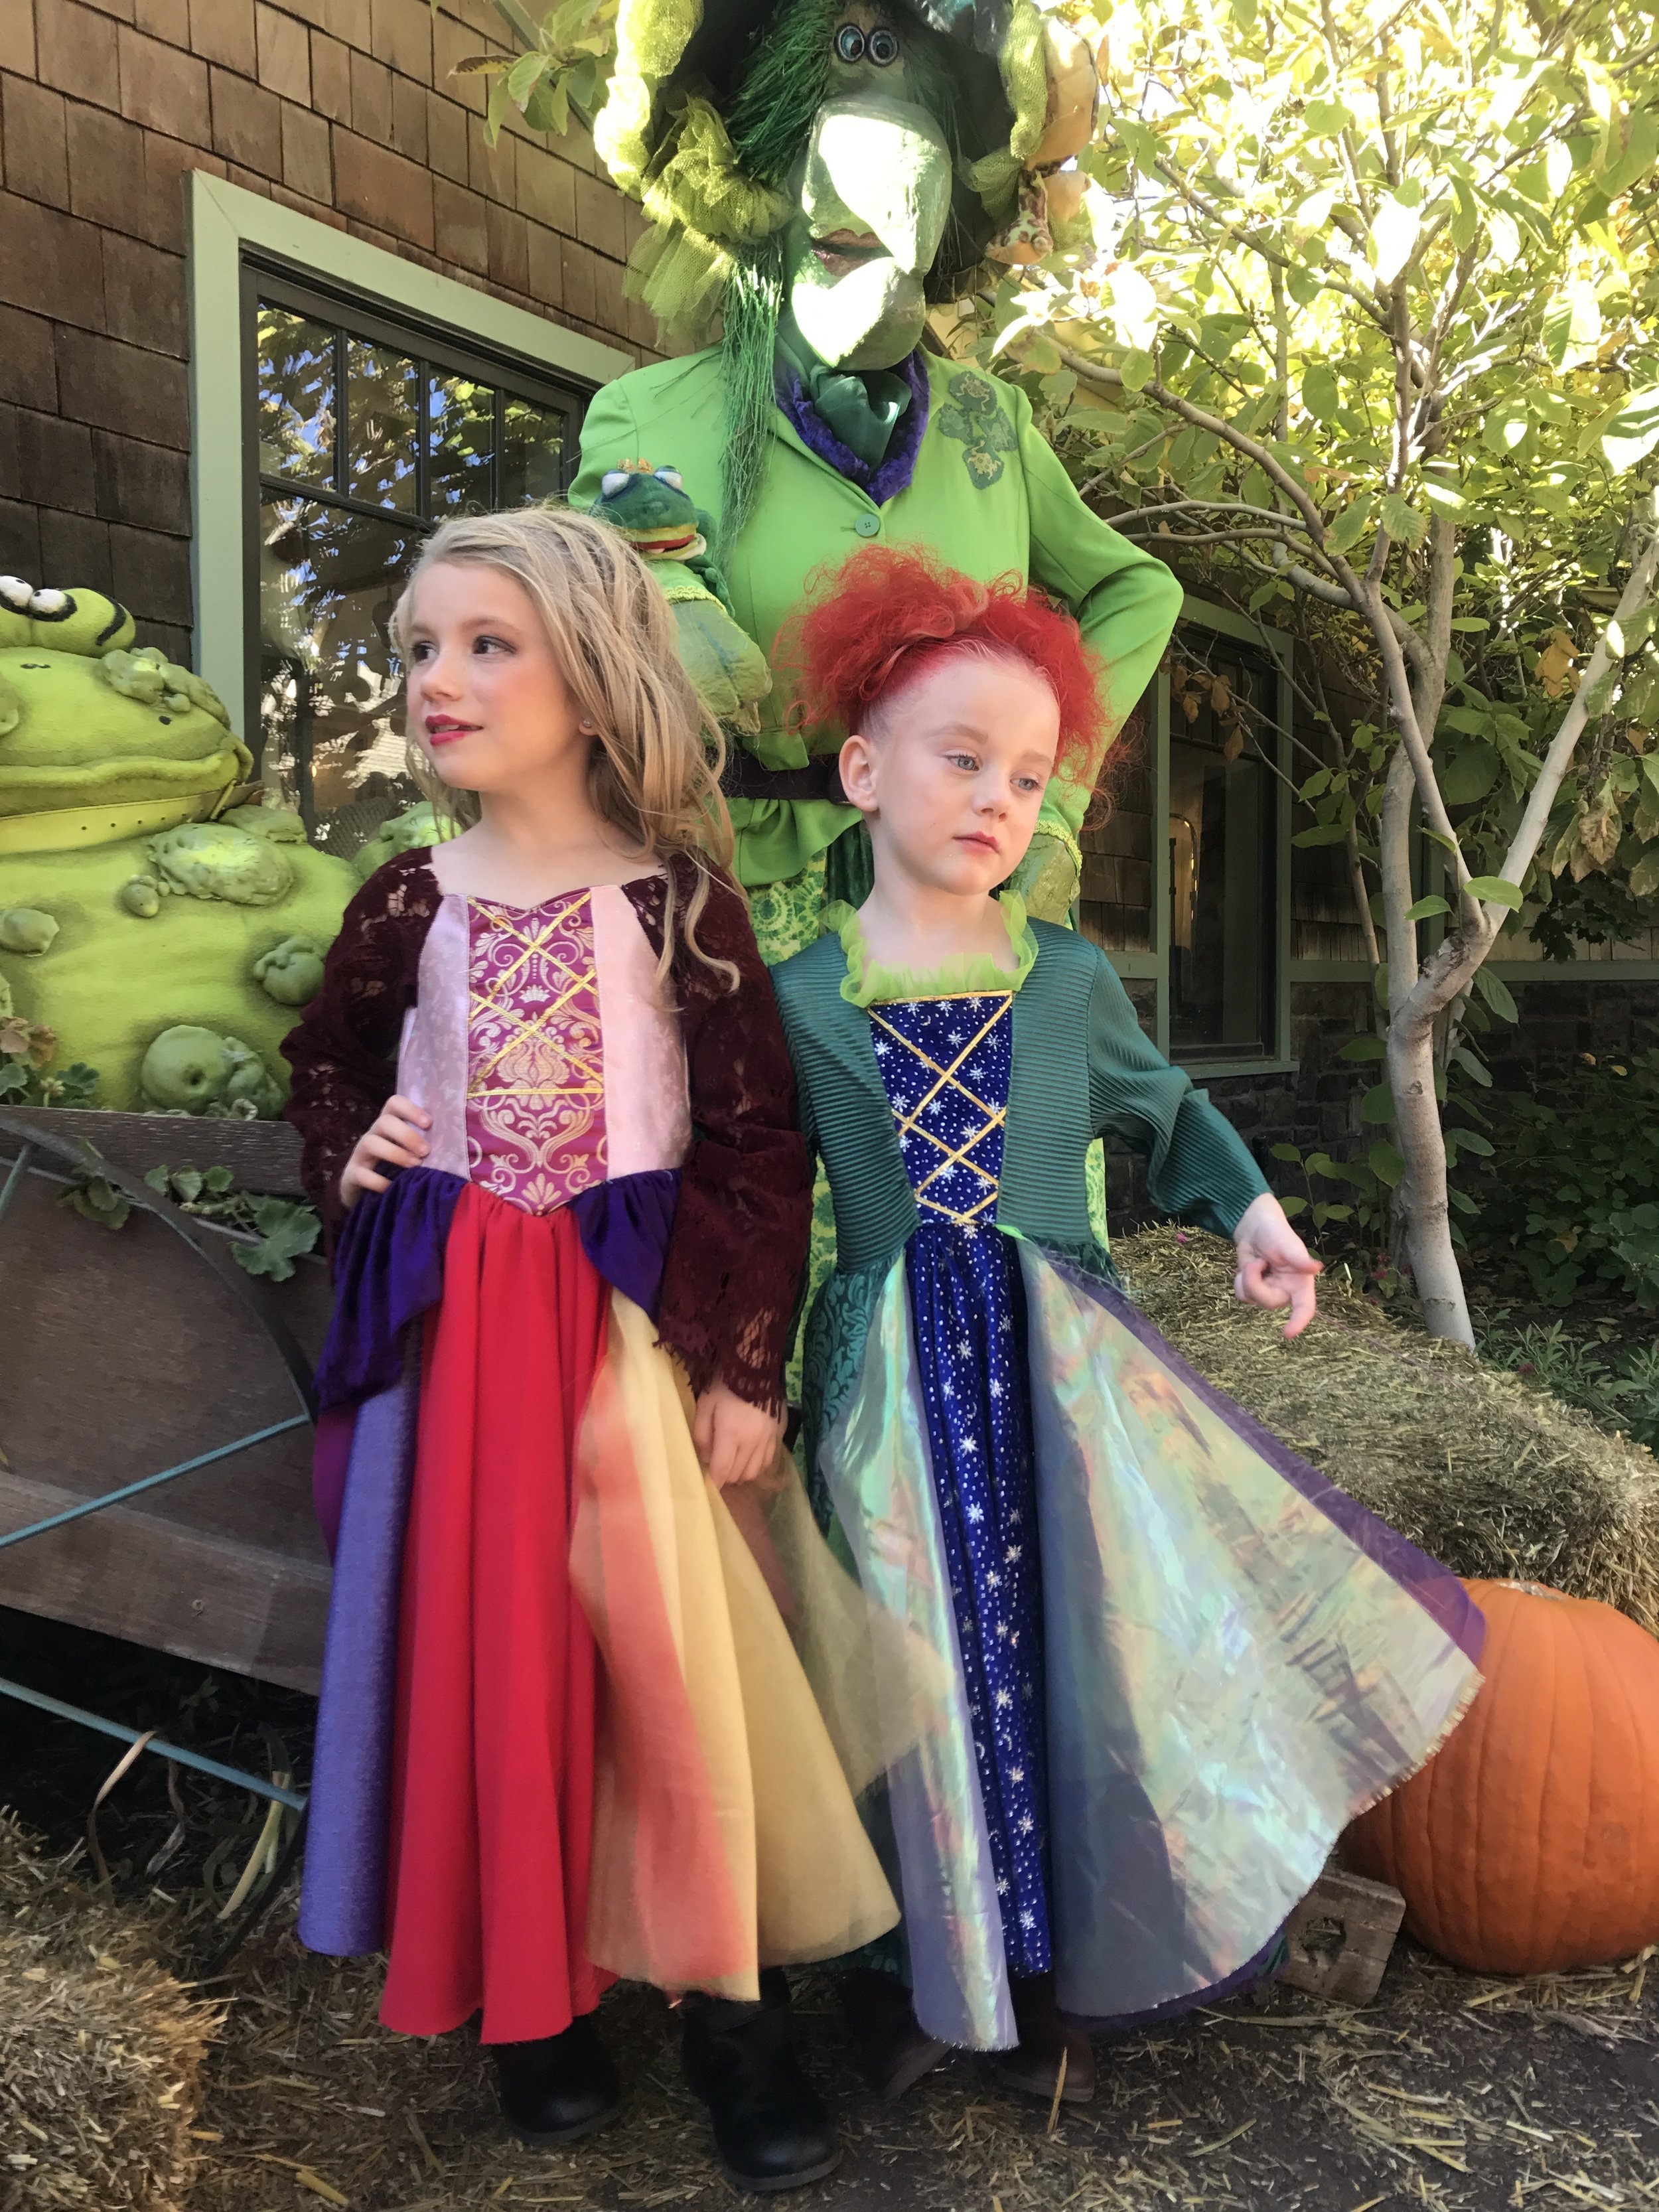
I love Disney and seem to do a Disney themed costume each year and this year is no exception. My youngest wanted the new Anna dress from the Disney store so I really only had to focus on my oldest and she wanted something from Disney Descendents. At first it was Uma and I’m like “umm…. You should try another character because the sea witch's daughter isn’t going to happen.” She thought long and hard because last year she was Evie {Evil Queen’s daughter} She finally decided upon Dizzy Tremaine who is {daughter of Drizella}

I was so up for the challenge and it seems when I was doing my research from group to group gathering ideas a lot had interest in Dizzy so I’m so thrilled to showcase what fabrics and pattern mash up I used as a base to make your own. I can’t wait to see your take on this super adorable costume bringing your own style to Dizzy. Please tag me Nicole Lee and Pattern Revolution when you do make it your own.
Shall we get started?!!!
Patterns used:
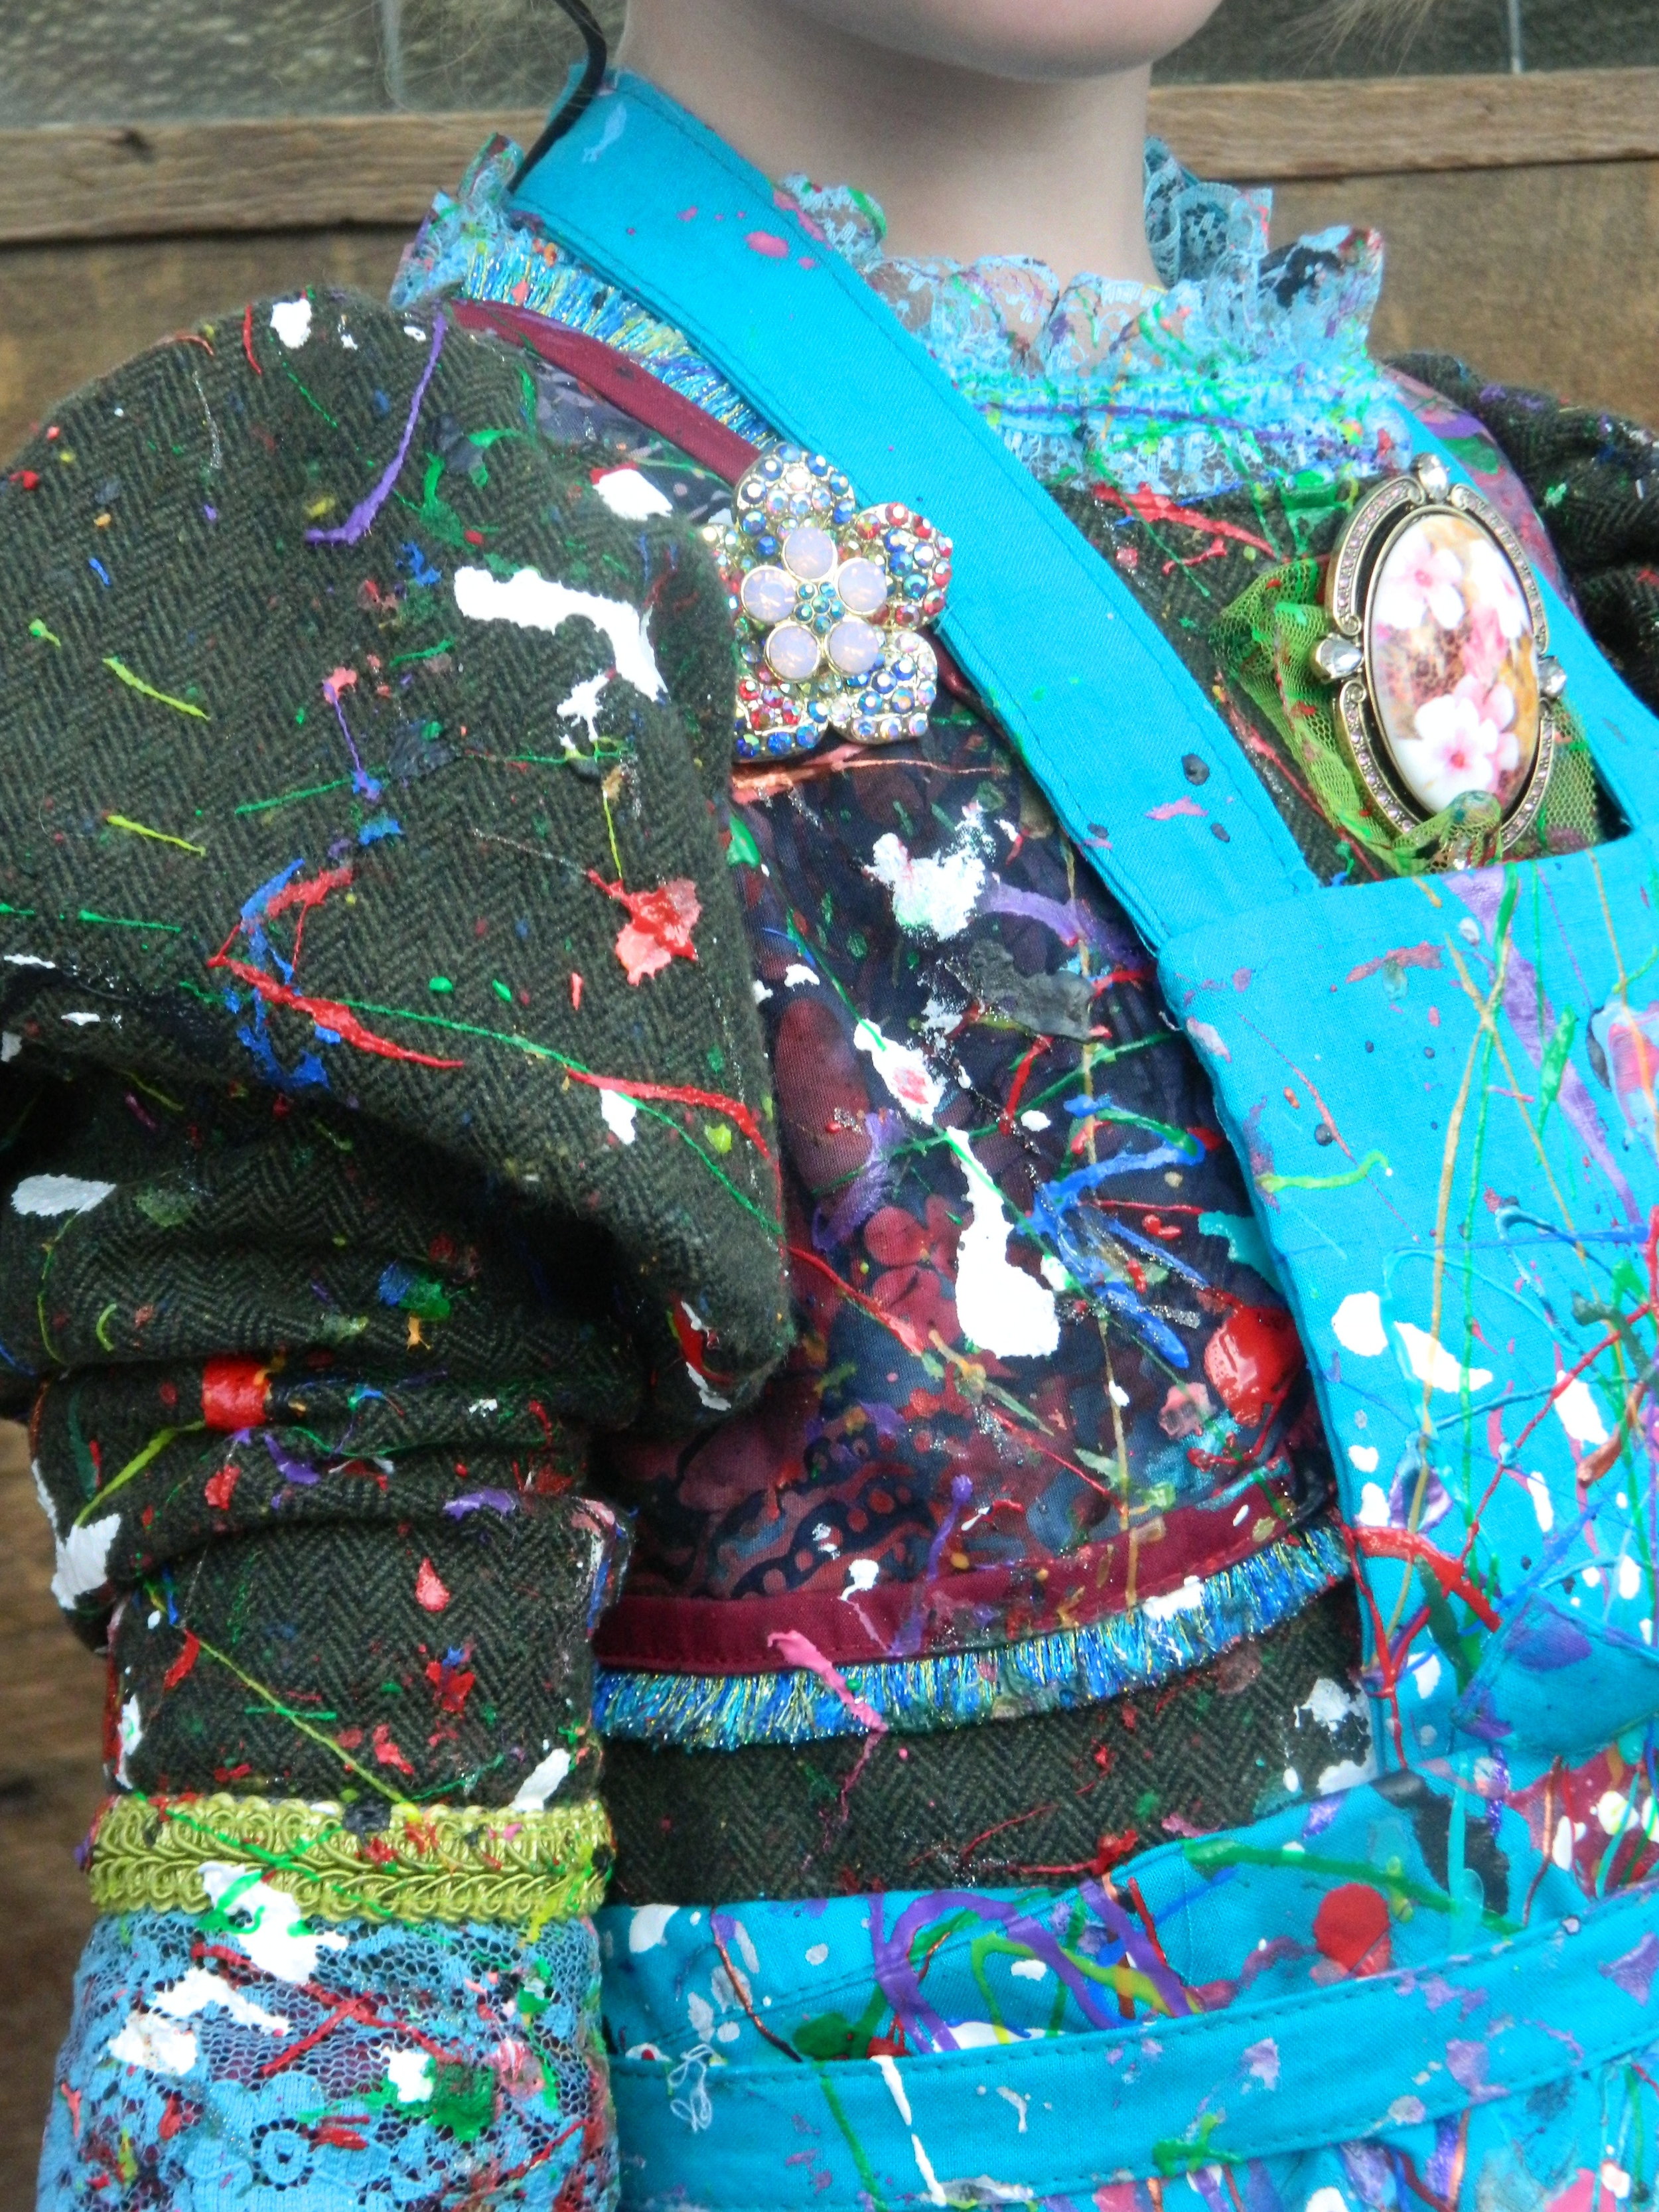
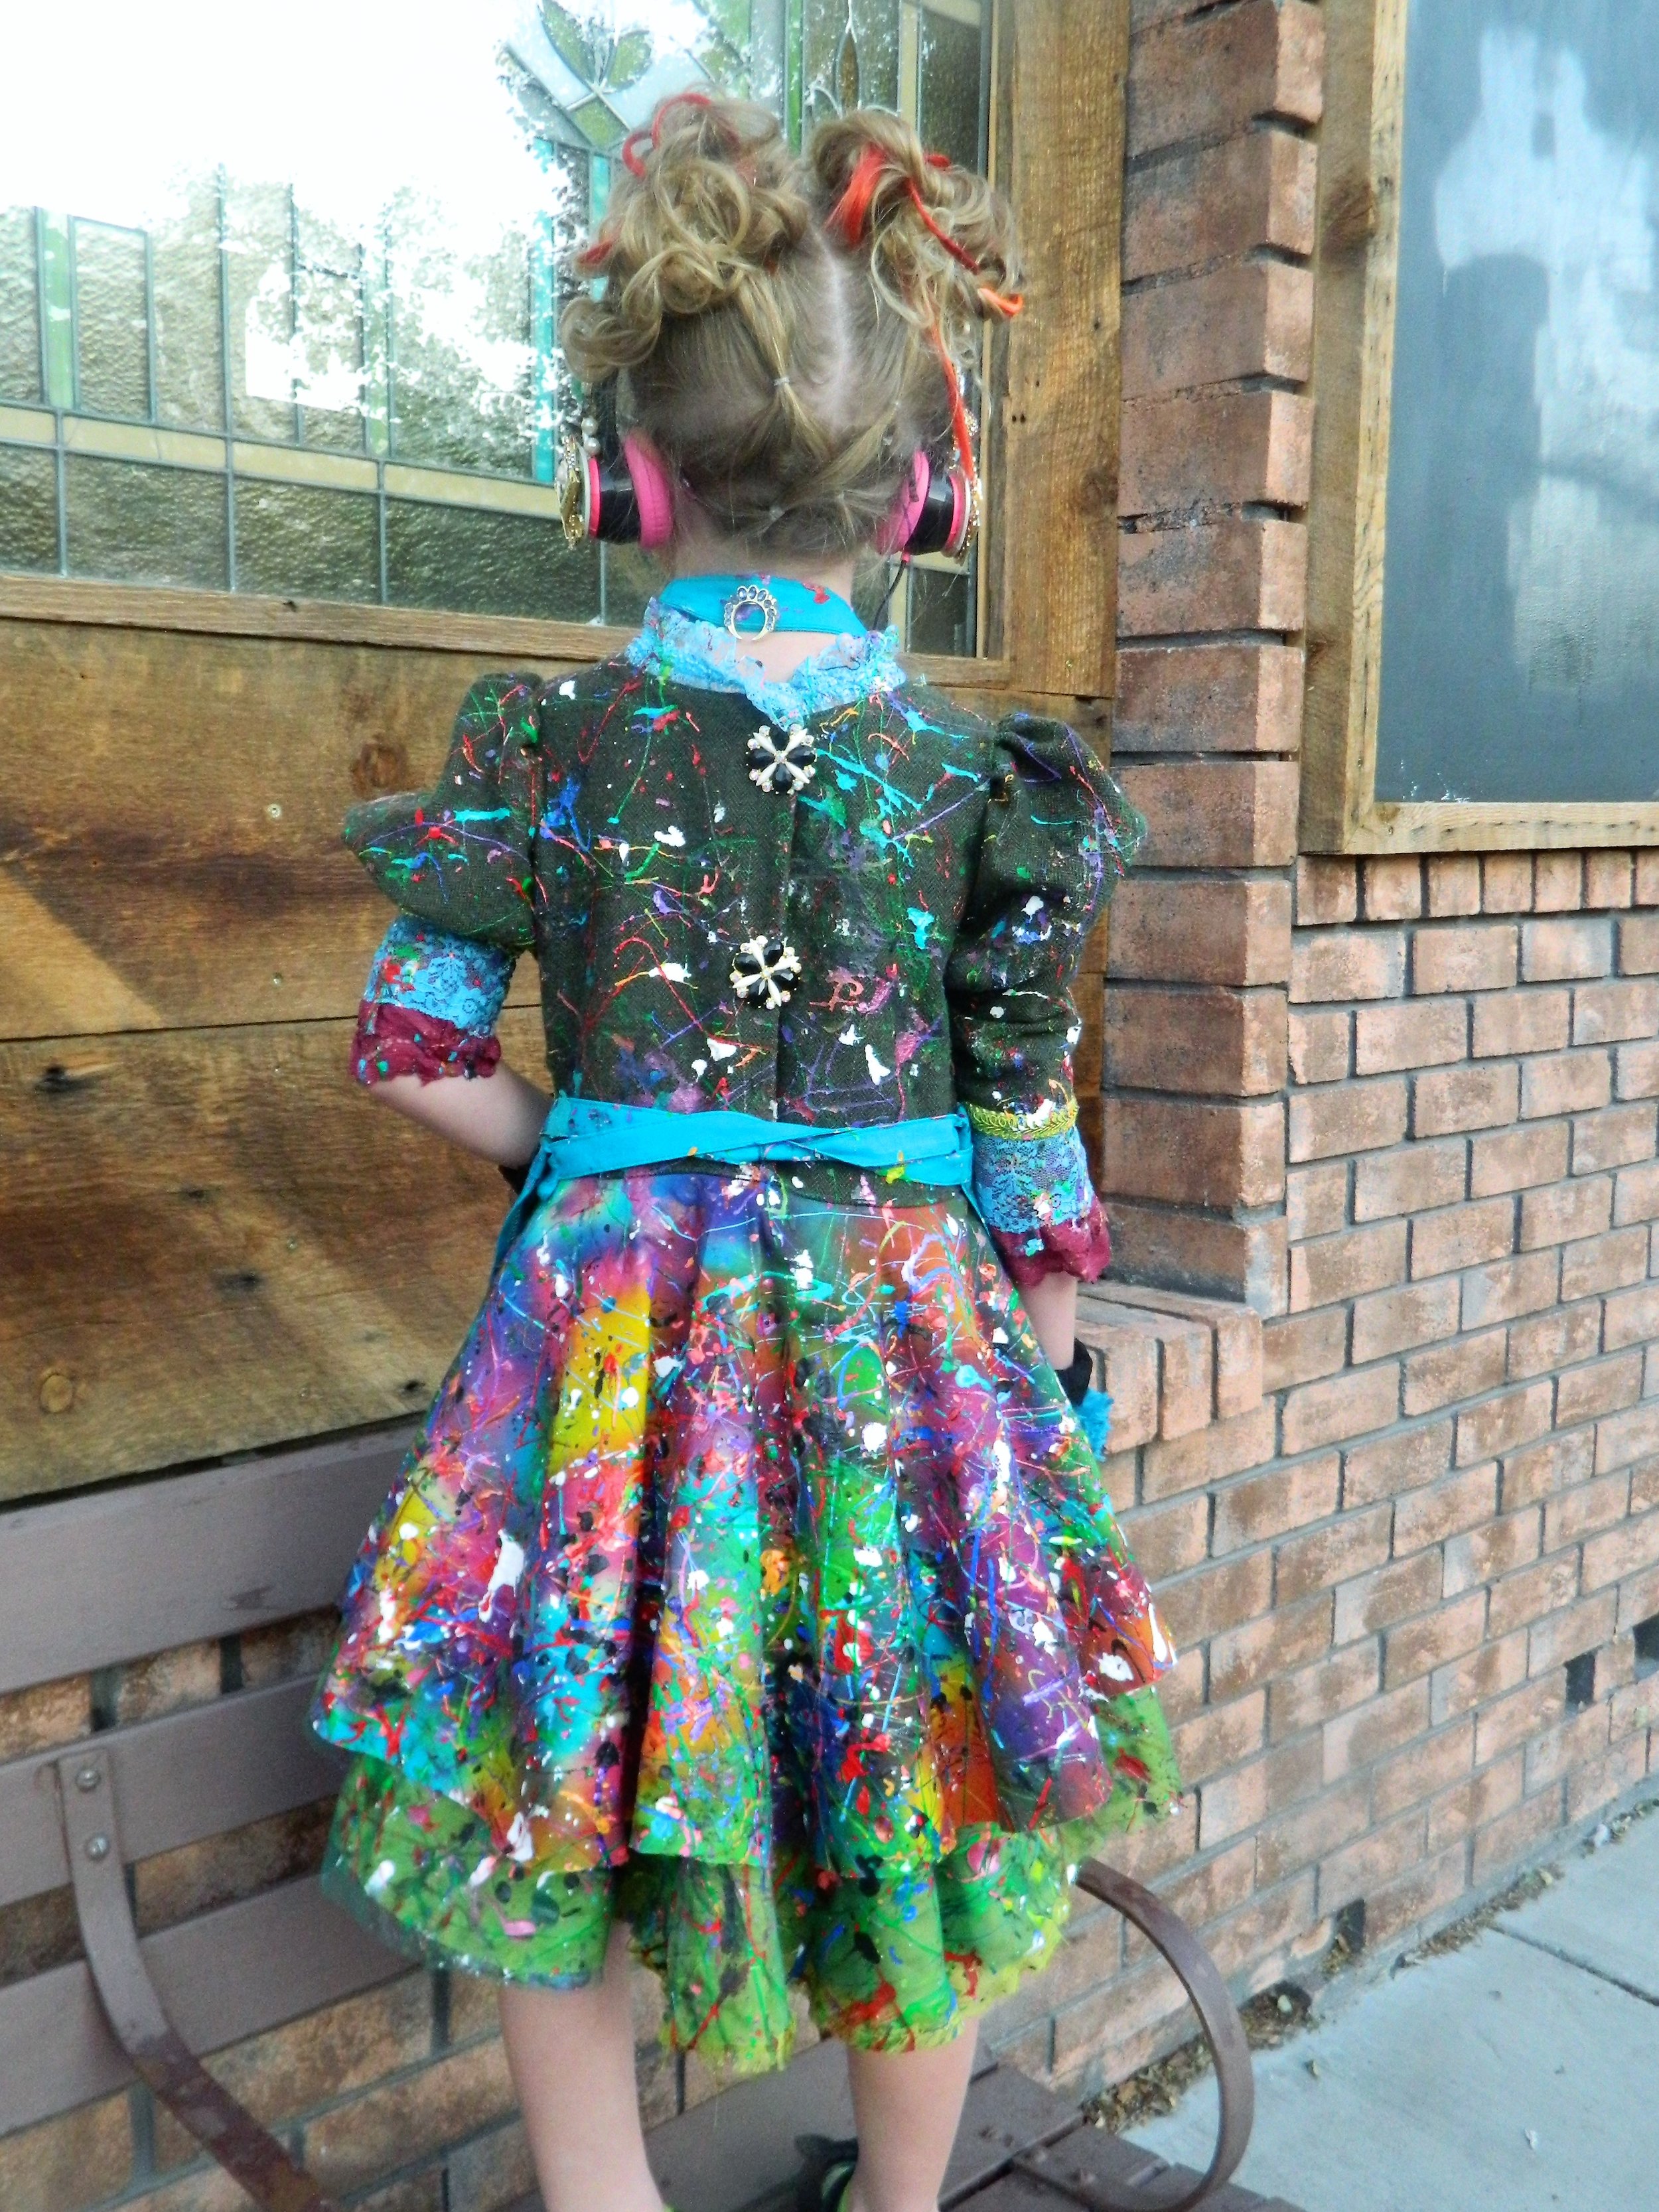
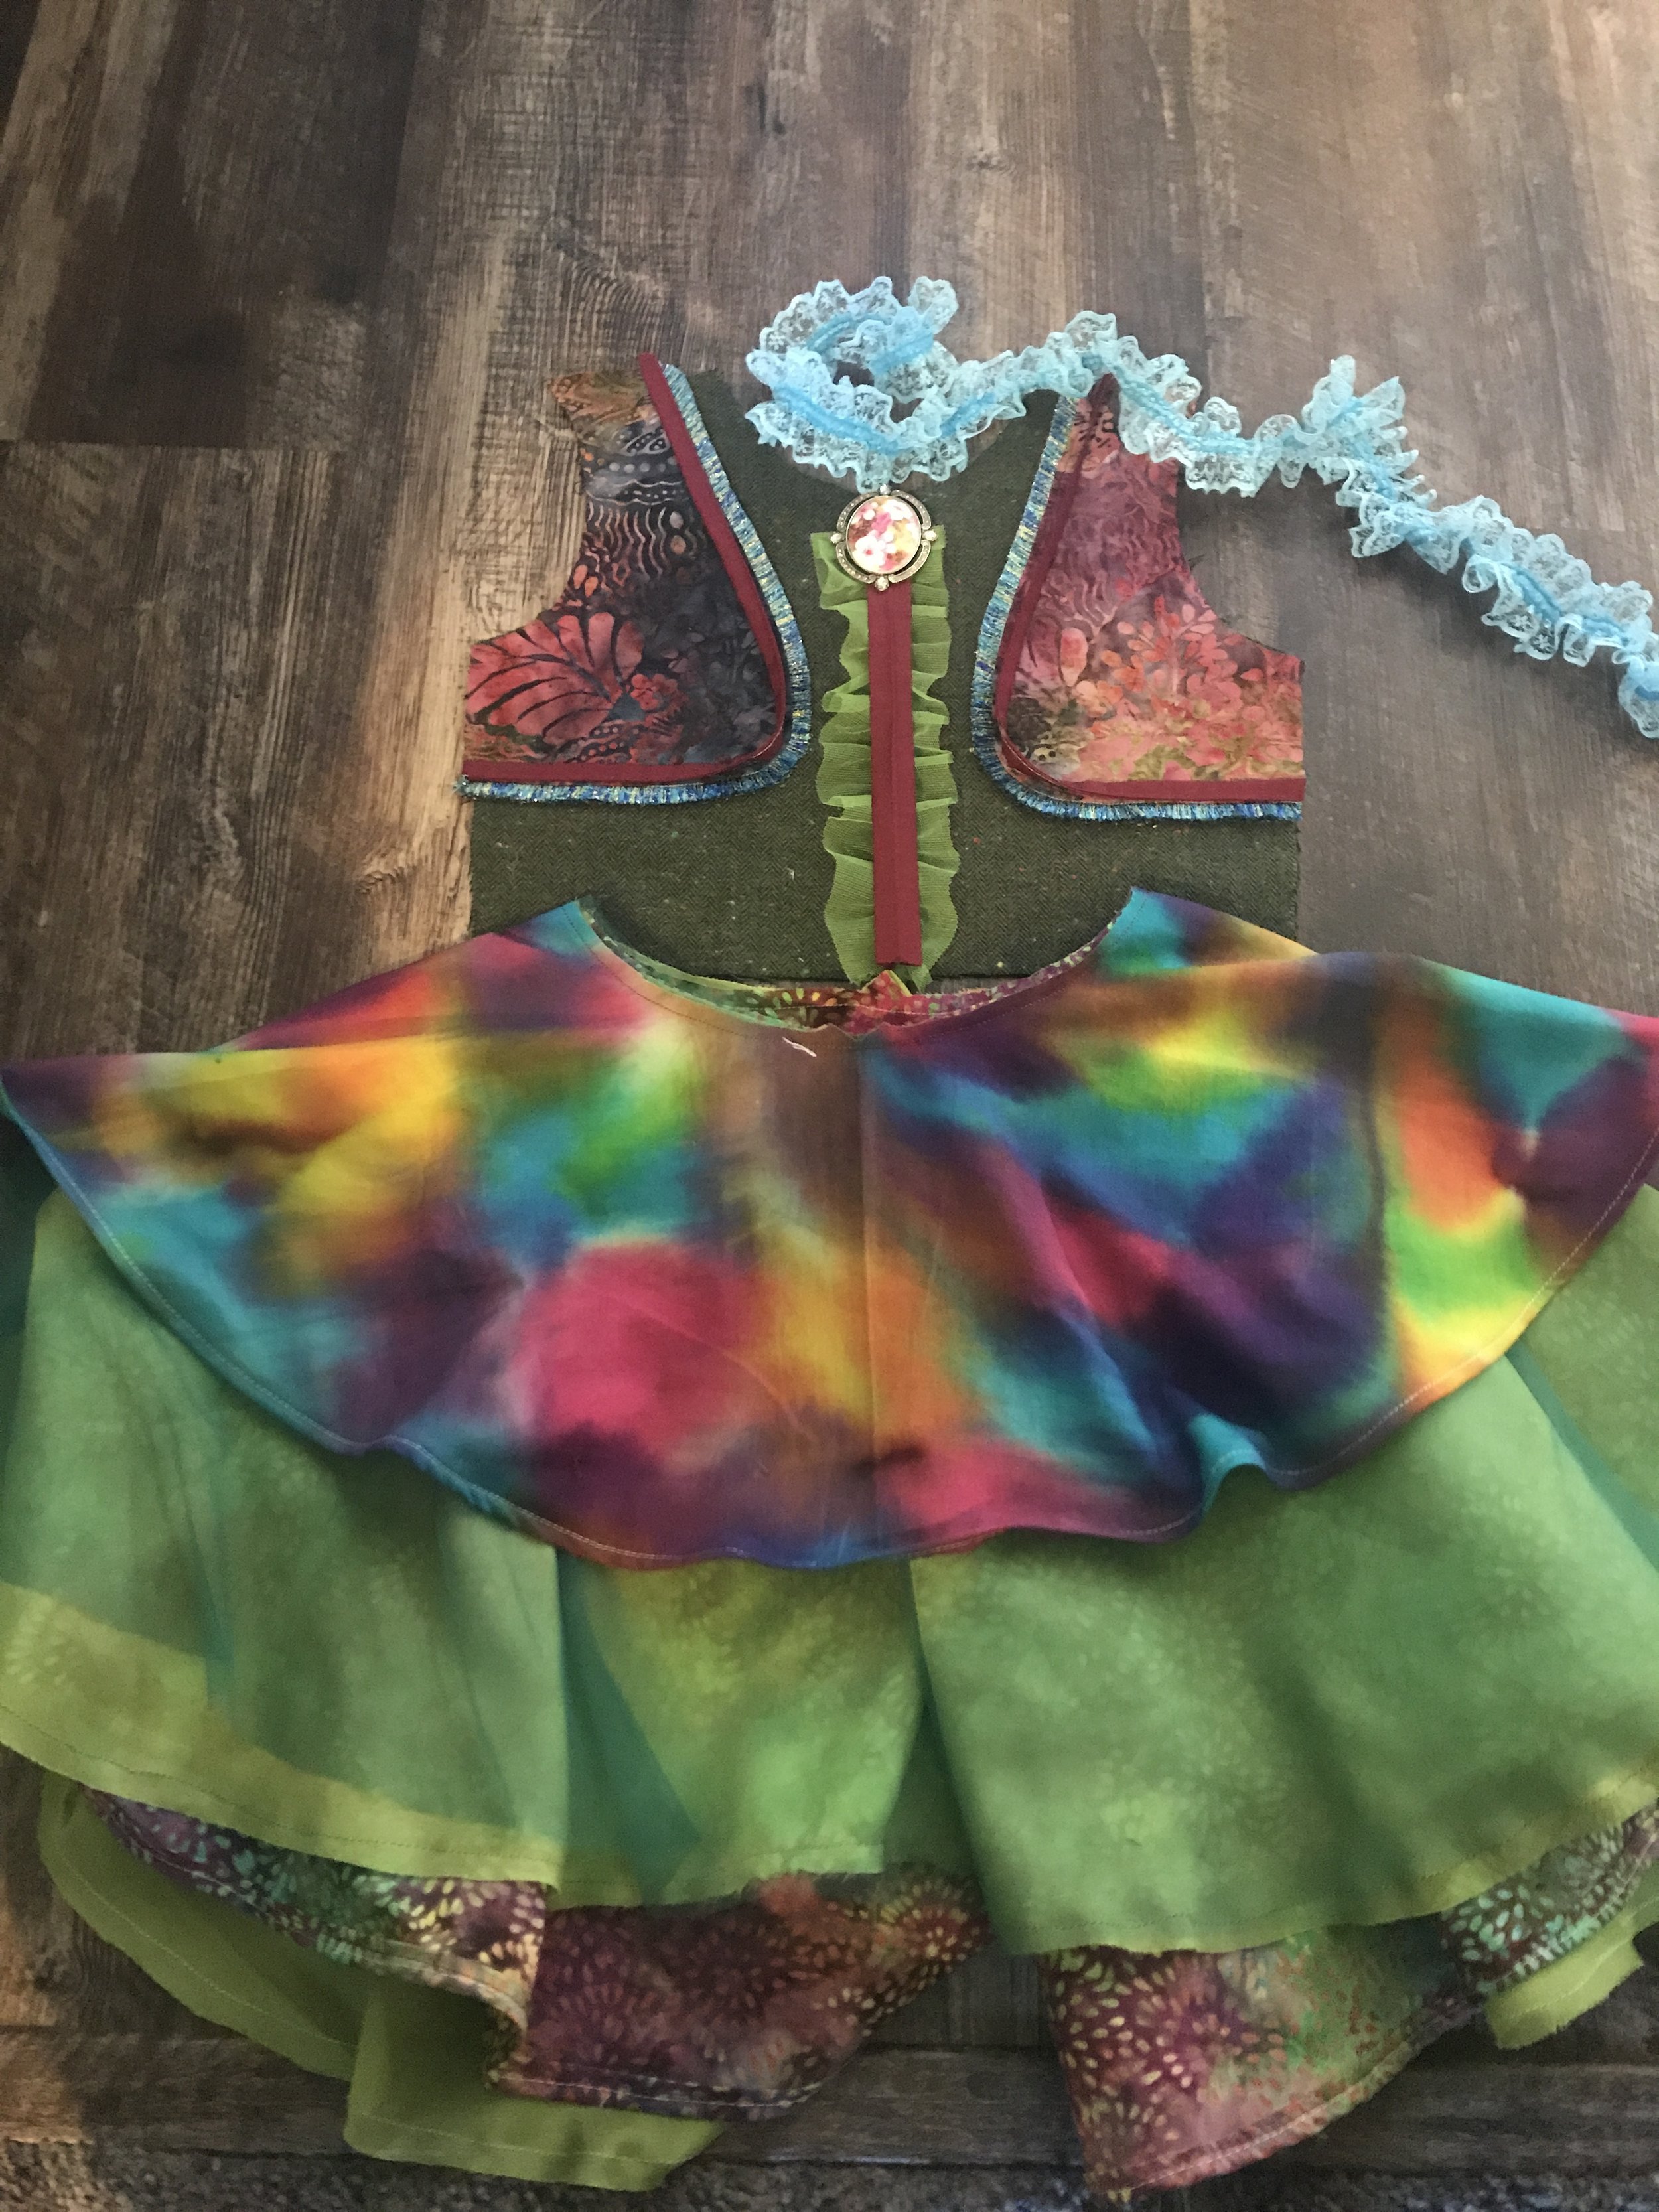
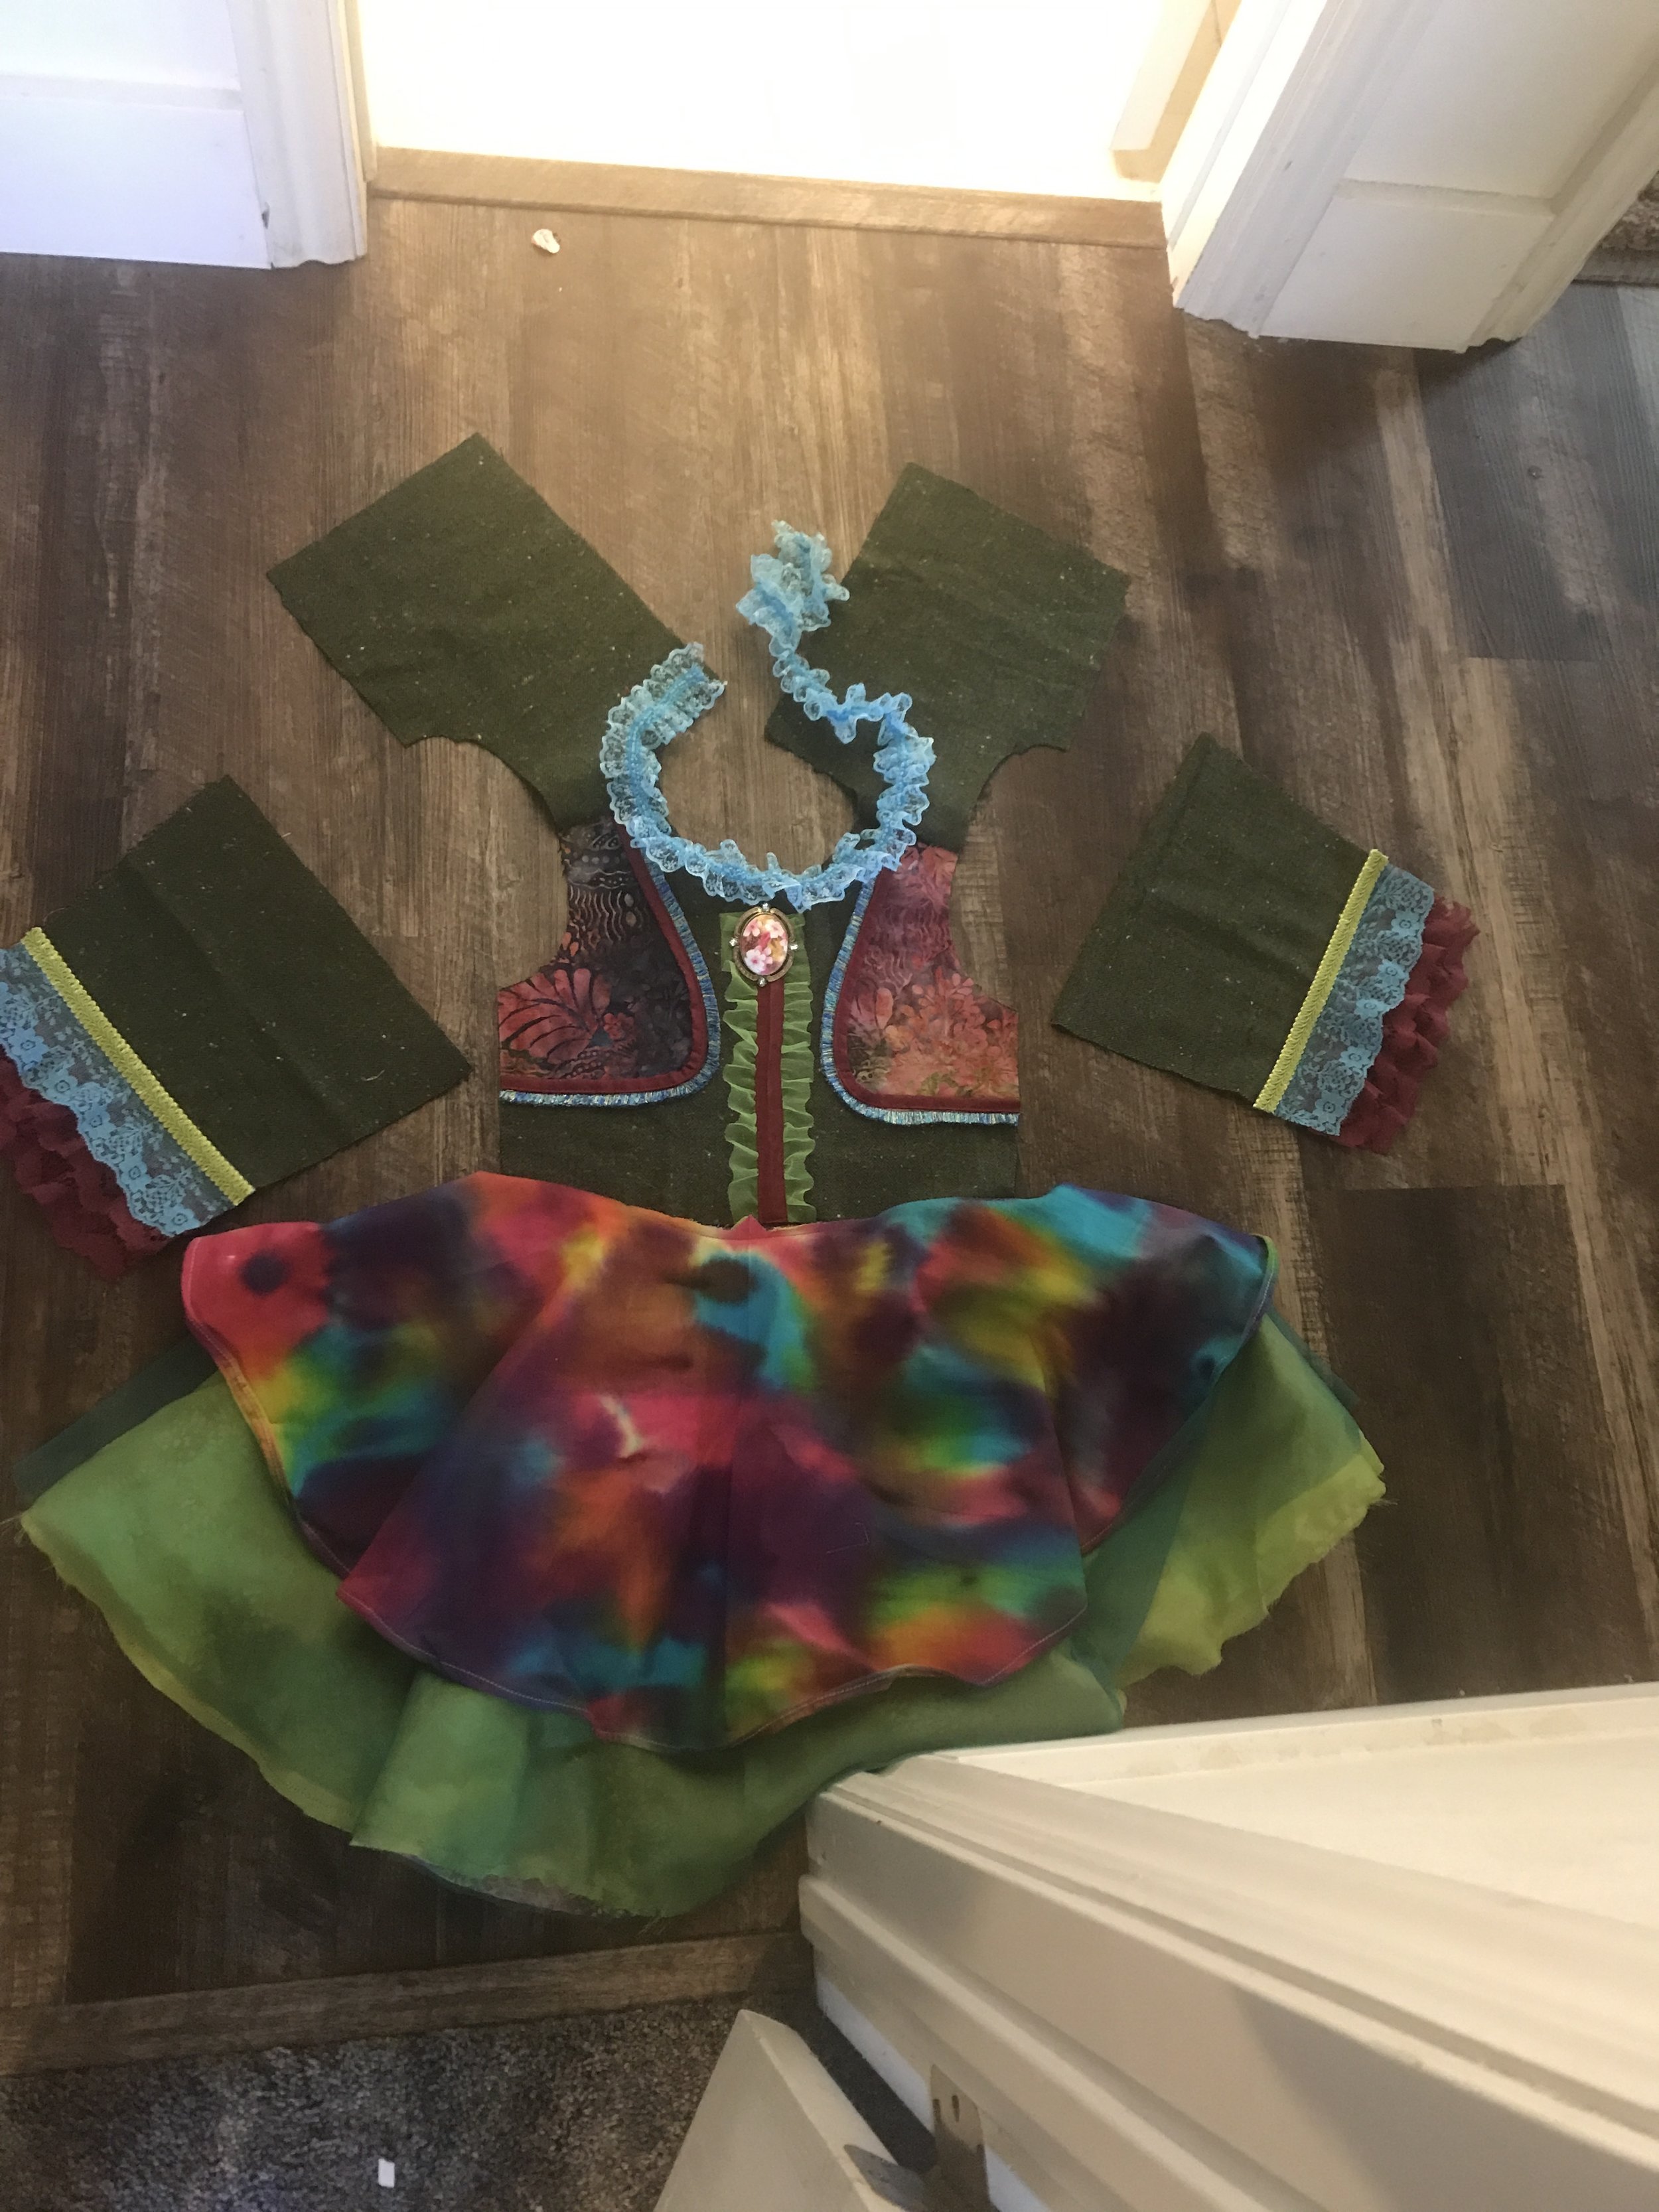
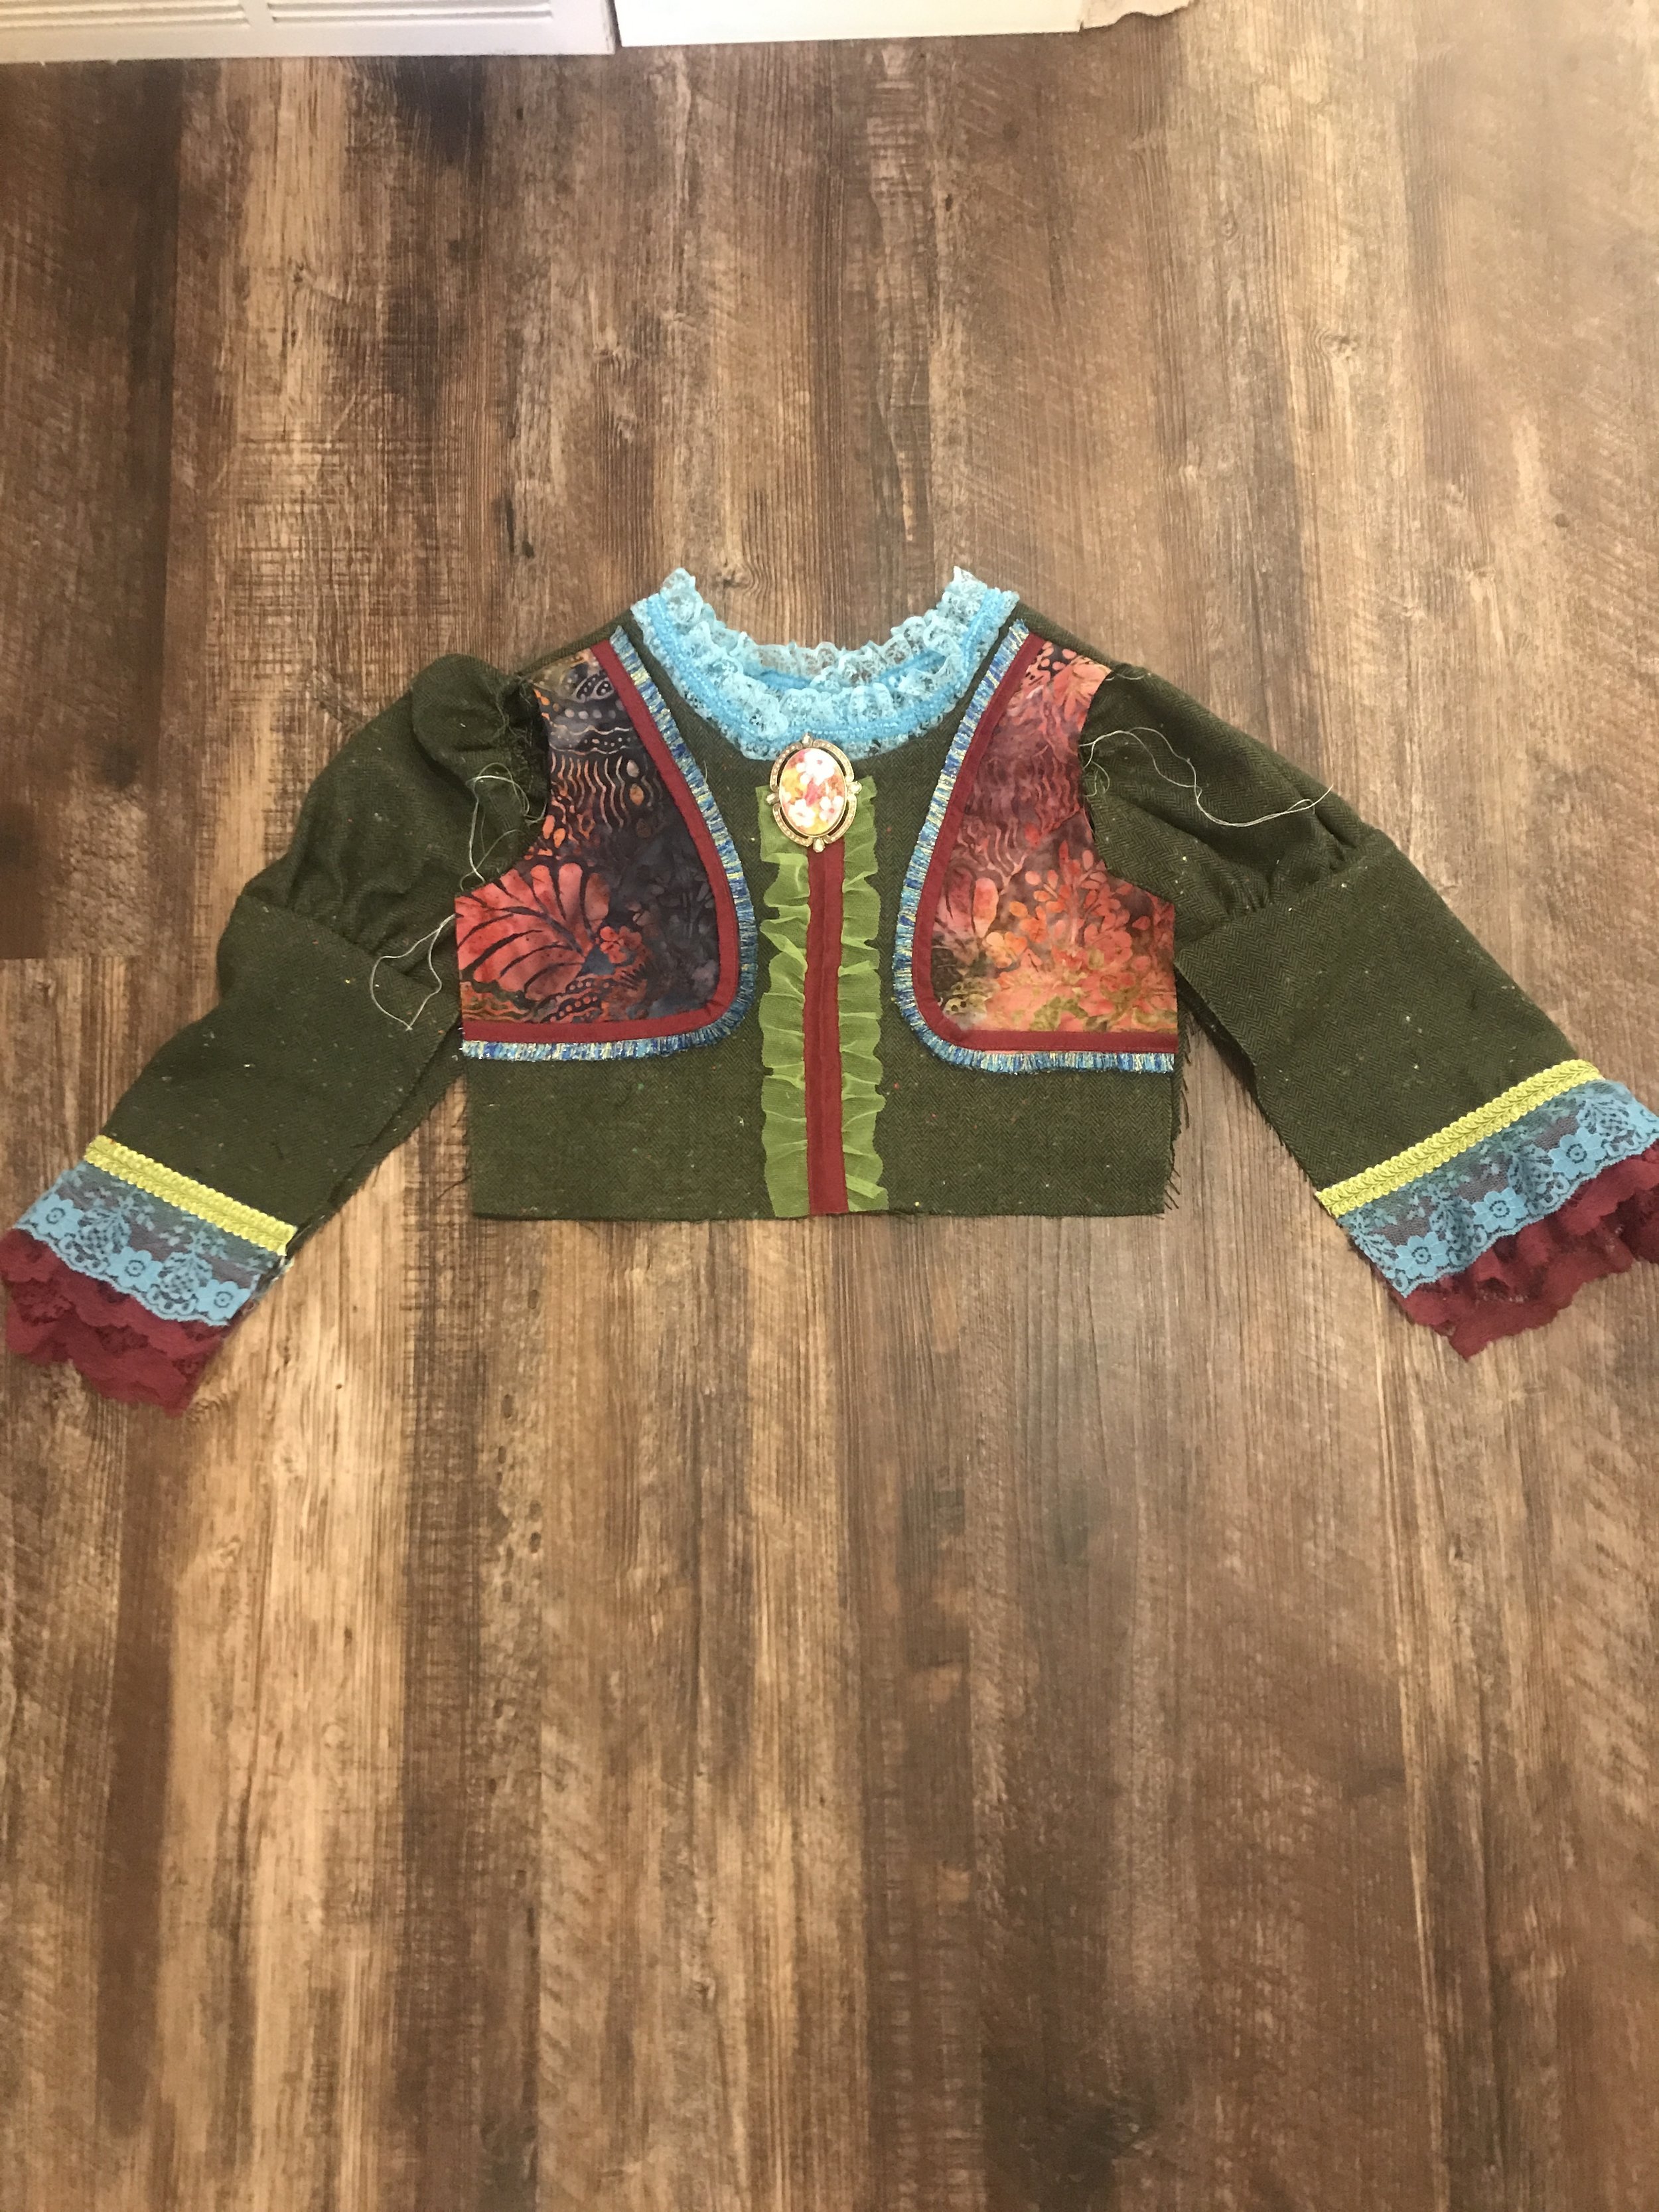
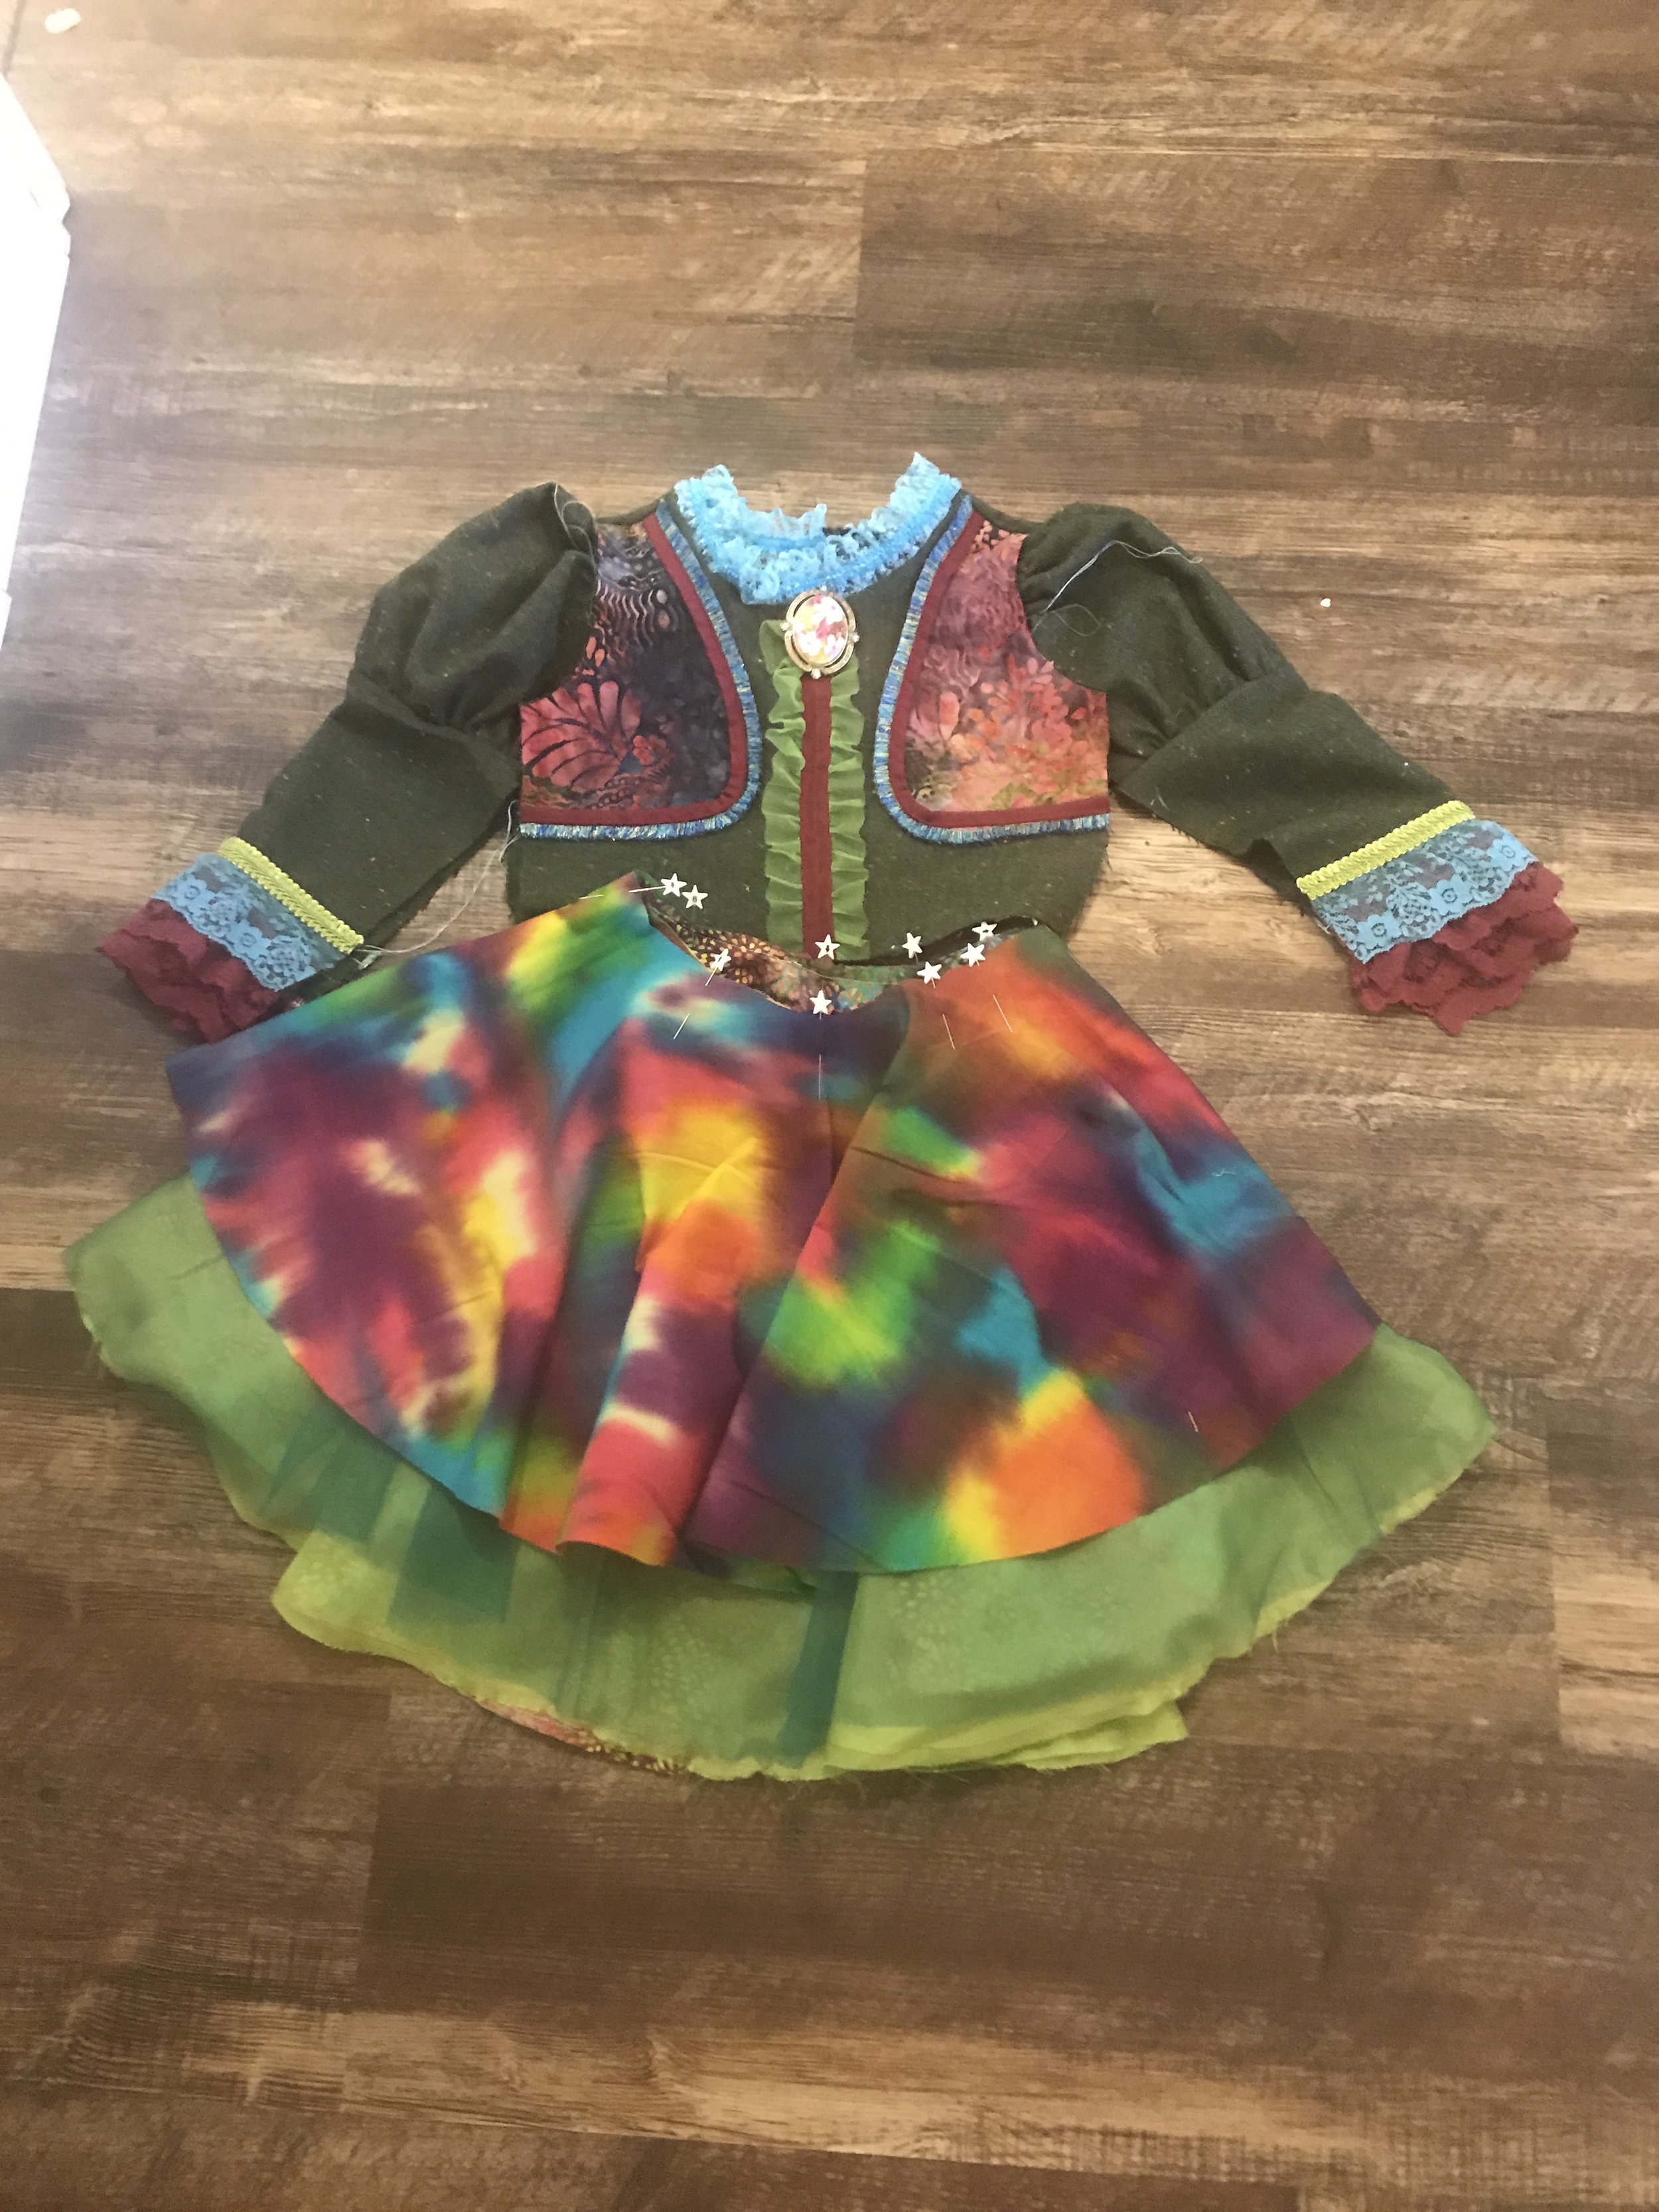
Little Lizard KingReversible Vest- I heavily modified this Vest front to create a rounded cropped vest to stitch onto my bodice.
Made For Mermaids Noelle-I used the peplum, petti, and dress length for the skirt portion. I also used the M4M Free Annie Apron to create the apron.
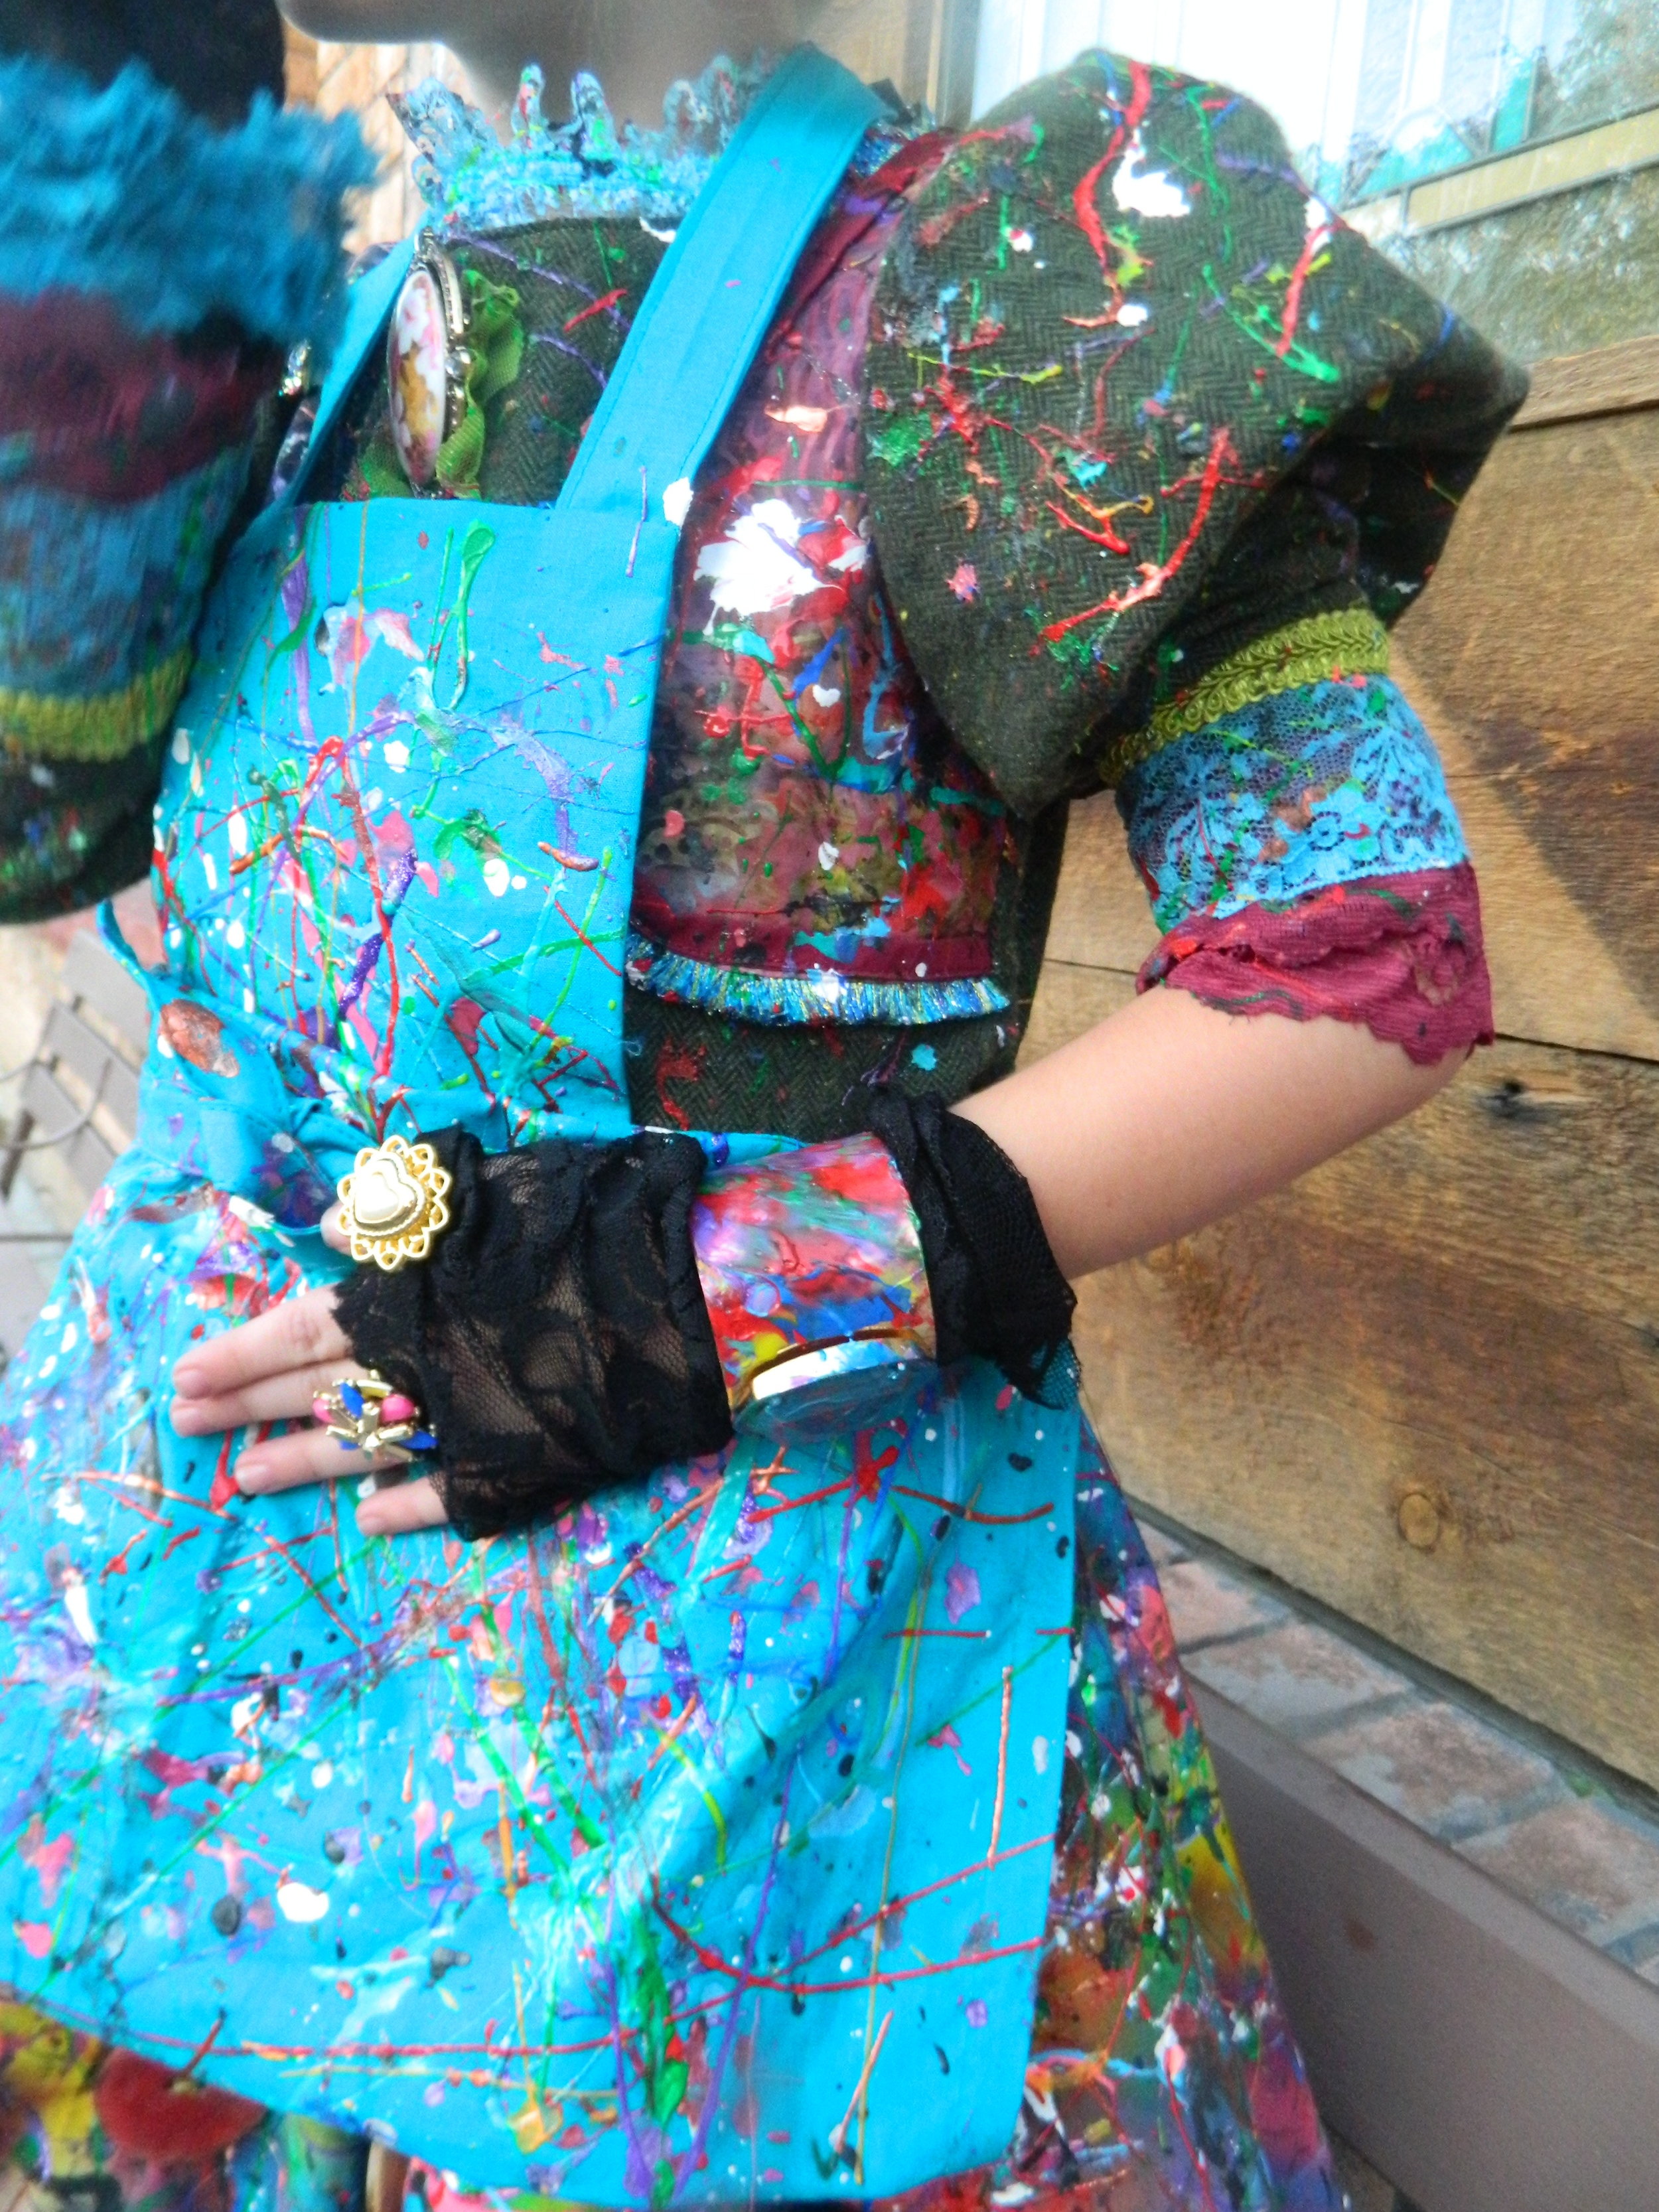
Duchess and Hare Every Which Way and Muttonchop Dress- I used the bodice and puffy sleeve from the Every Which Way and the bottom sleeve from the Muttonchop to create that because Victoian style sleeve in which Dizzy has.


Fabric use:
I went all to Joann and I used coupons on everything. Bella picked out her pin brooch but, I will link several others that would be gorgeous for that extra special touch.
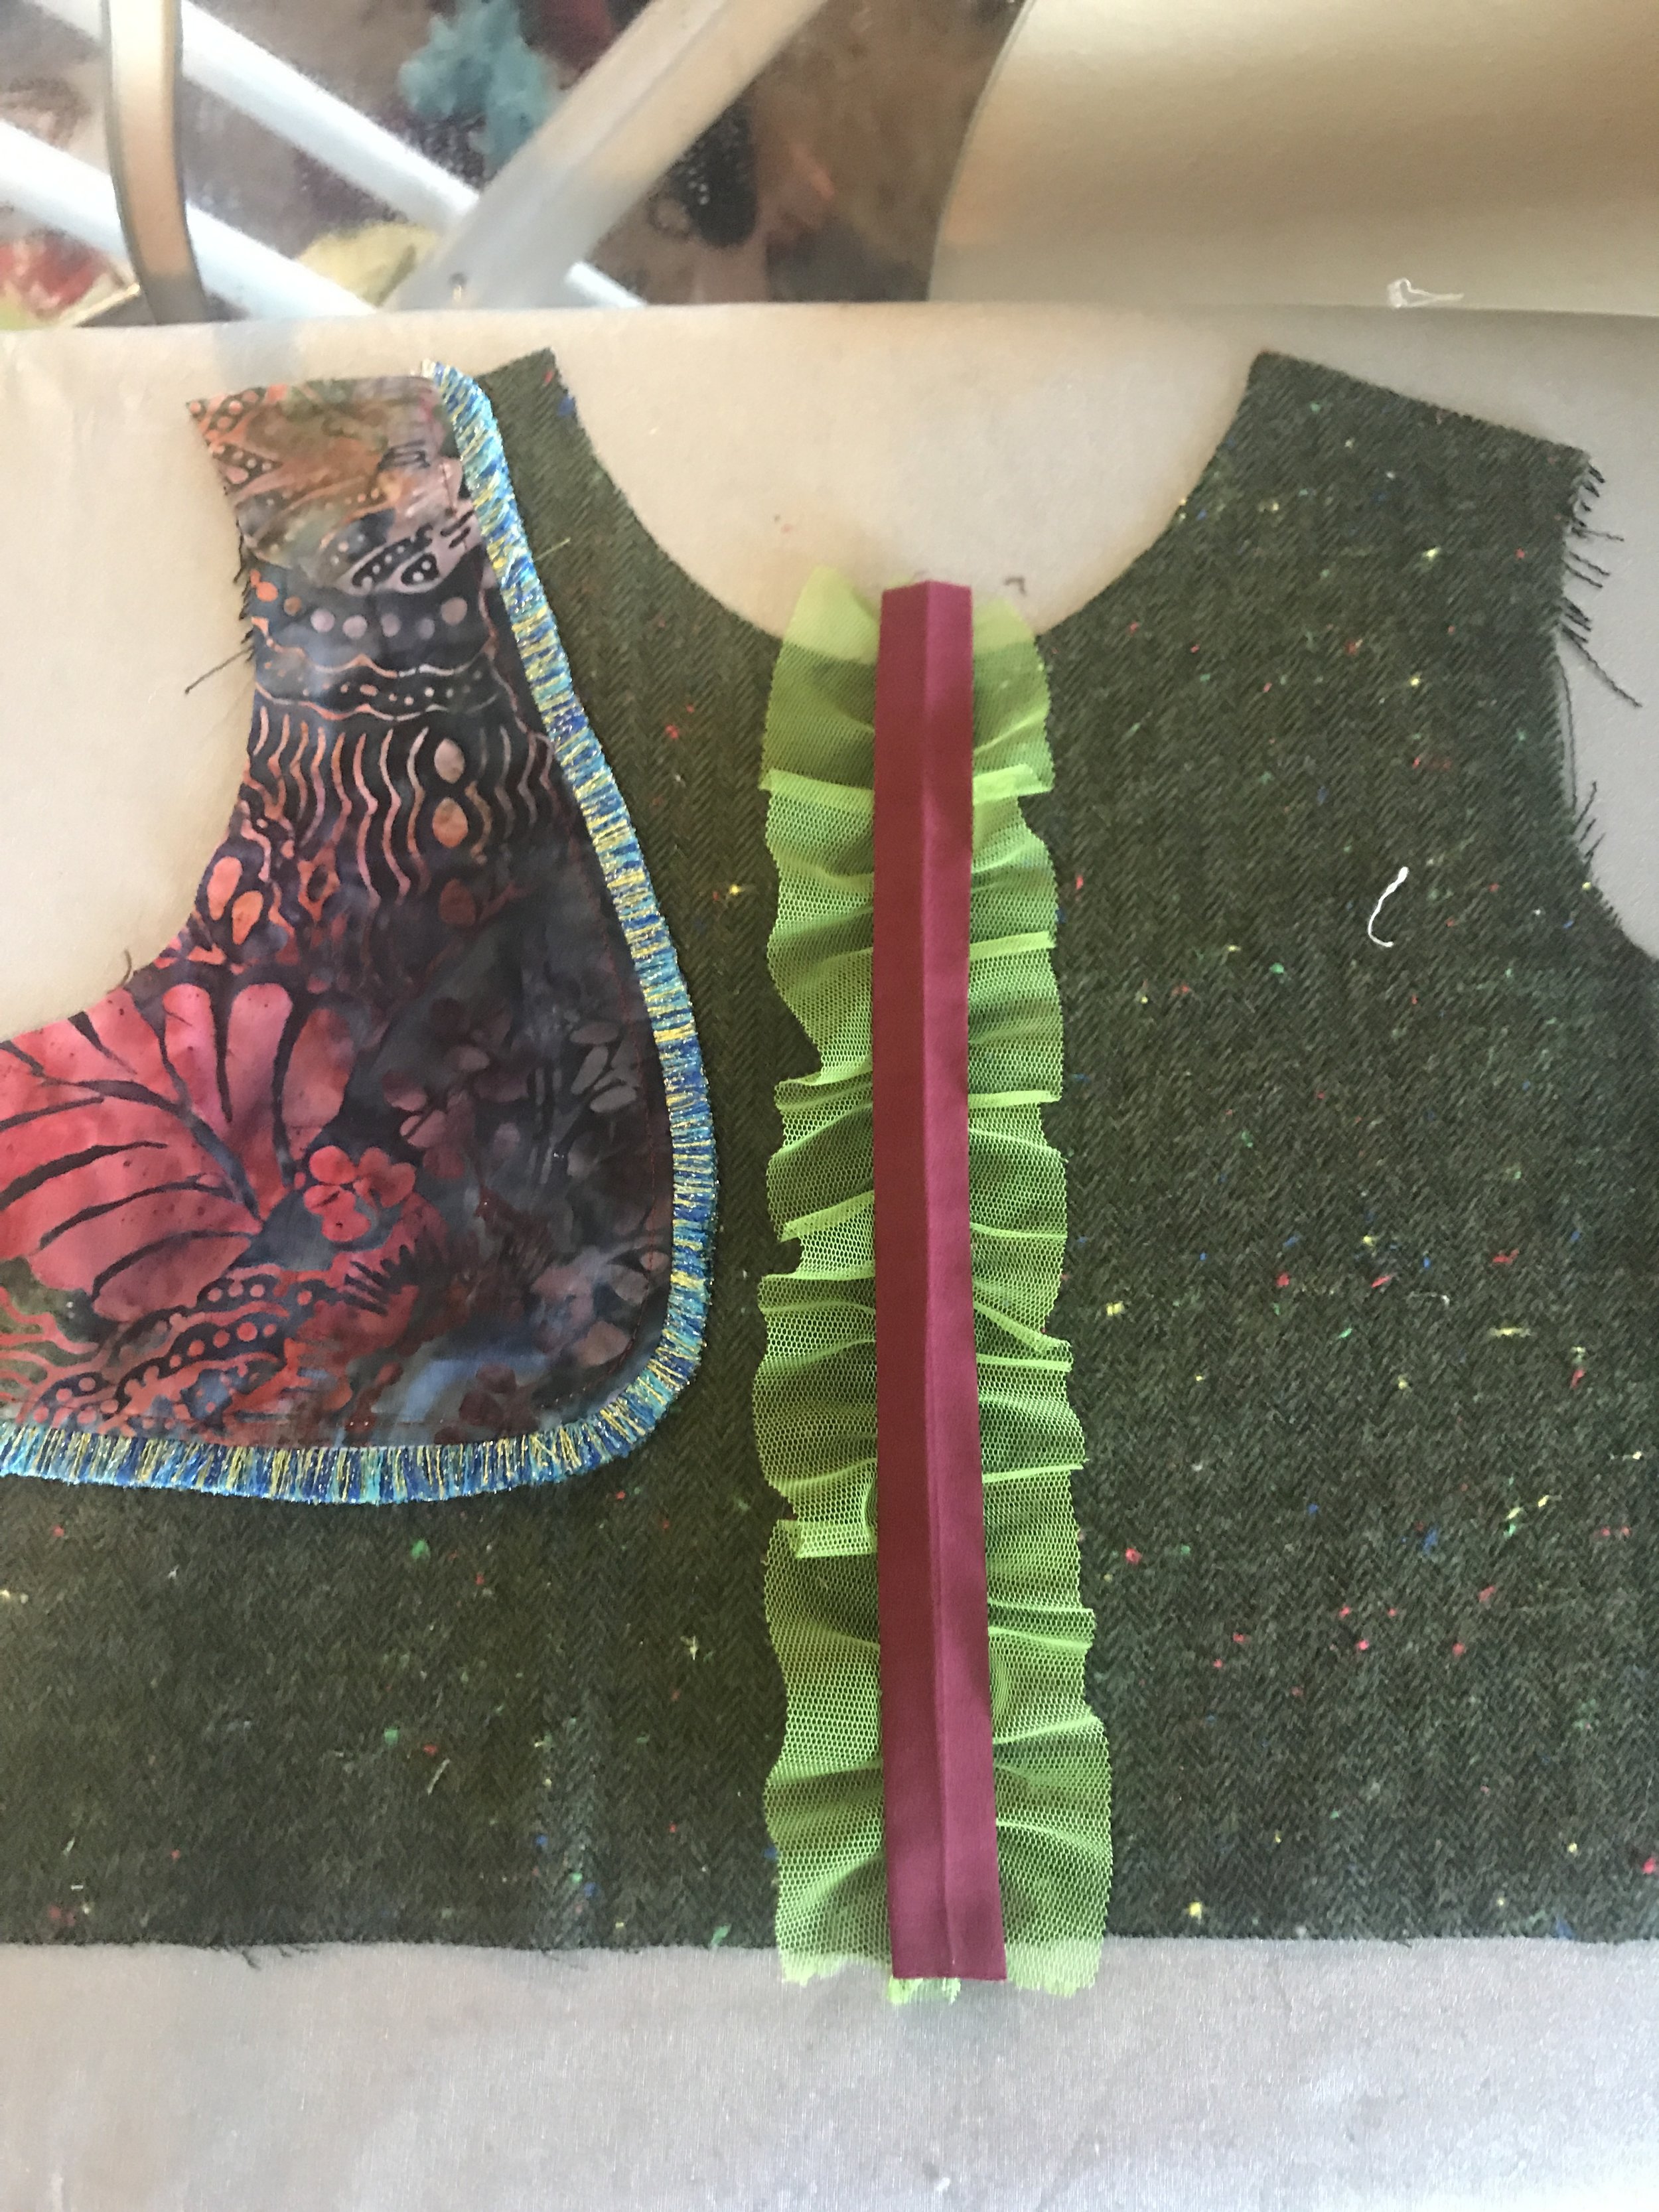
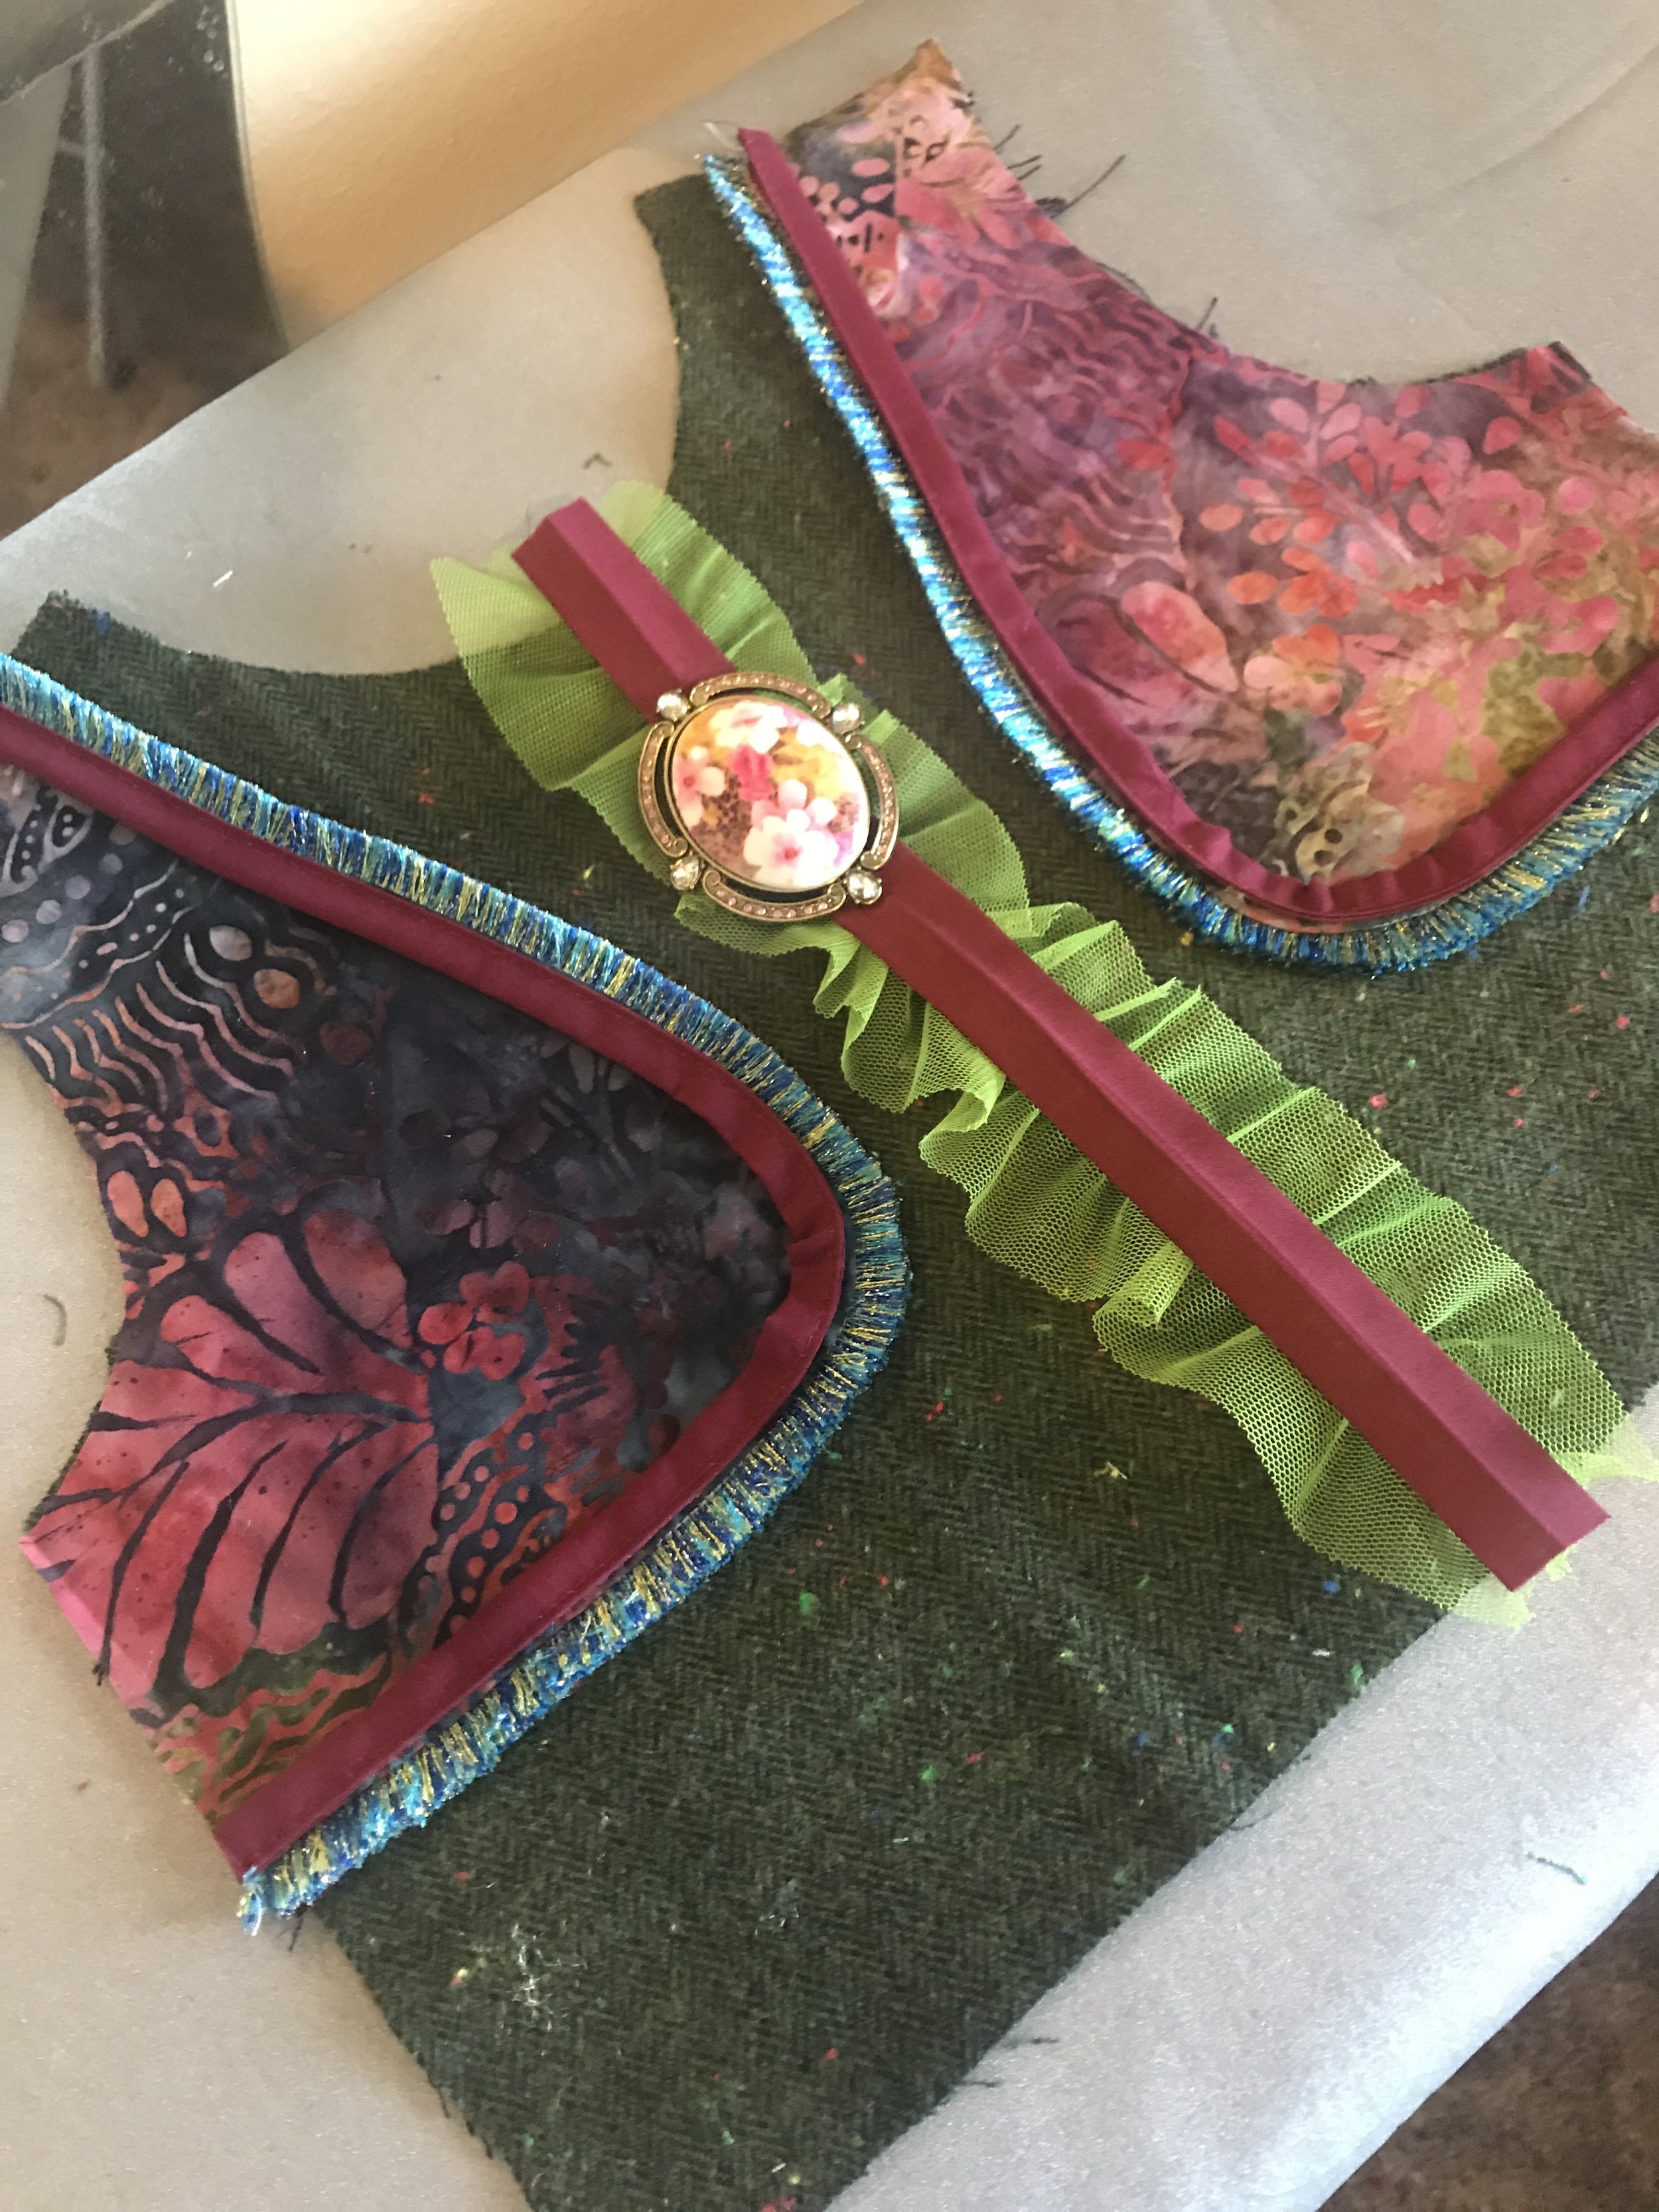
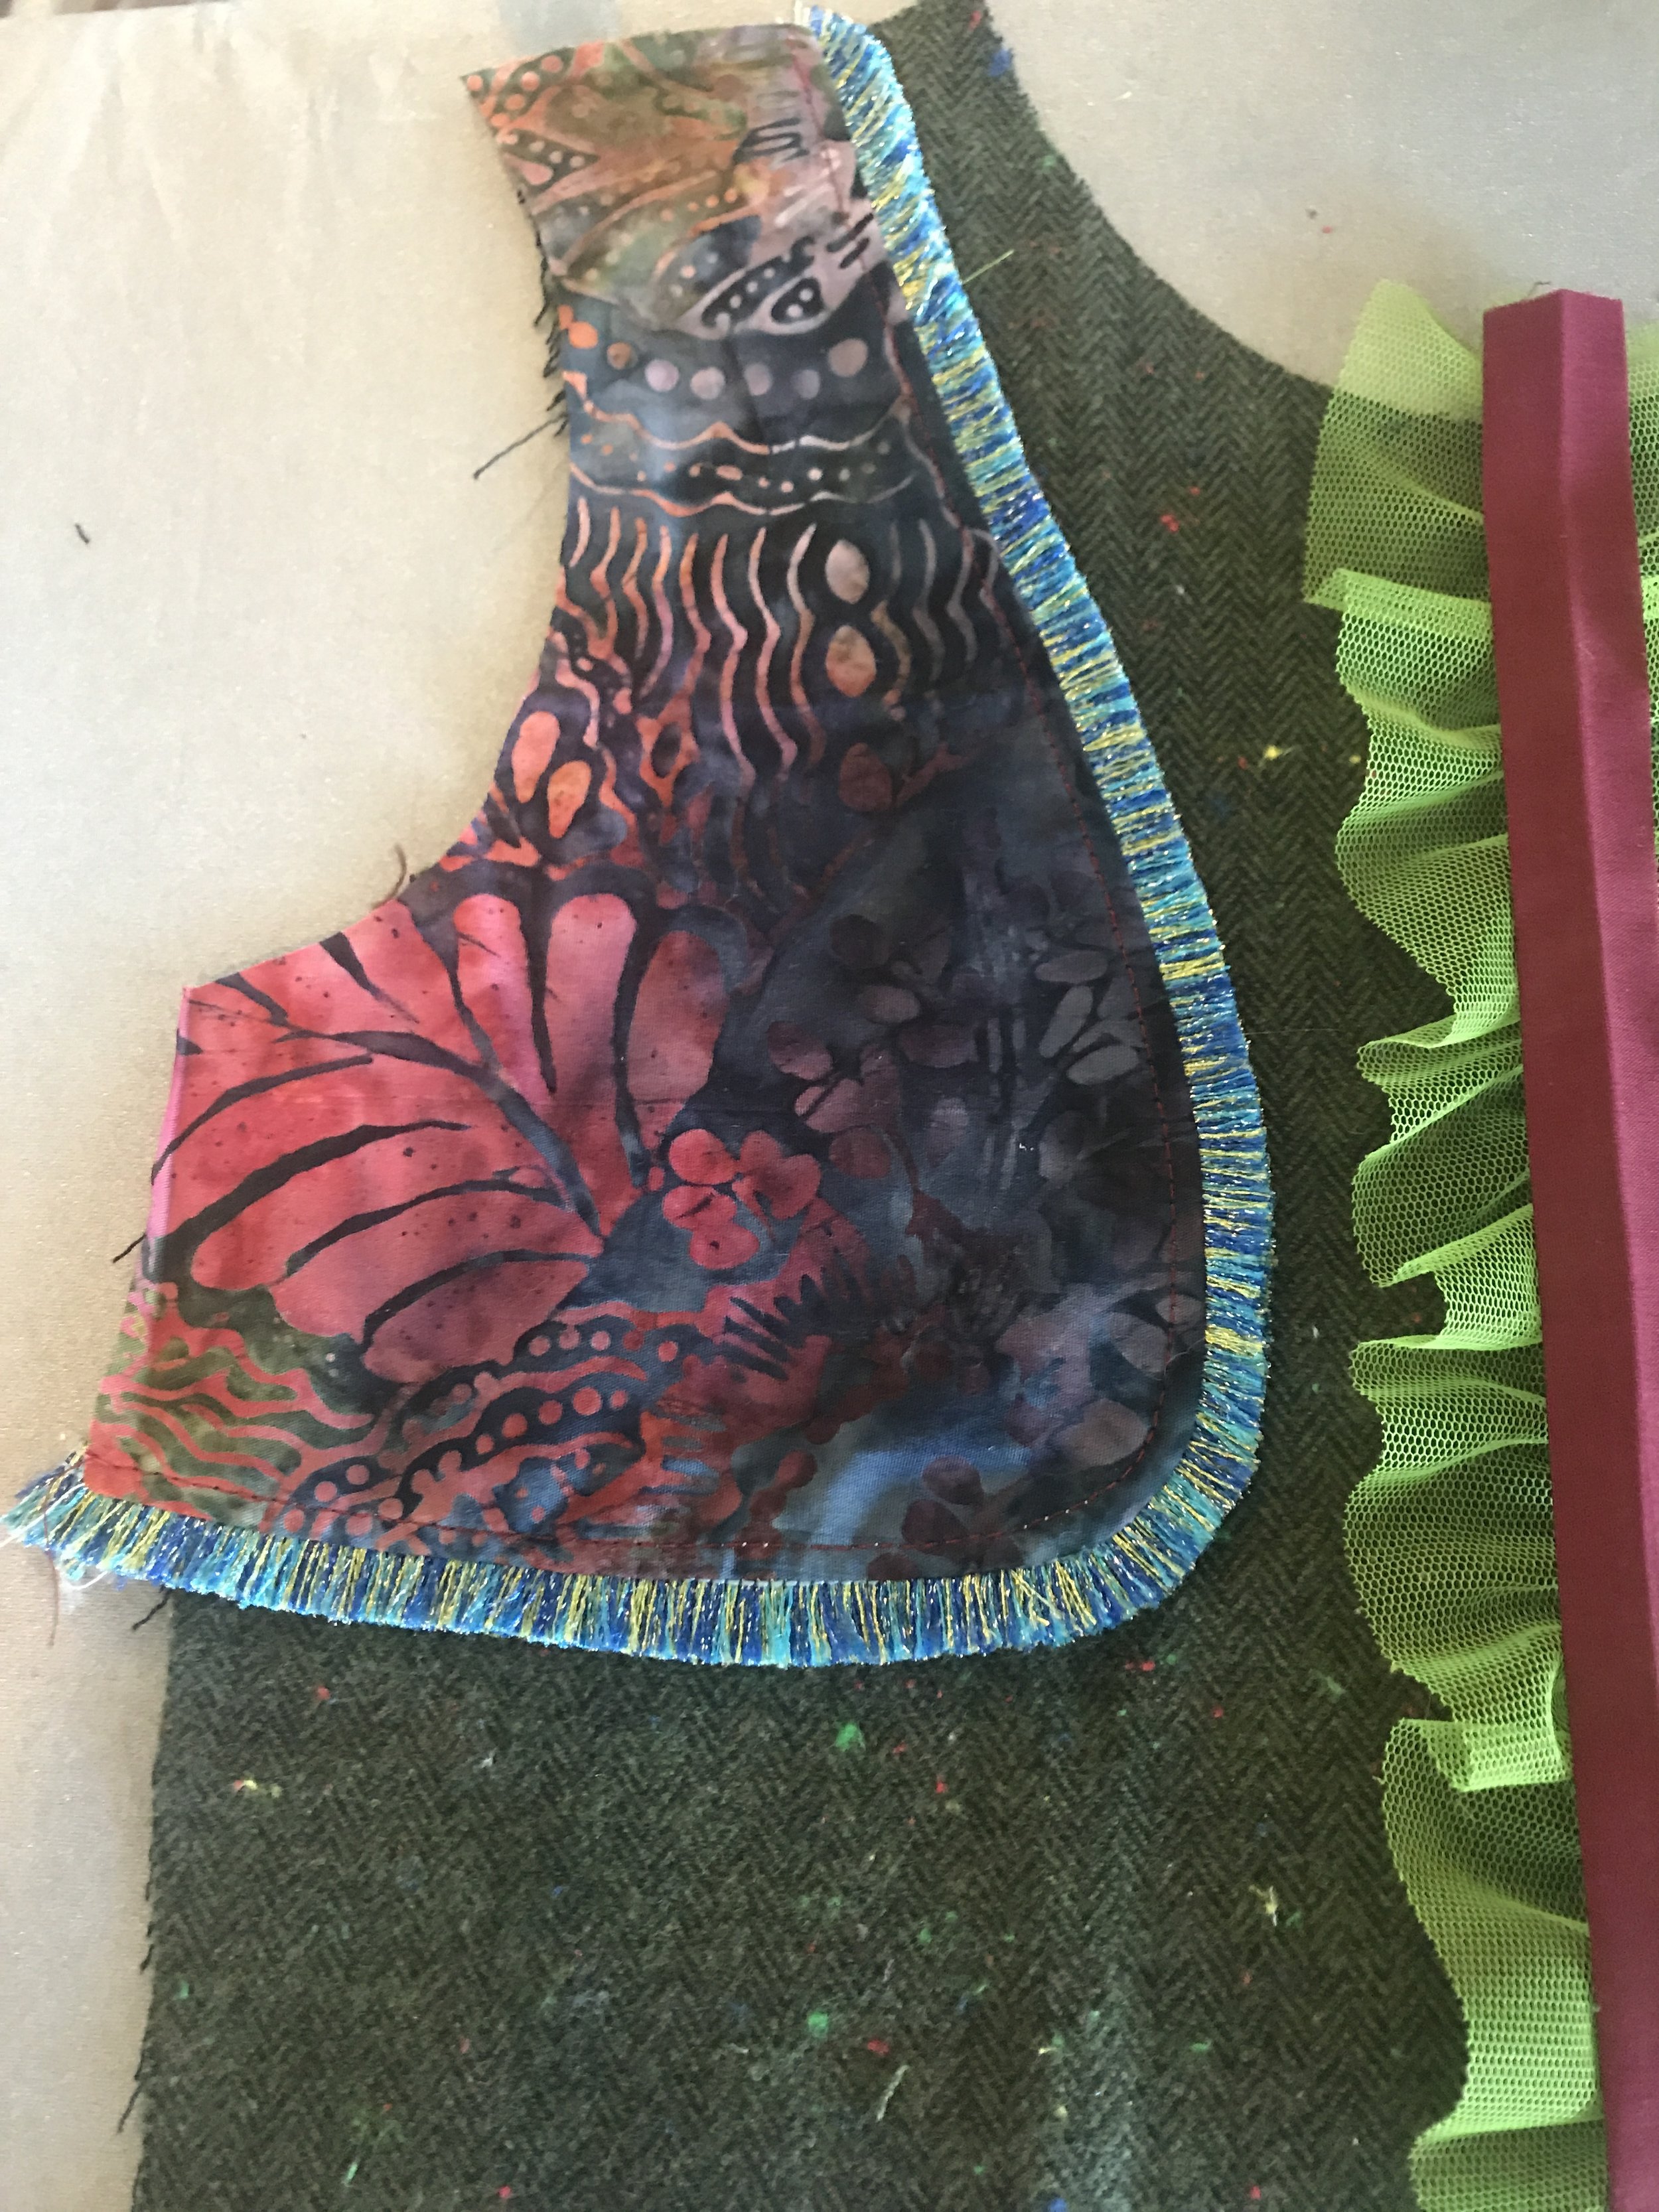
Vest: I used a small fat quarter my grandma gave to me but, any Batik would work that suites your own personal taste.
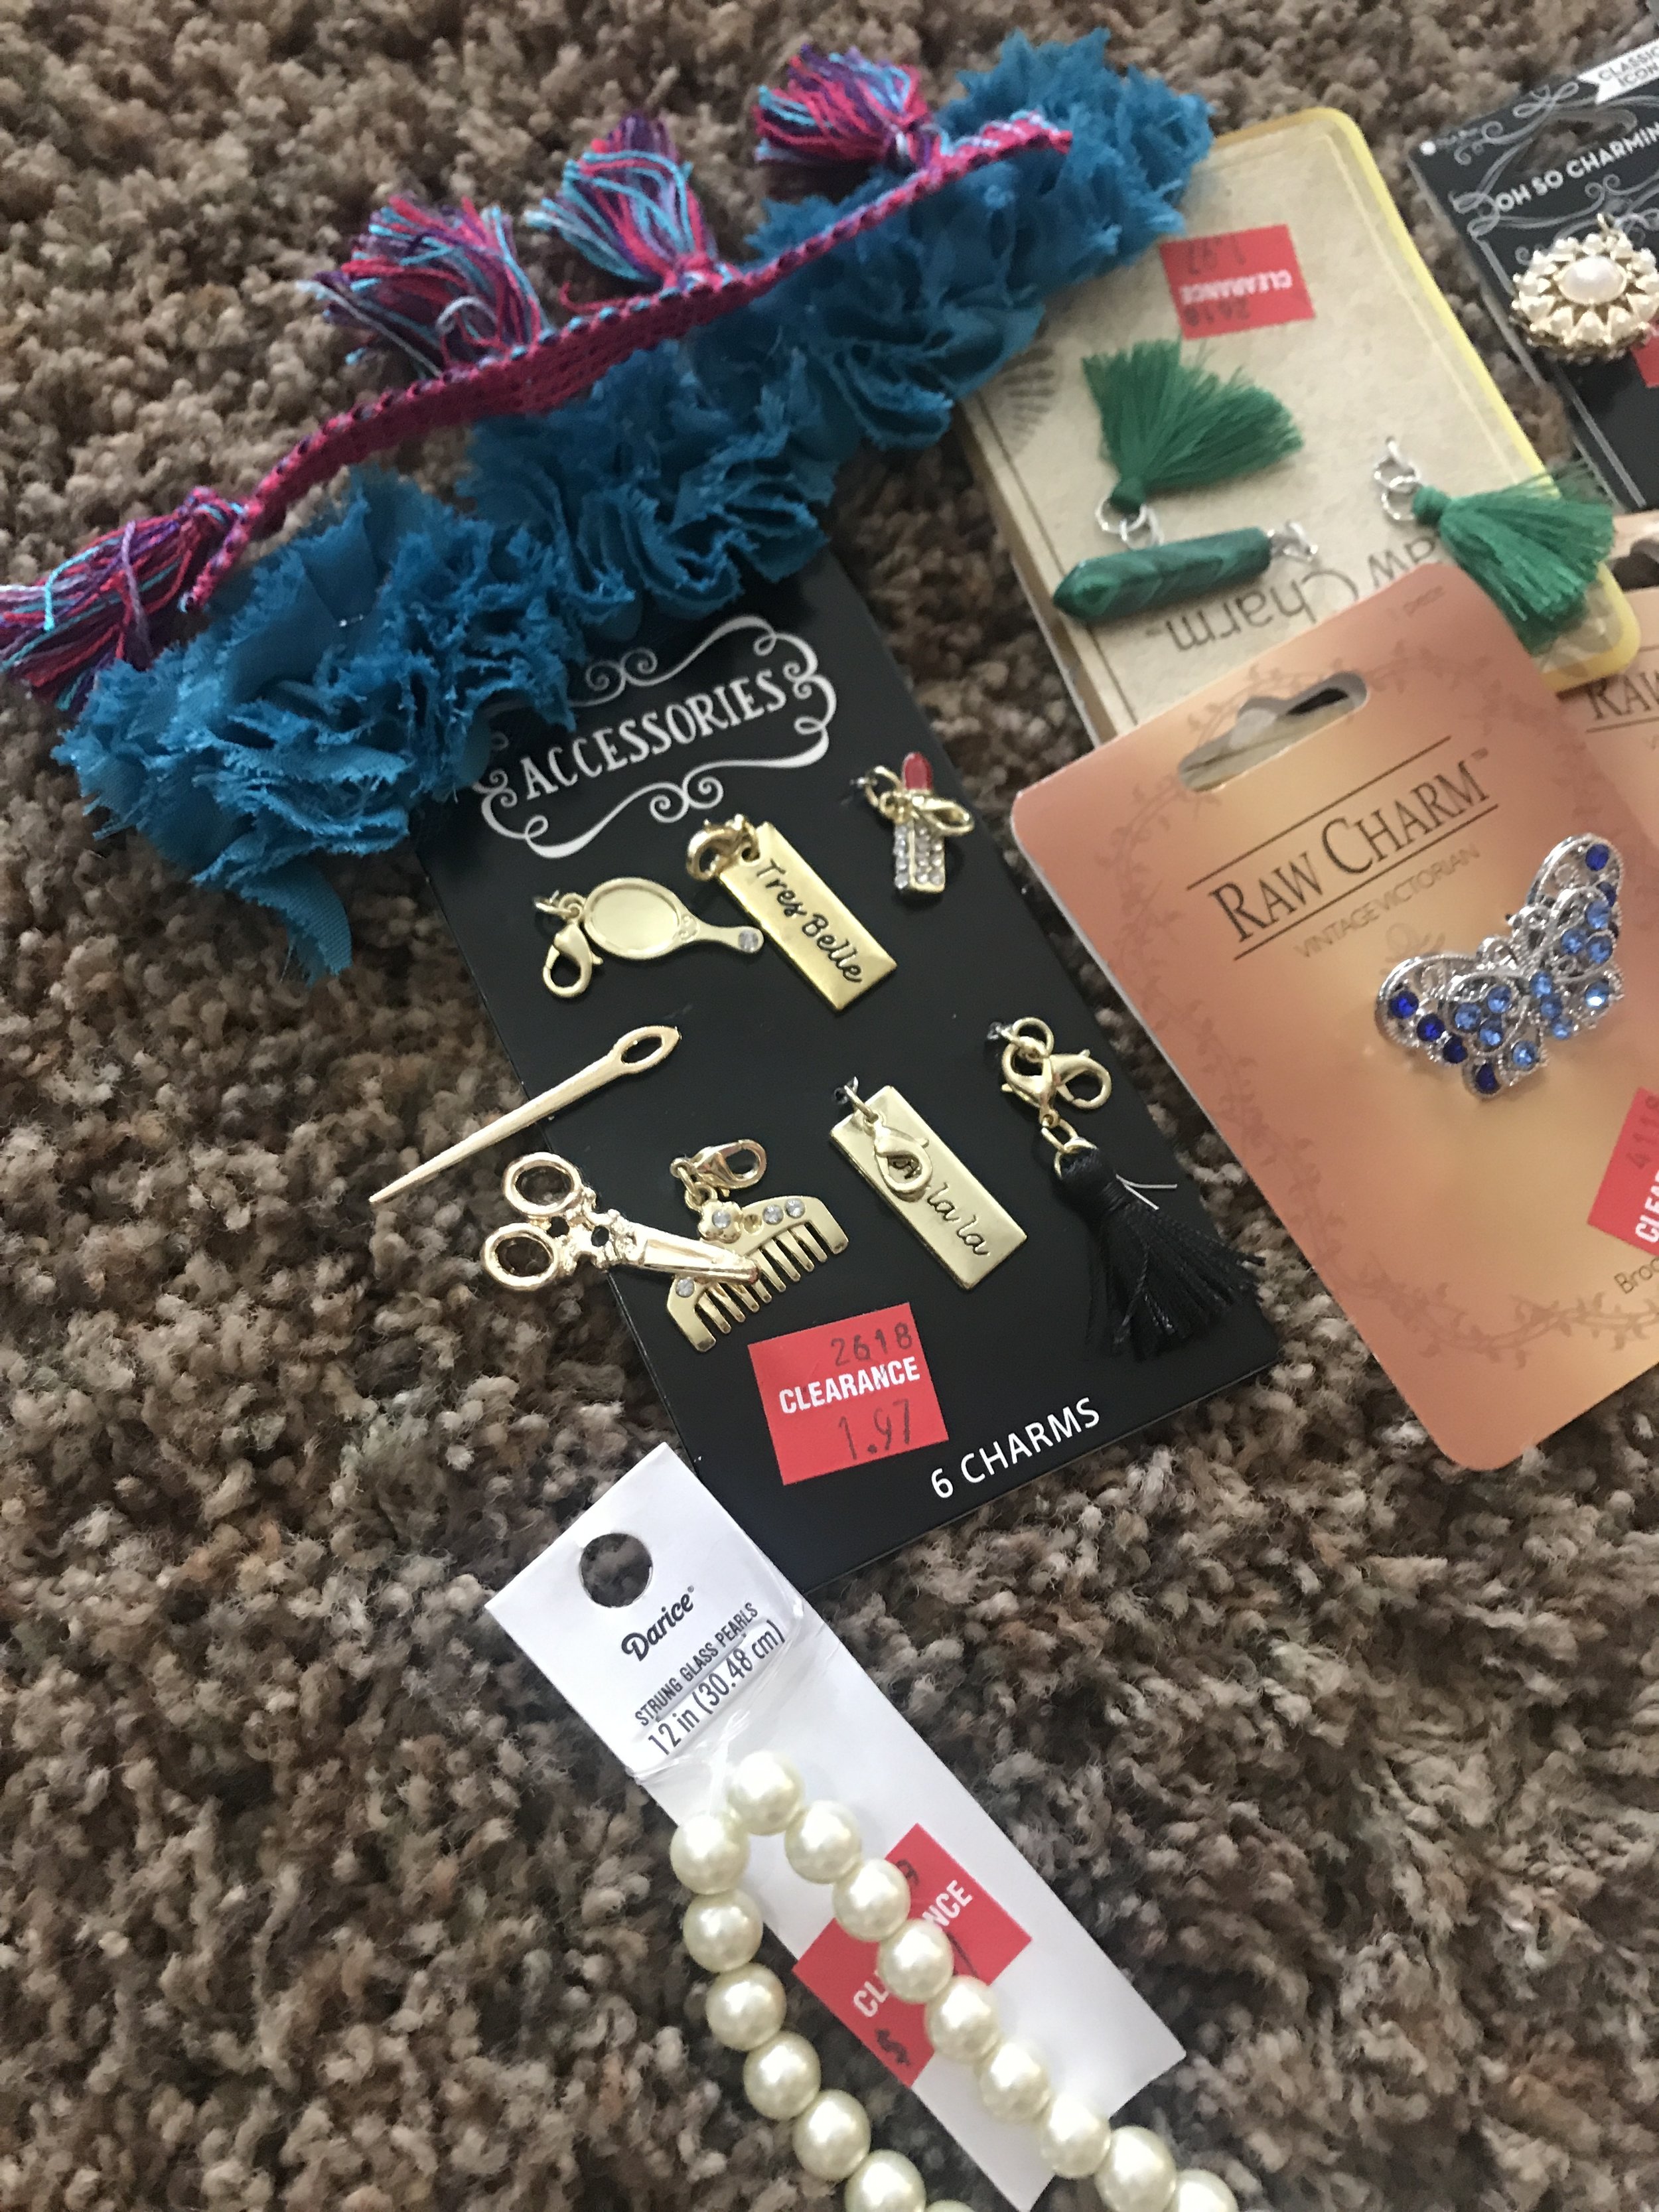
Trims: I used a wine burgundy Kona cut 1 ½” strip and made my own bias for the vest portion. I also found a blue, green, and yellow fringe trim I used over by the yardage but, it was in a package I also used on the vest. I couldn’t find it to link it up so I’ve included a detailed photo for that.
Sleeve Trim: This was hand dyed with Dylon Emerald green and this one was hand dyed in Rite Dye.
Bodice Trim: in the lime green and also put in the Dylon Emerald dye to make it not so vivid of a green
Neck Trim: Also dyed with the Dylon Emerald green.
Dyes: Emerald Green Wine
Skirt: Upper portion which is the peplum of the skirt
Pettiskirt: Bottom Layer Top Layer
Bottom Dress Skirt: I used this one **These would also work for the peplum portion.
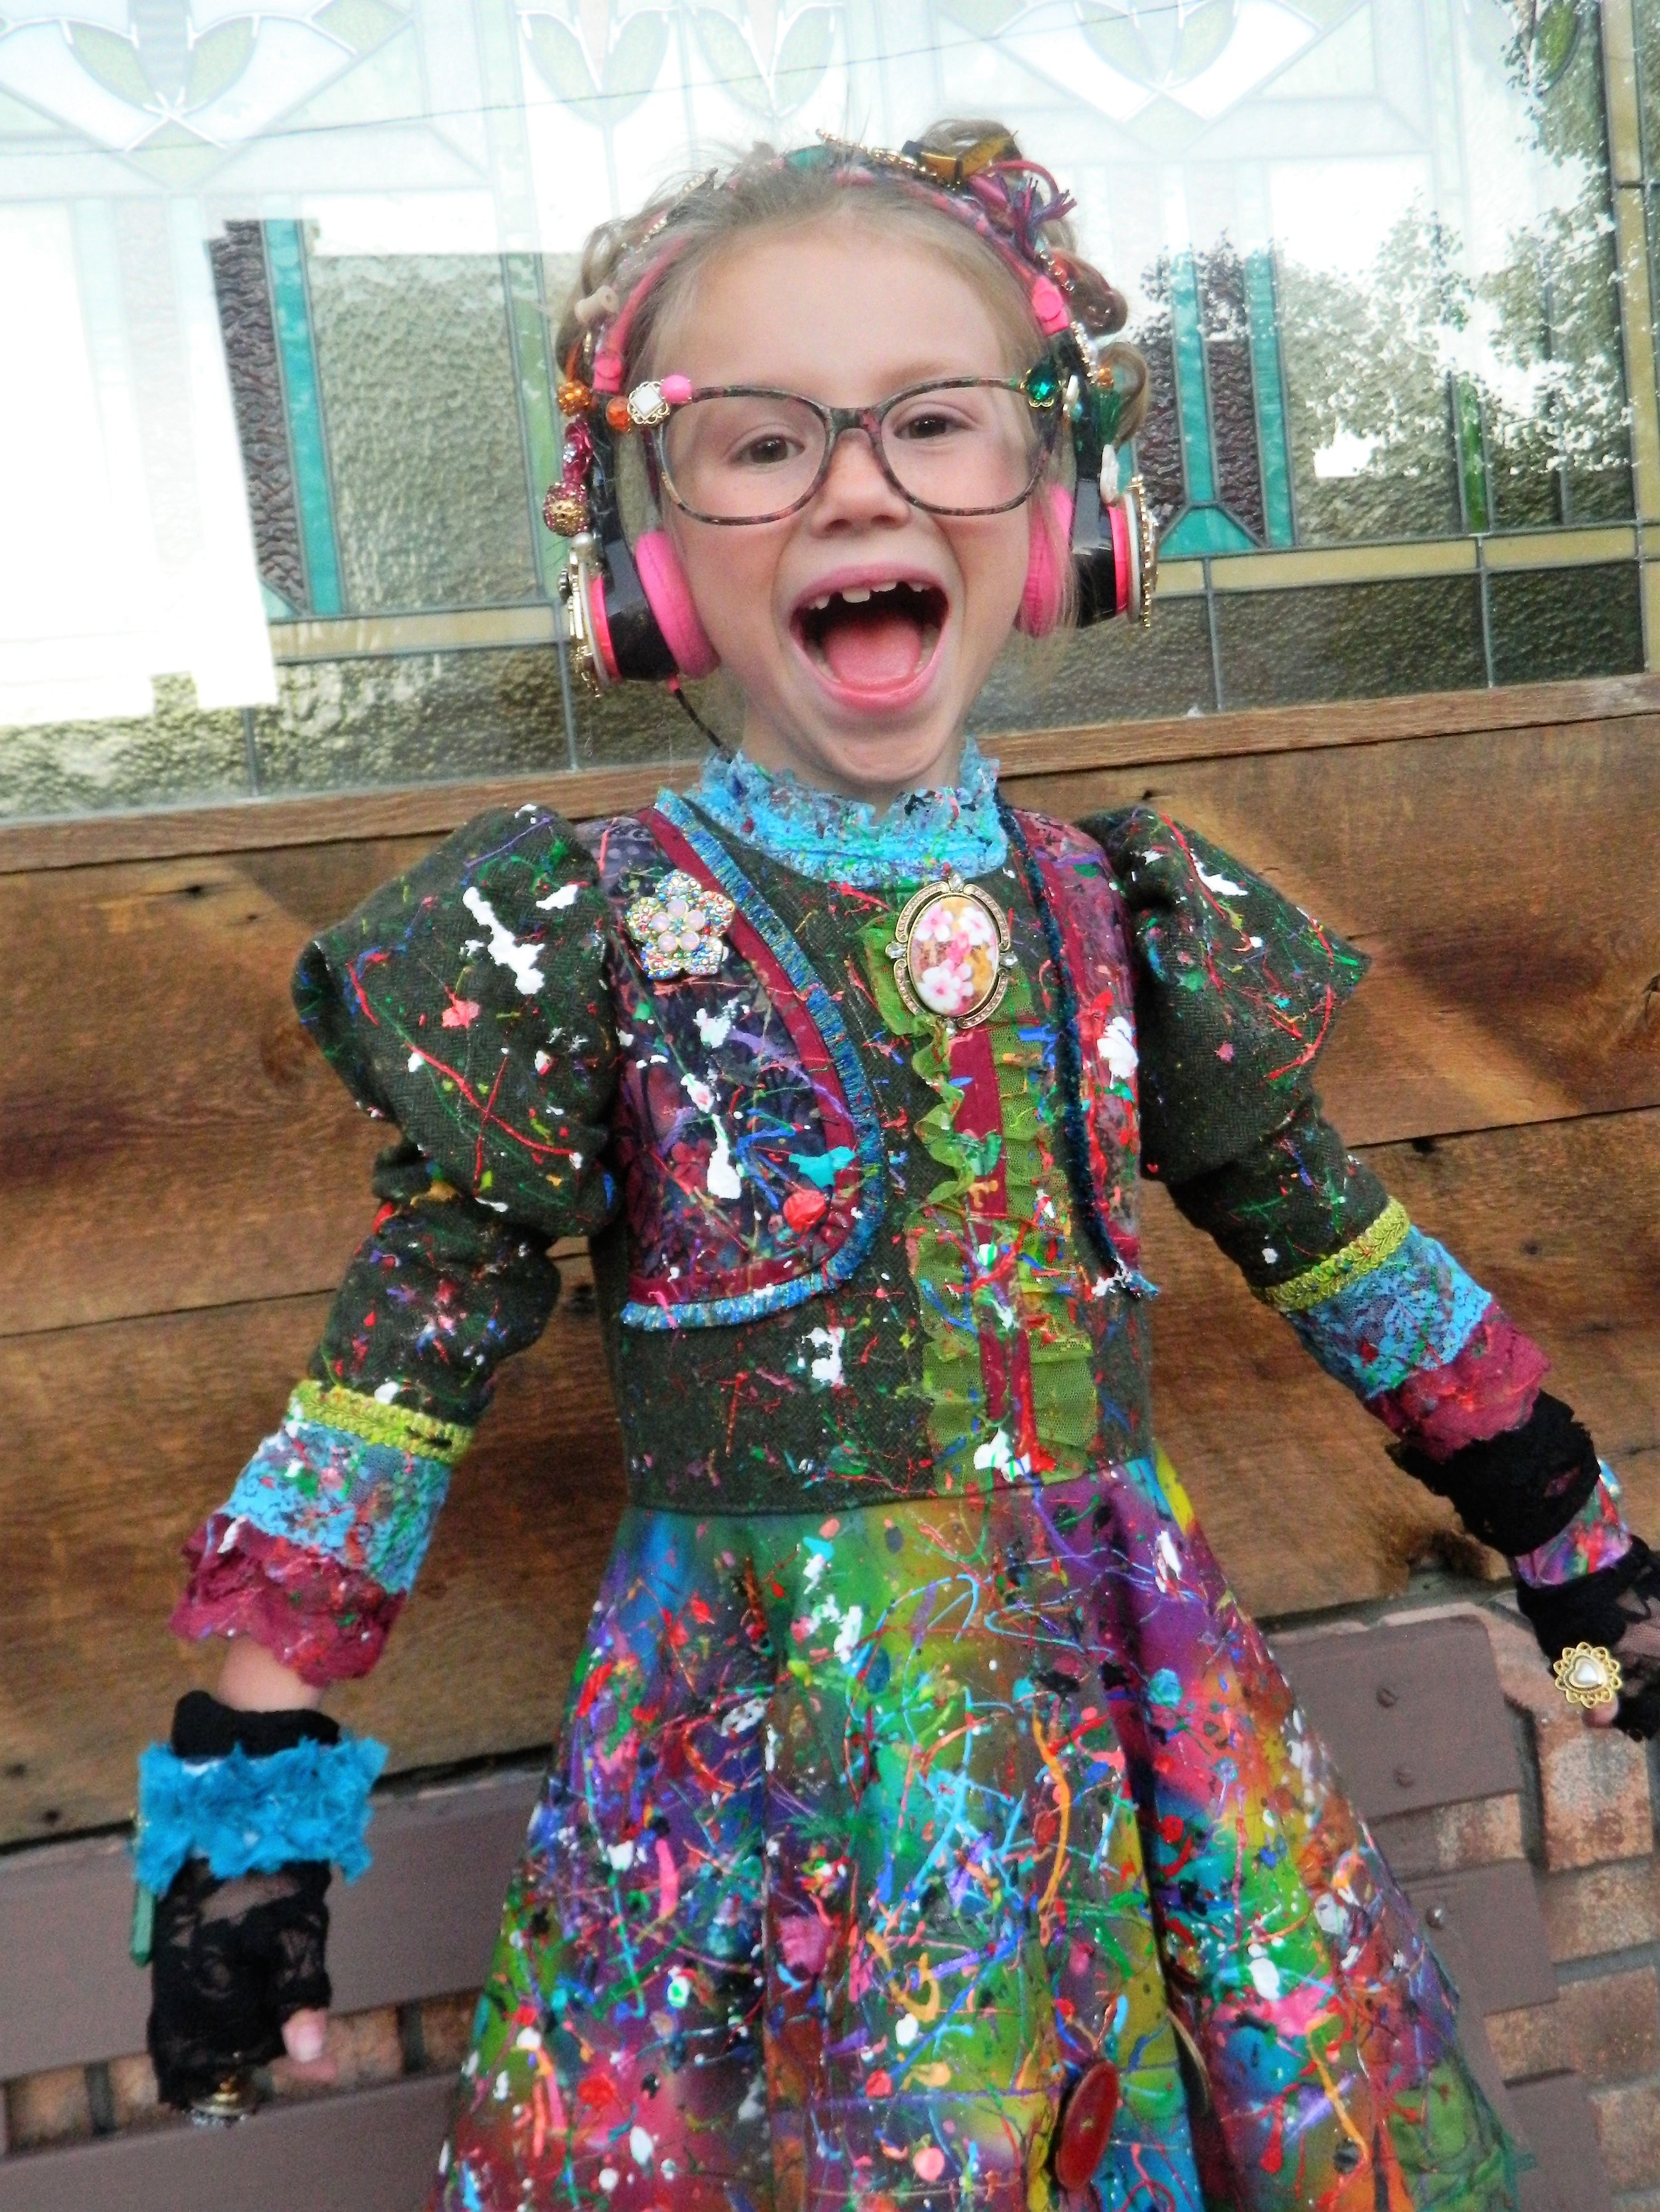
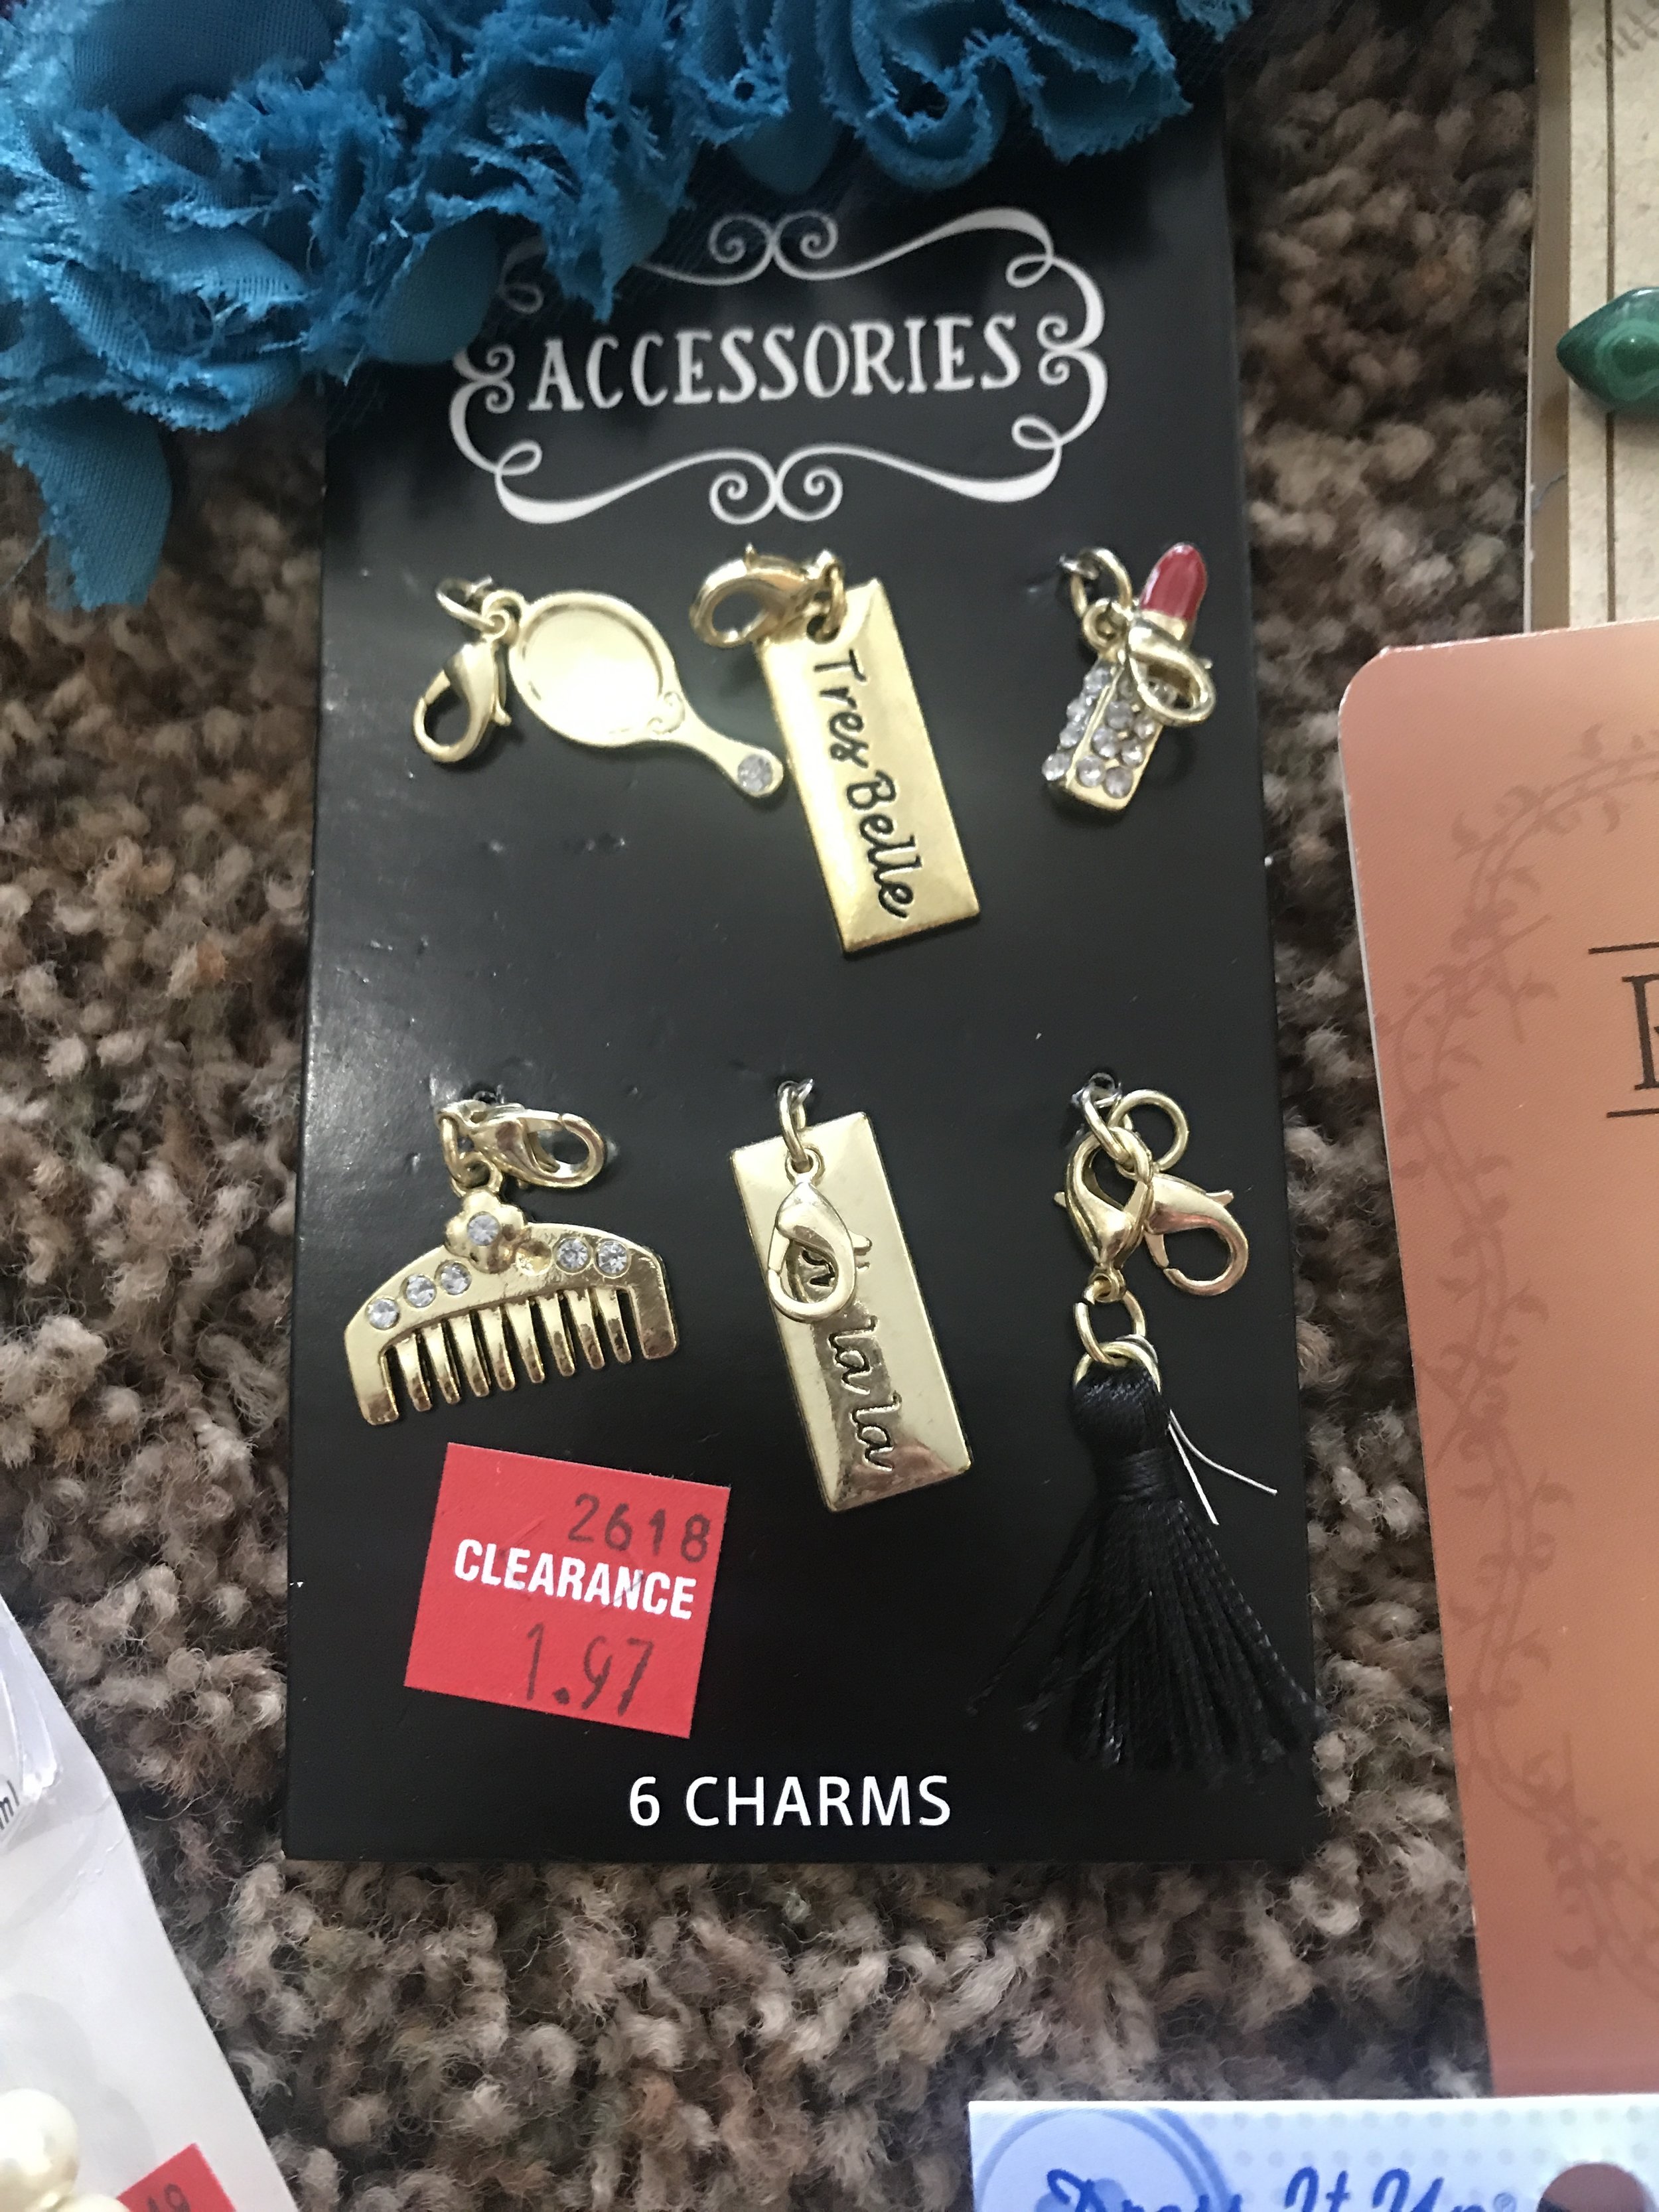
Pendants: The one I got I couldn’t find online because it was on clearance for $1 so I linked up several options that will work. Mine was also a pin back so I saved myself from having to sew it on and highly recommend making it a detachable piece to your dress by taking E6000 glue and gluing a pin back to the pendant. Option 1 Option 2 Option 3
Paints: This was the best part ever! Getting messy and getting a fun paint splatter effect on the dress. Now I decided to do this part after it was all sewn together and I just got this brand and picked a bunch of fun colors to use. This one and this one.
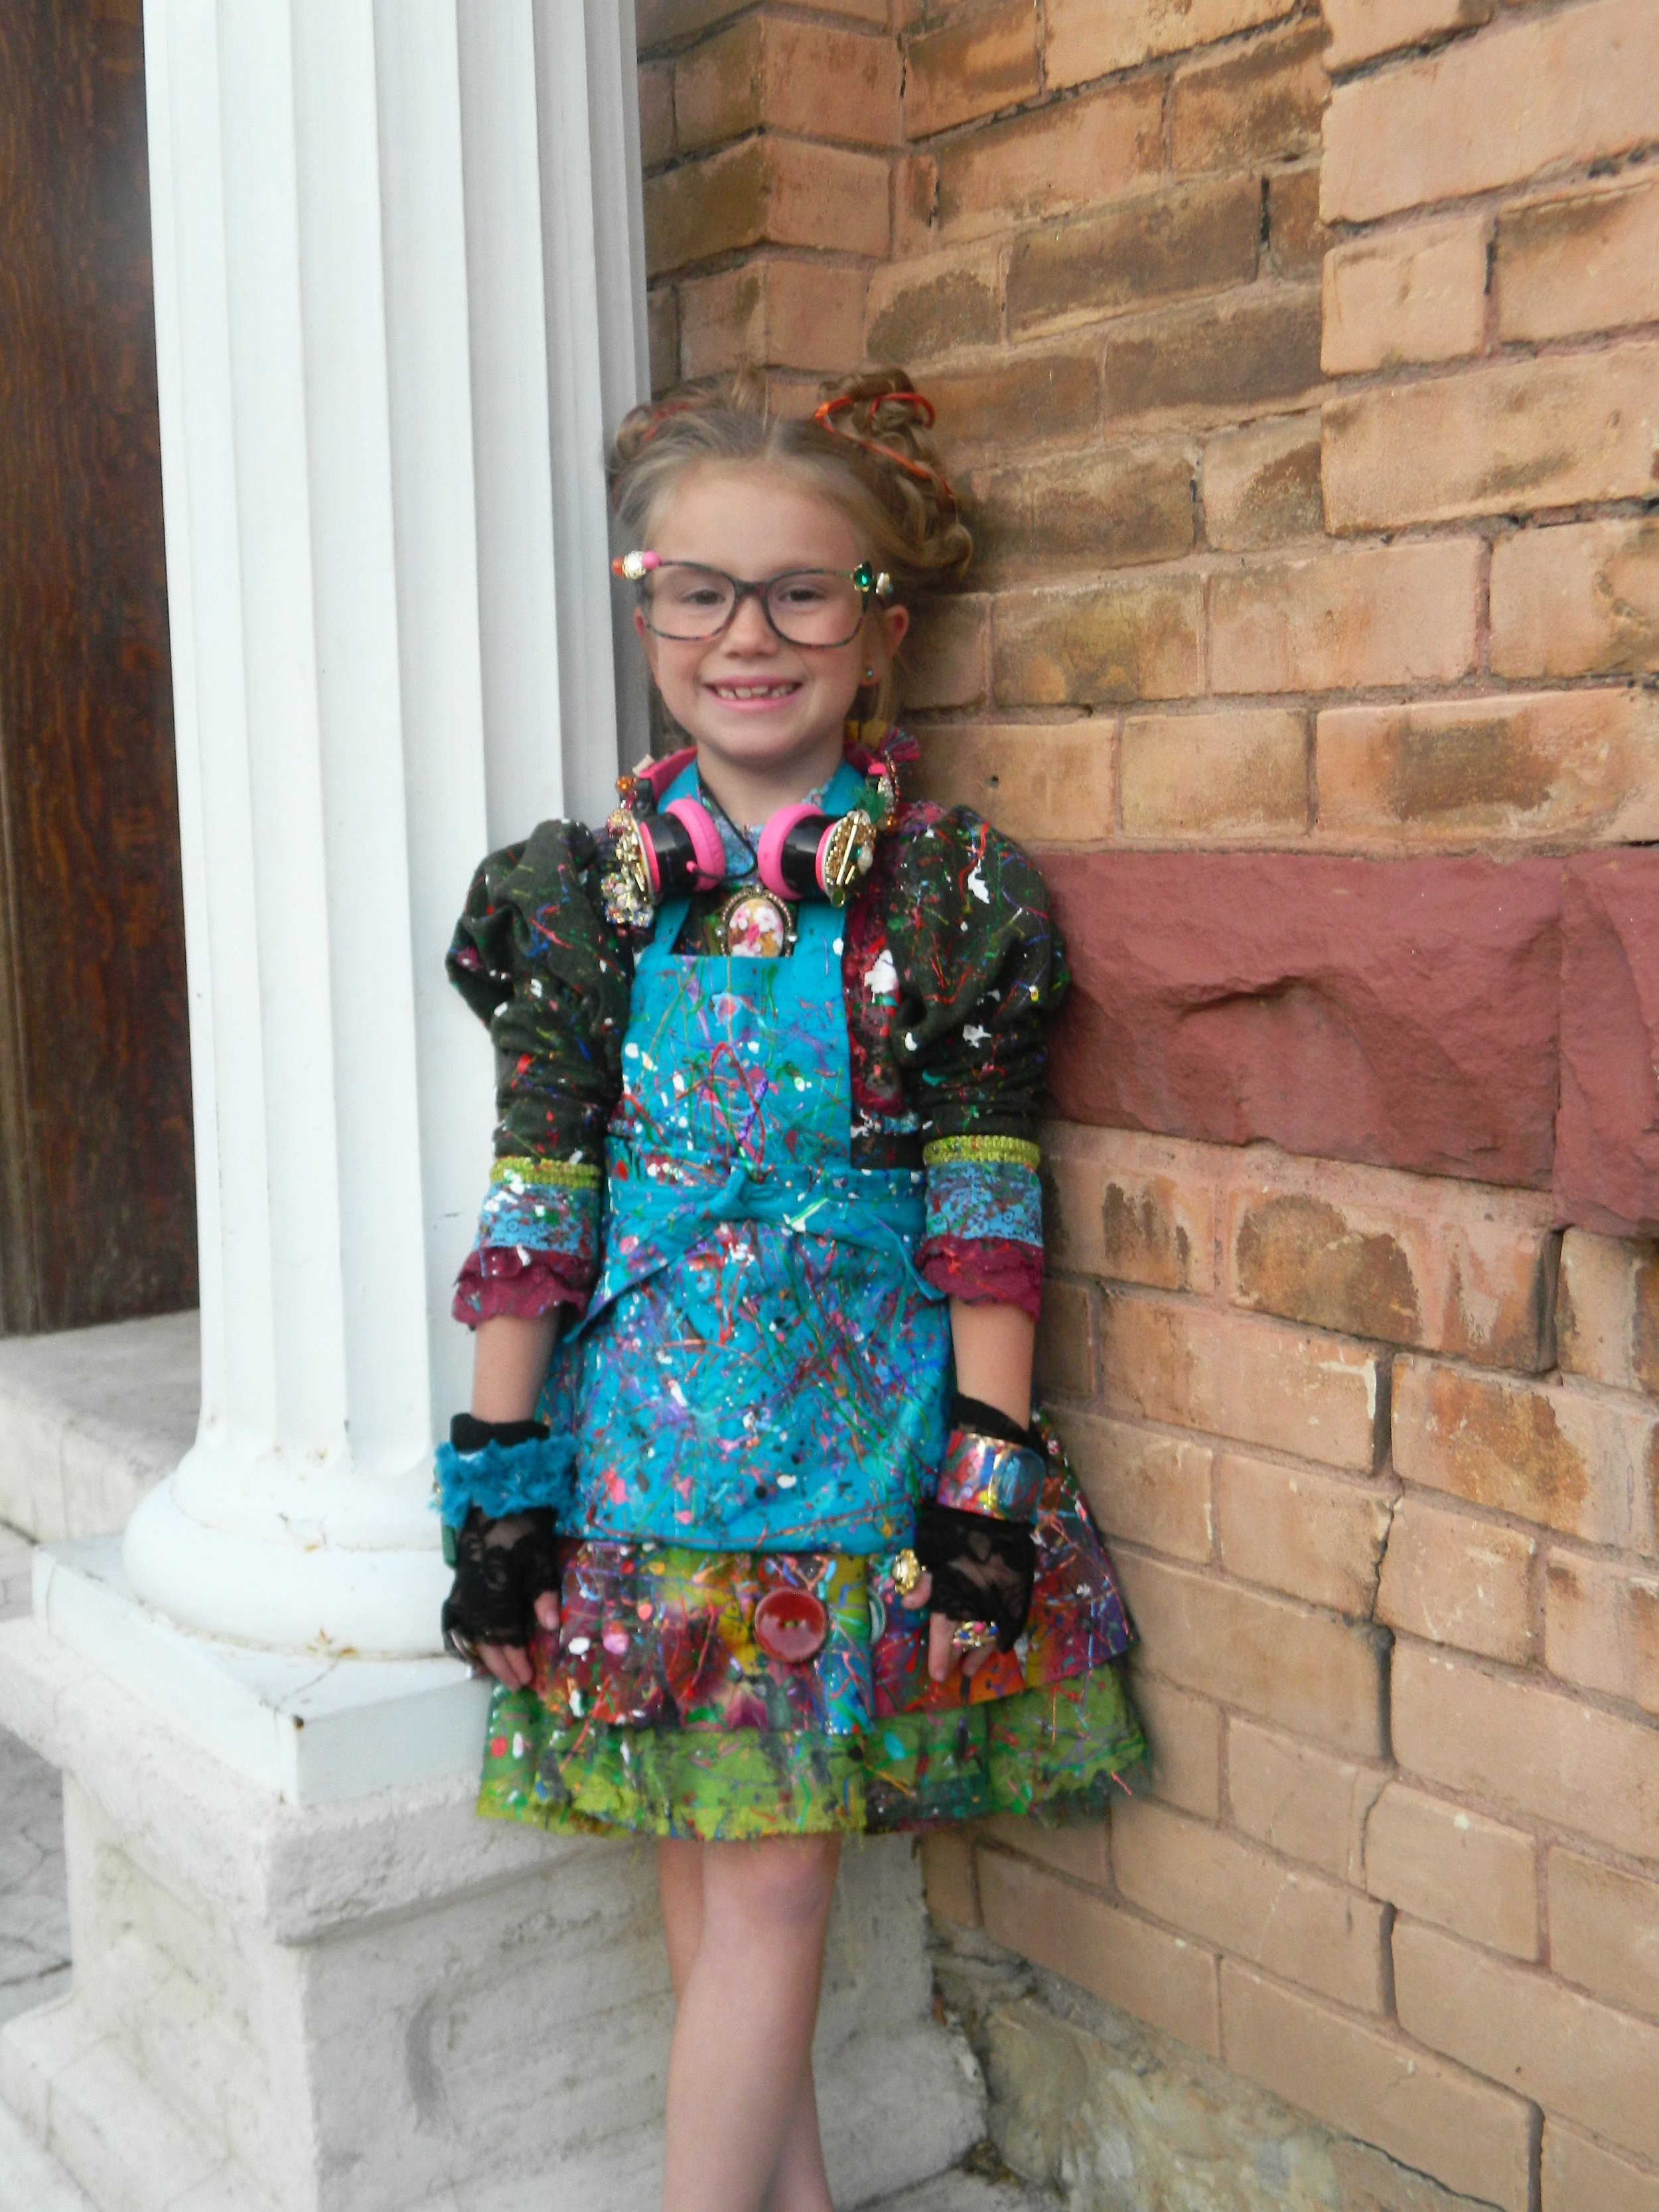
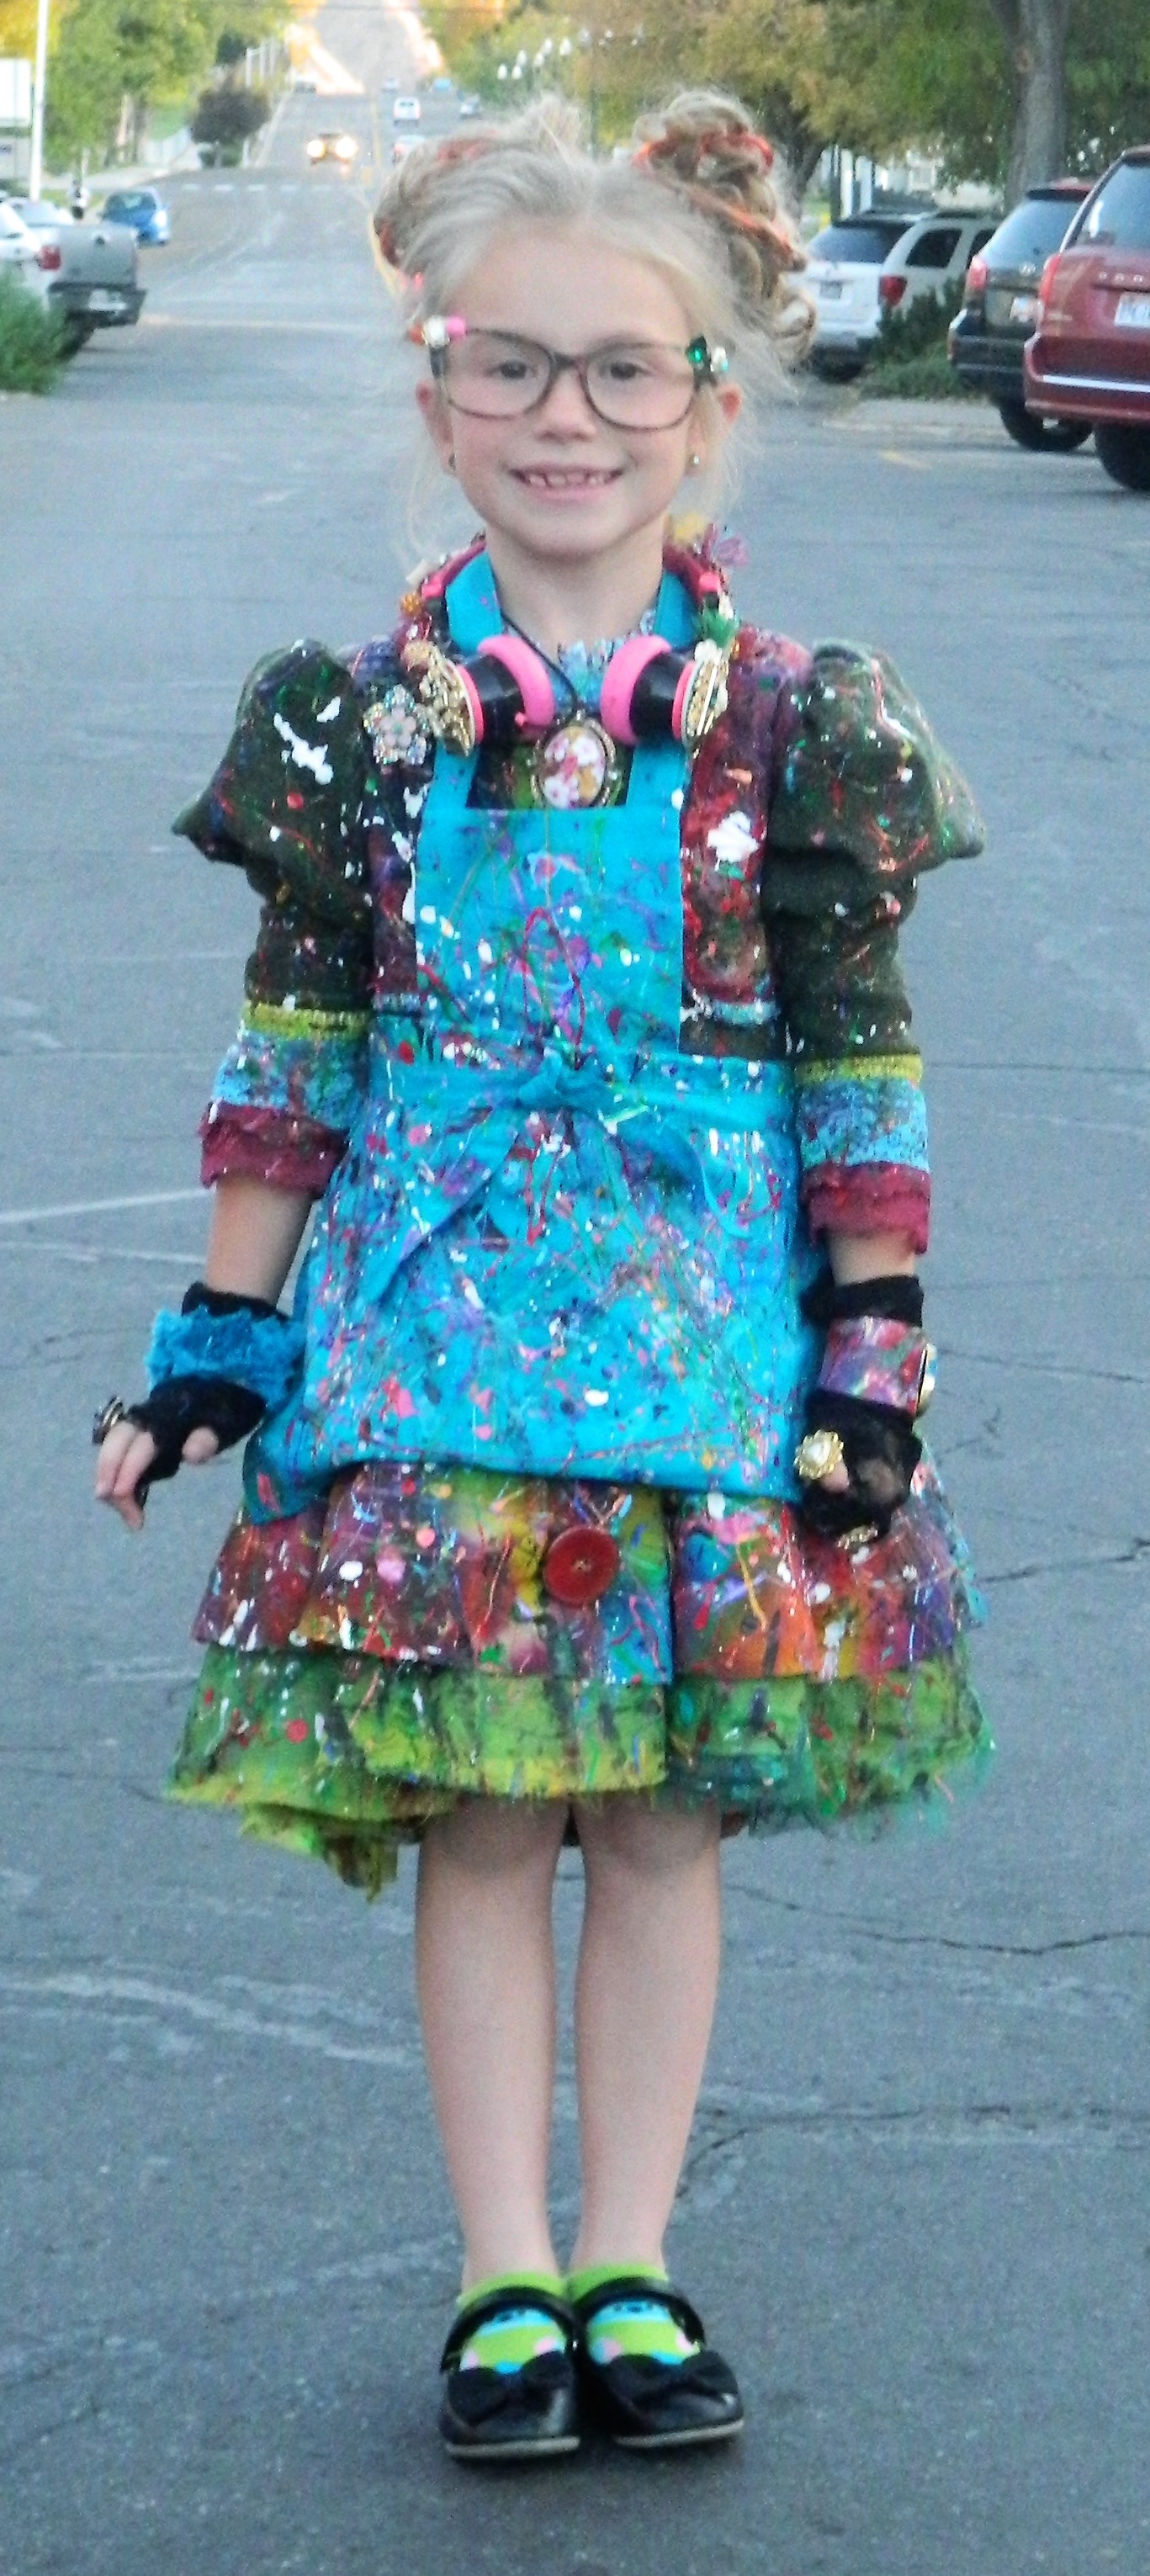
Apron: Color used, Teal
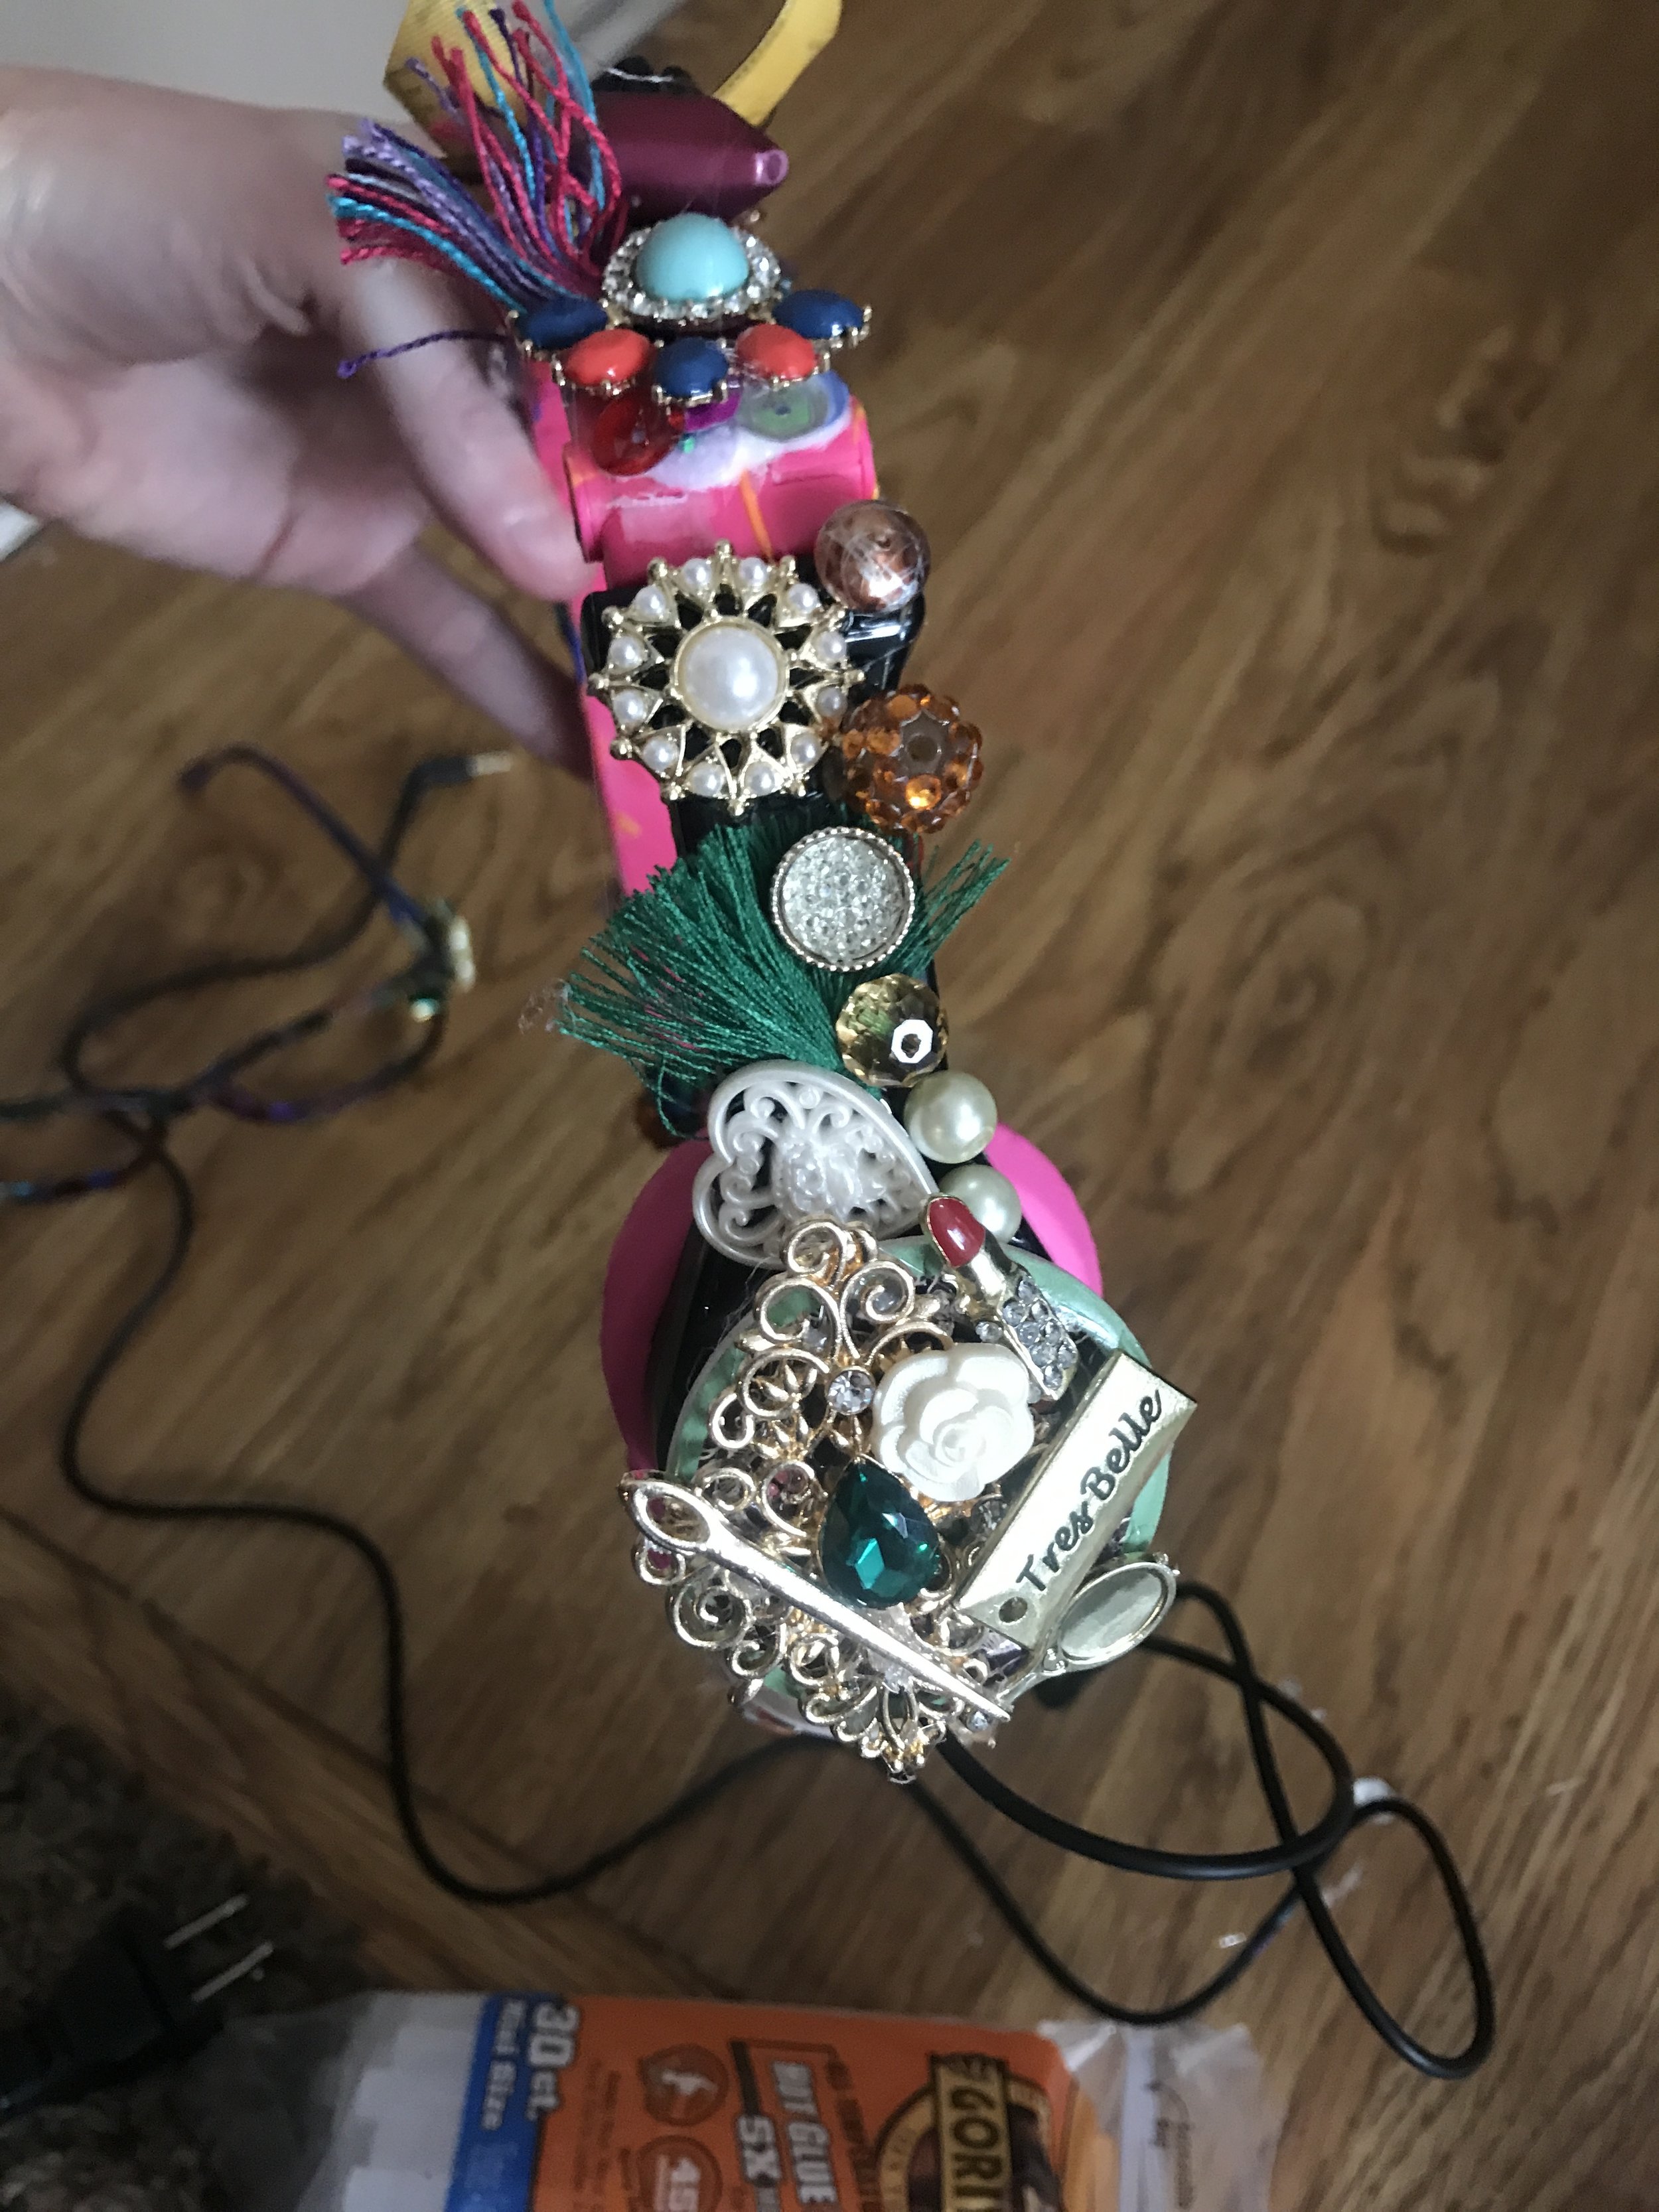
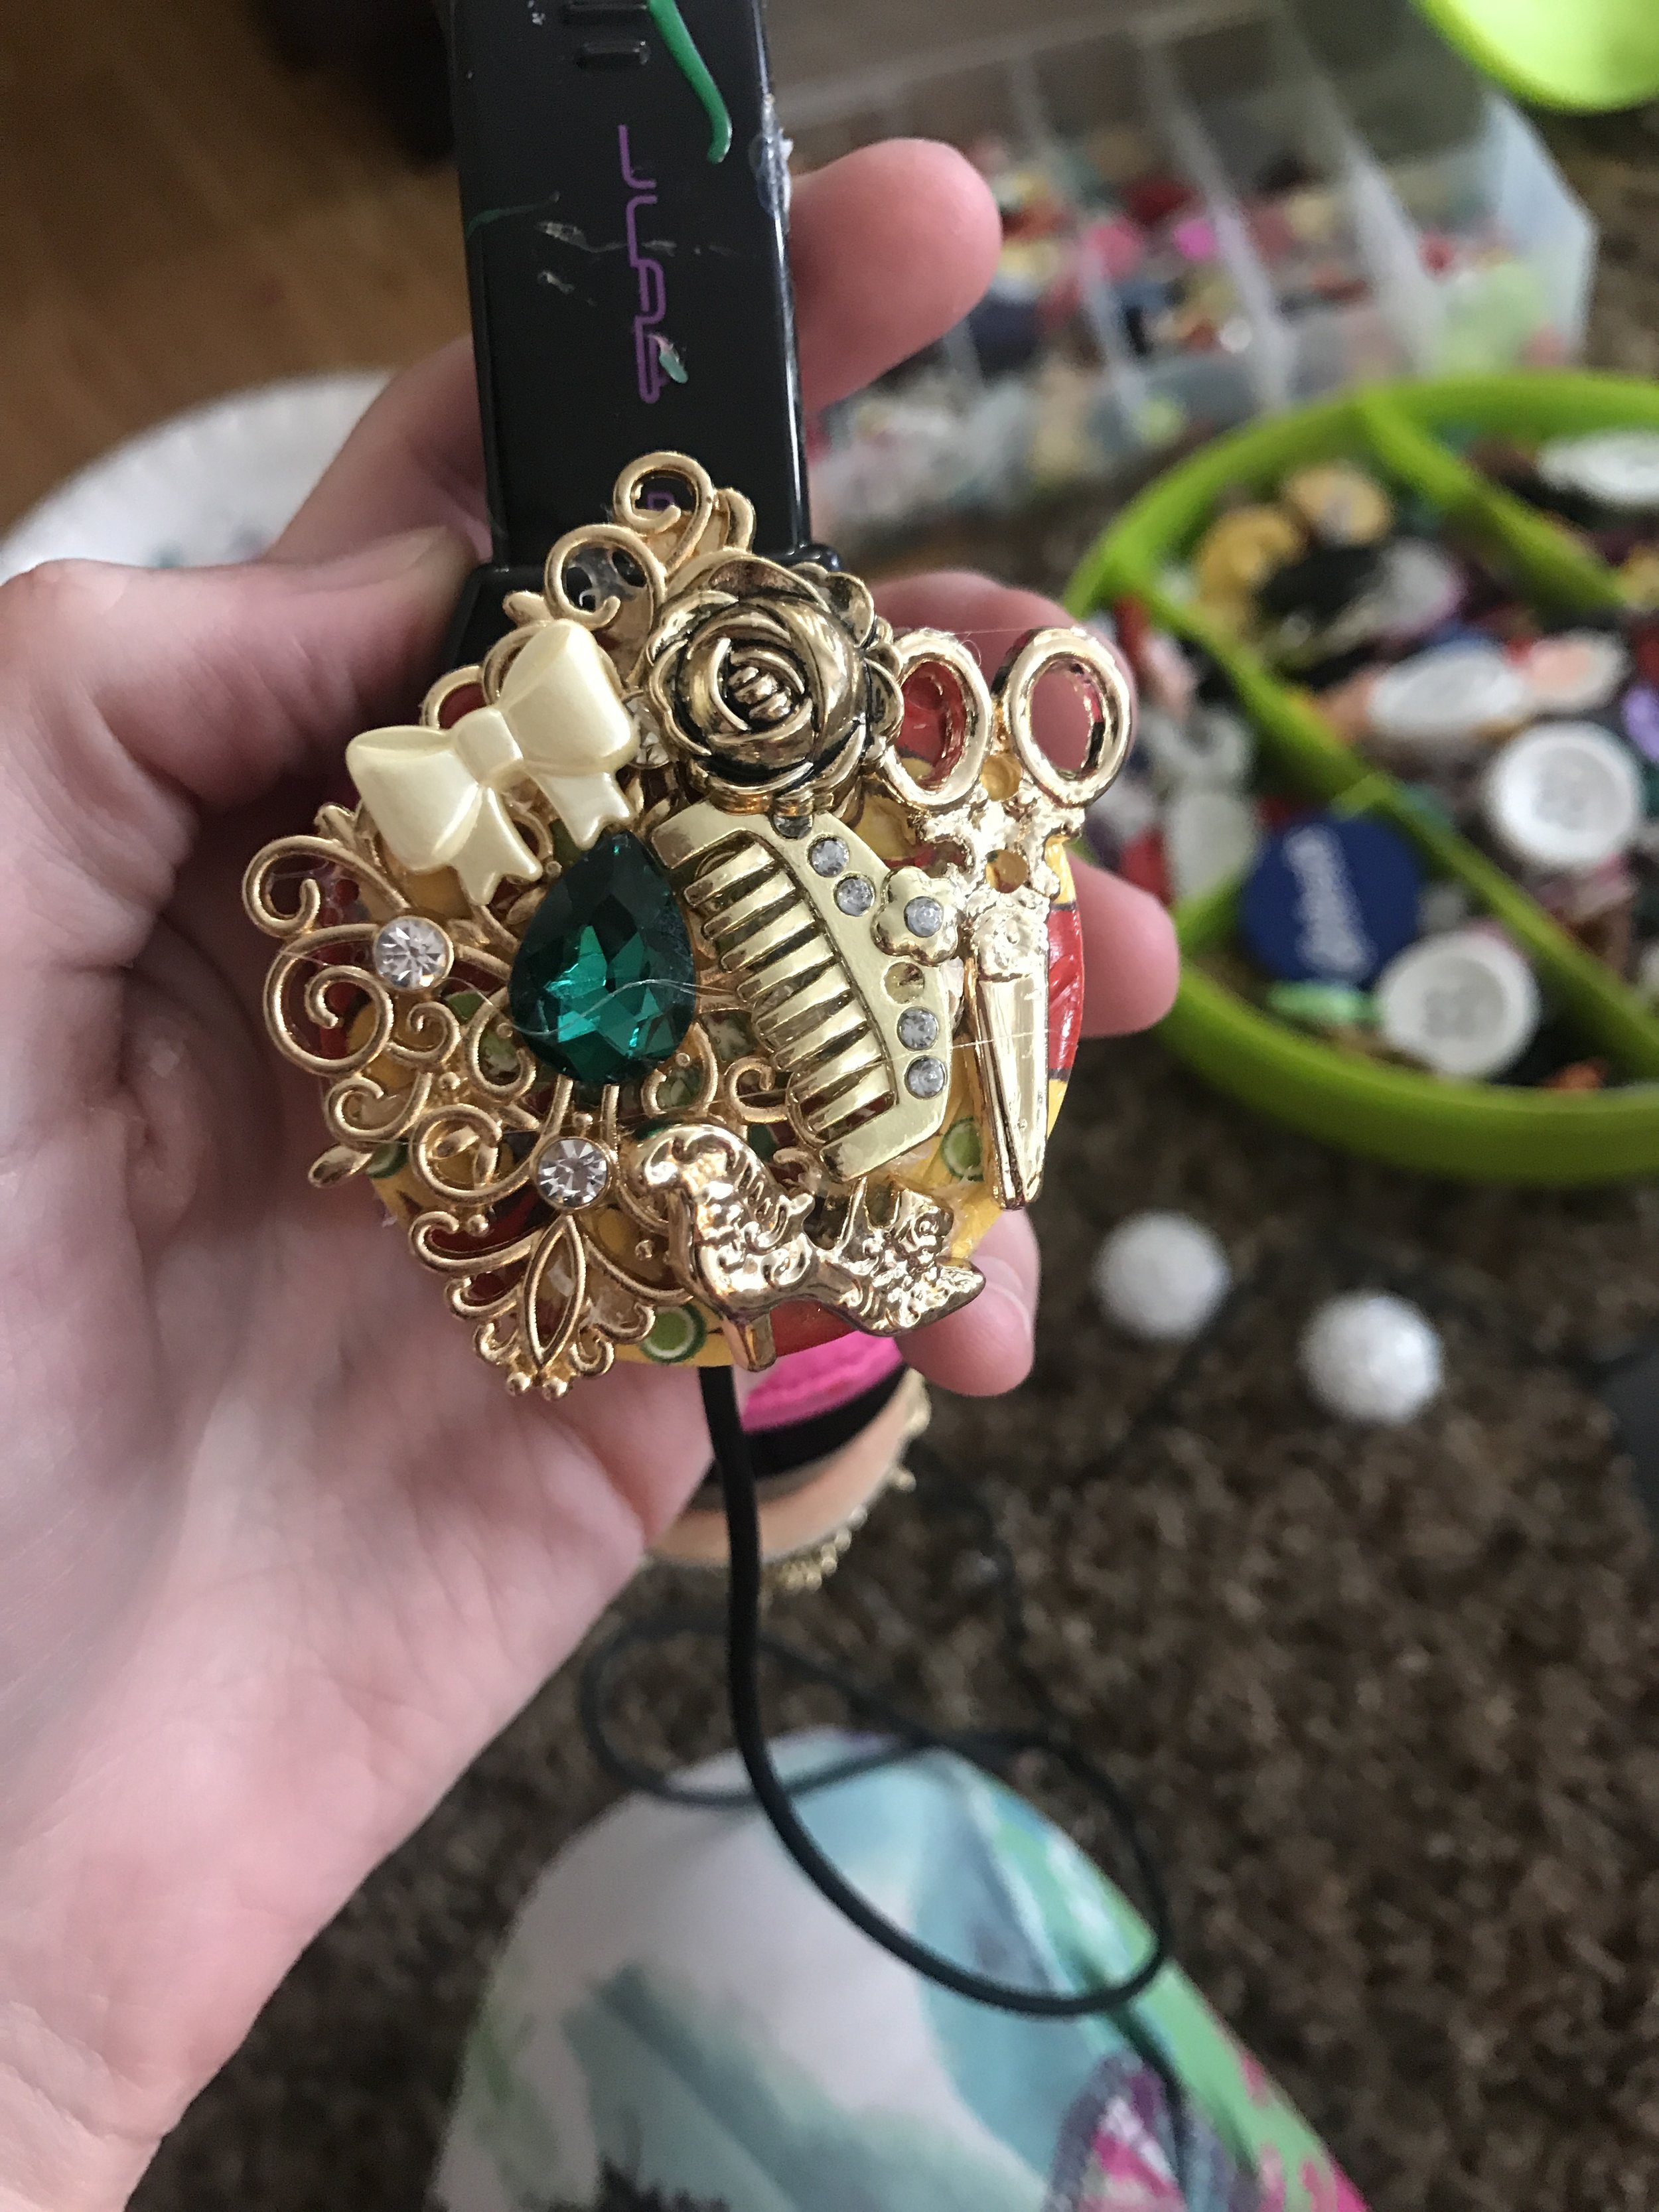
Headphones & Jewelry: For these I purchase a pair of headphones I then painted and glued sequin and jewels. For the supplies I went to Walmart and Joann and got everything on clearance. Check in the jewelry section Joann right now is getting rid of a lot of jewelry. Then I found cute buttons to fill in.
Now that we have everything linked above “LET US SEW!!”
I started out by slowly making the mods to the vest. I decided to just showcase the vest on the bodice front and not make it go on my back bodices. I also went with a cropped vest and added a slight curve to make it more feminine. I cut 2 mirror images then I sewed my trim to the inner edge and top stitched, once top stitched I grabbed my favorite tool a can of basting spray and sprayed my backside piece then placed in on my main bodice. With this you can move your pieces around before you begin to stitch in place. Once stitched I took my wine Kona 1.5” and made my own bias and sewed that along my top.
Once the vest was finished. I found the center point in my front bodice and stitched my trim in place. Next take your back main bodices and stitch your shoulder seams together once that has been done press seam open. Next, you’ll take your neck trim and stitch it along the entire bodice.
Then you will follow the rest of the tutorial in the Duchess & Hare.
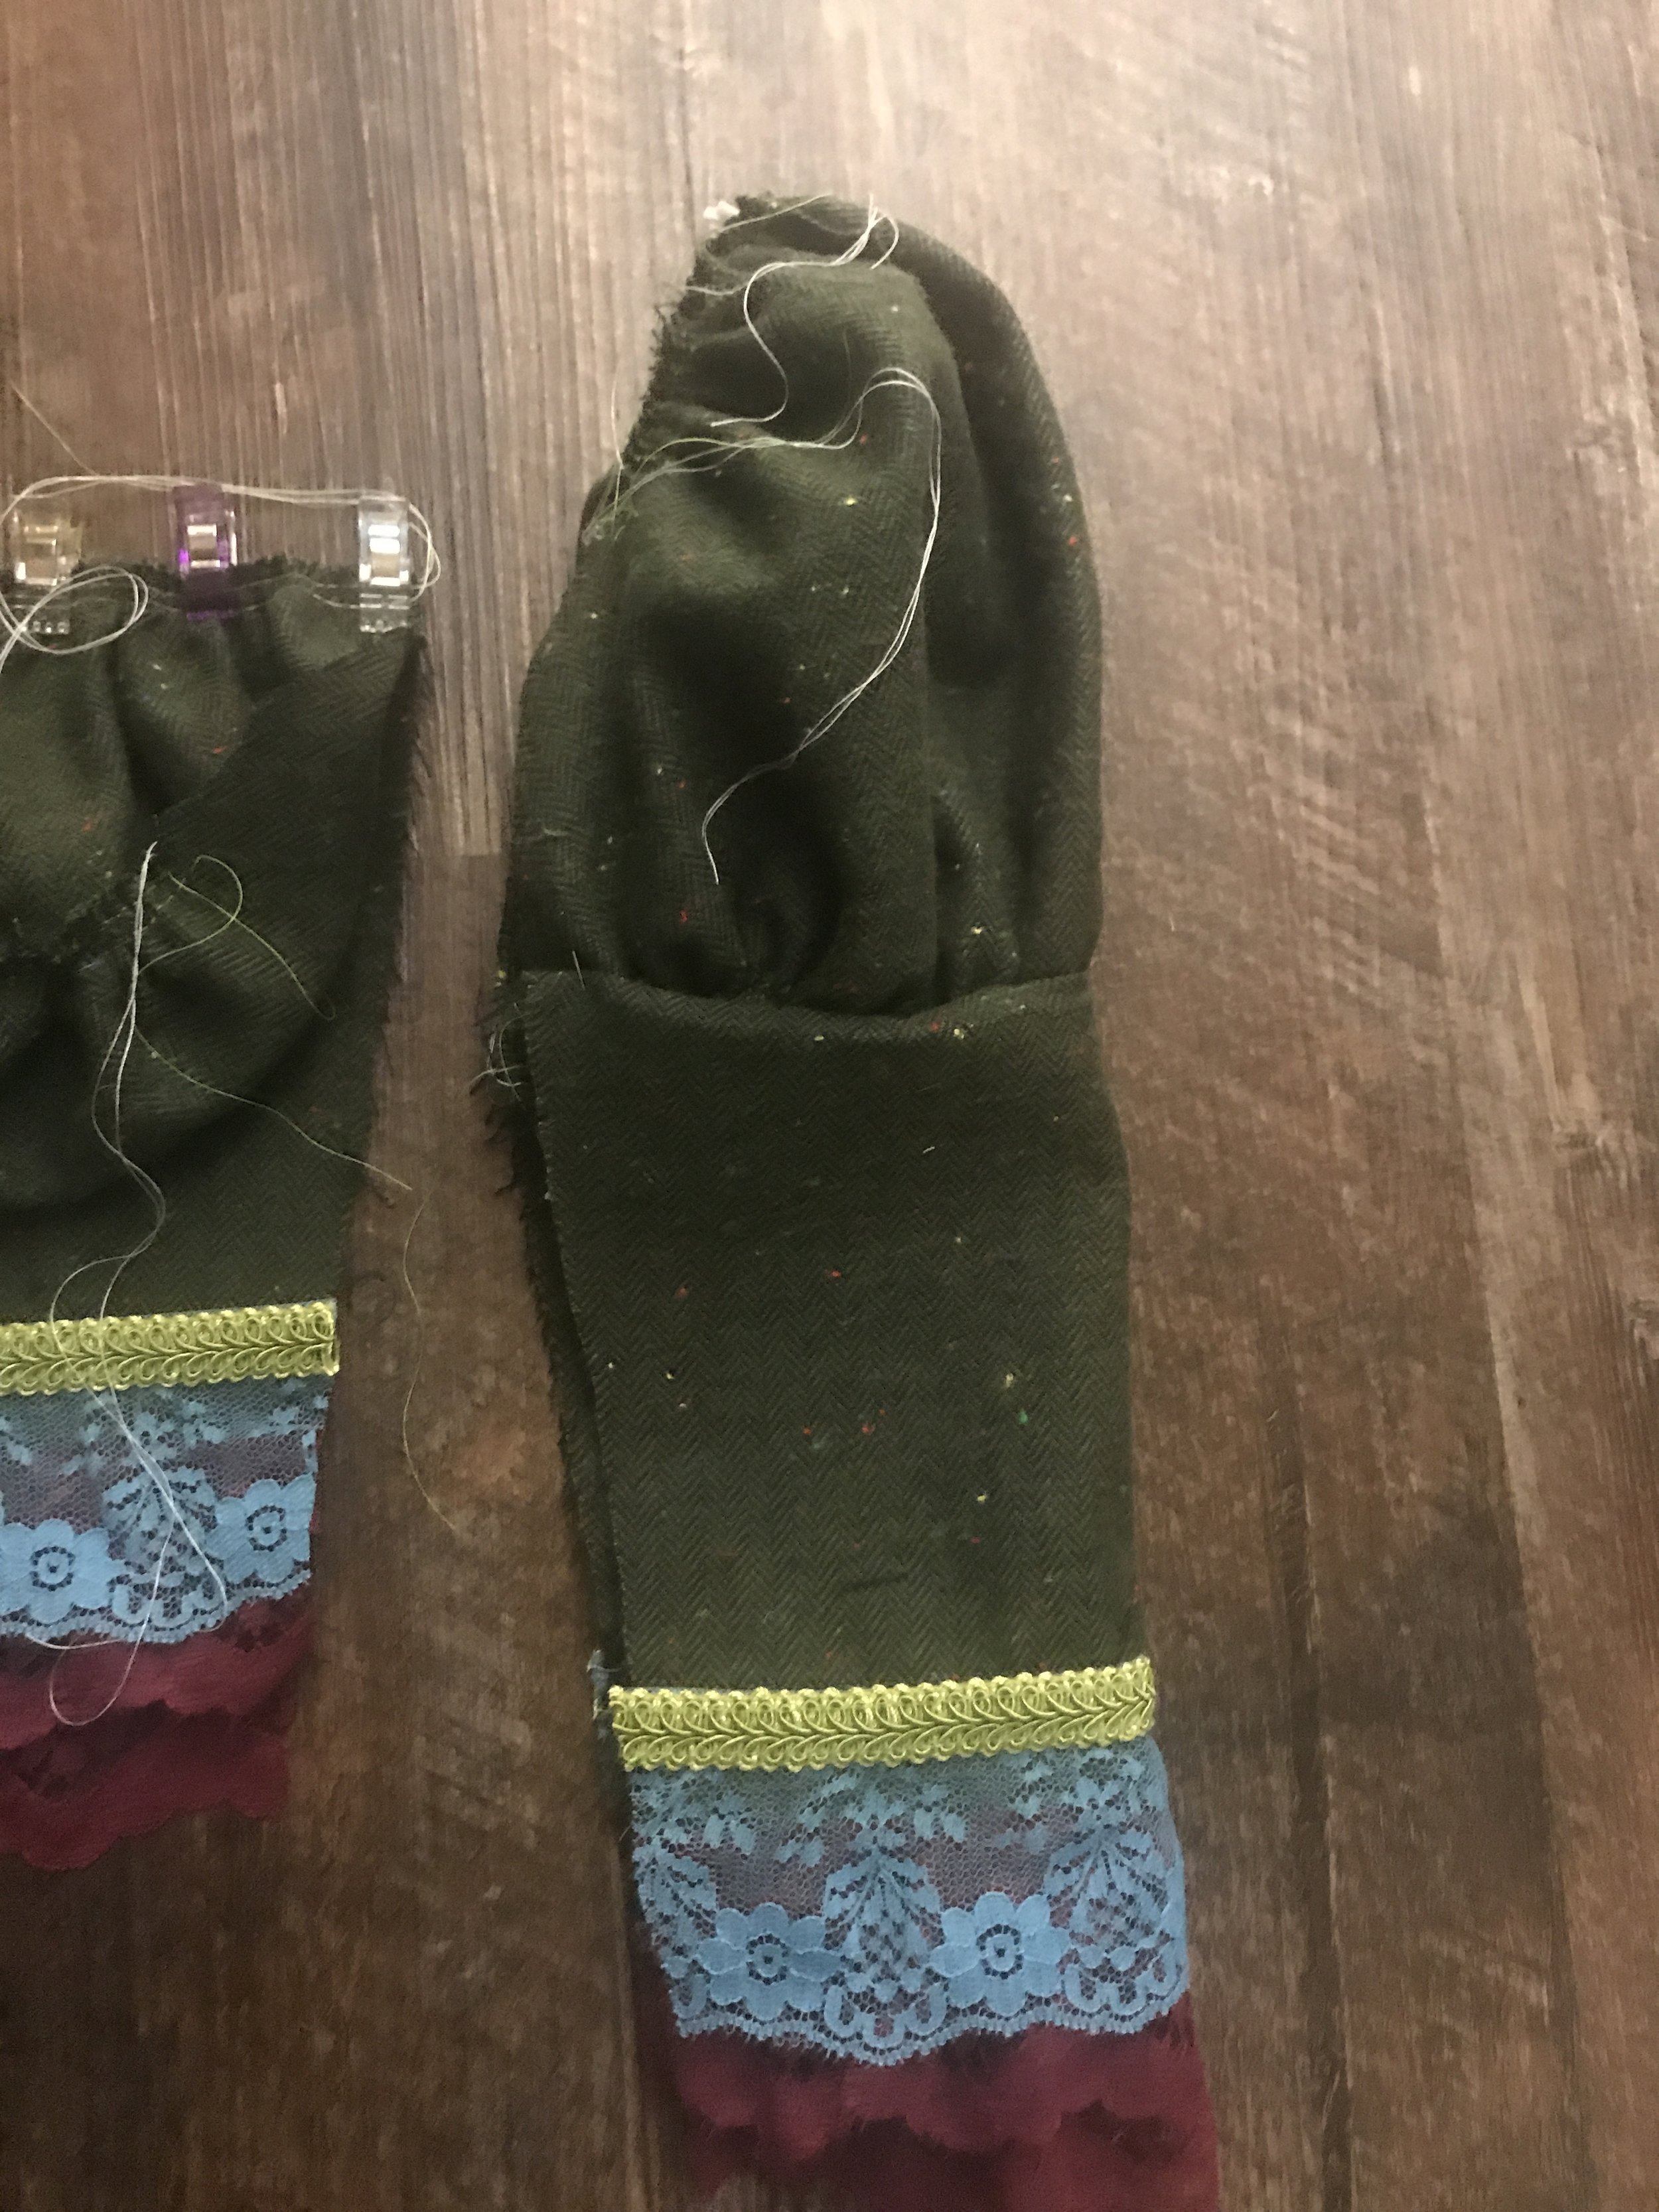
For the sleeve I took my puff sleeve from the Every Which Way and mashed it with the bottom portion of the Muttonchop. I added lace details and a green trim to the sleeve and stitched the side seam up.
Apply sleeve as indicated in the tutorial.
Skirt is different lengths within the Noelle pattern.
Then you’ll finish the dress up as written in the Dutchess & Hare.

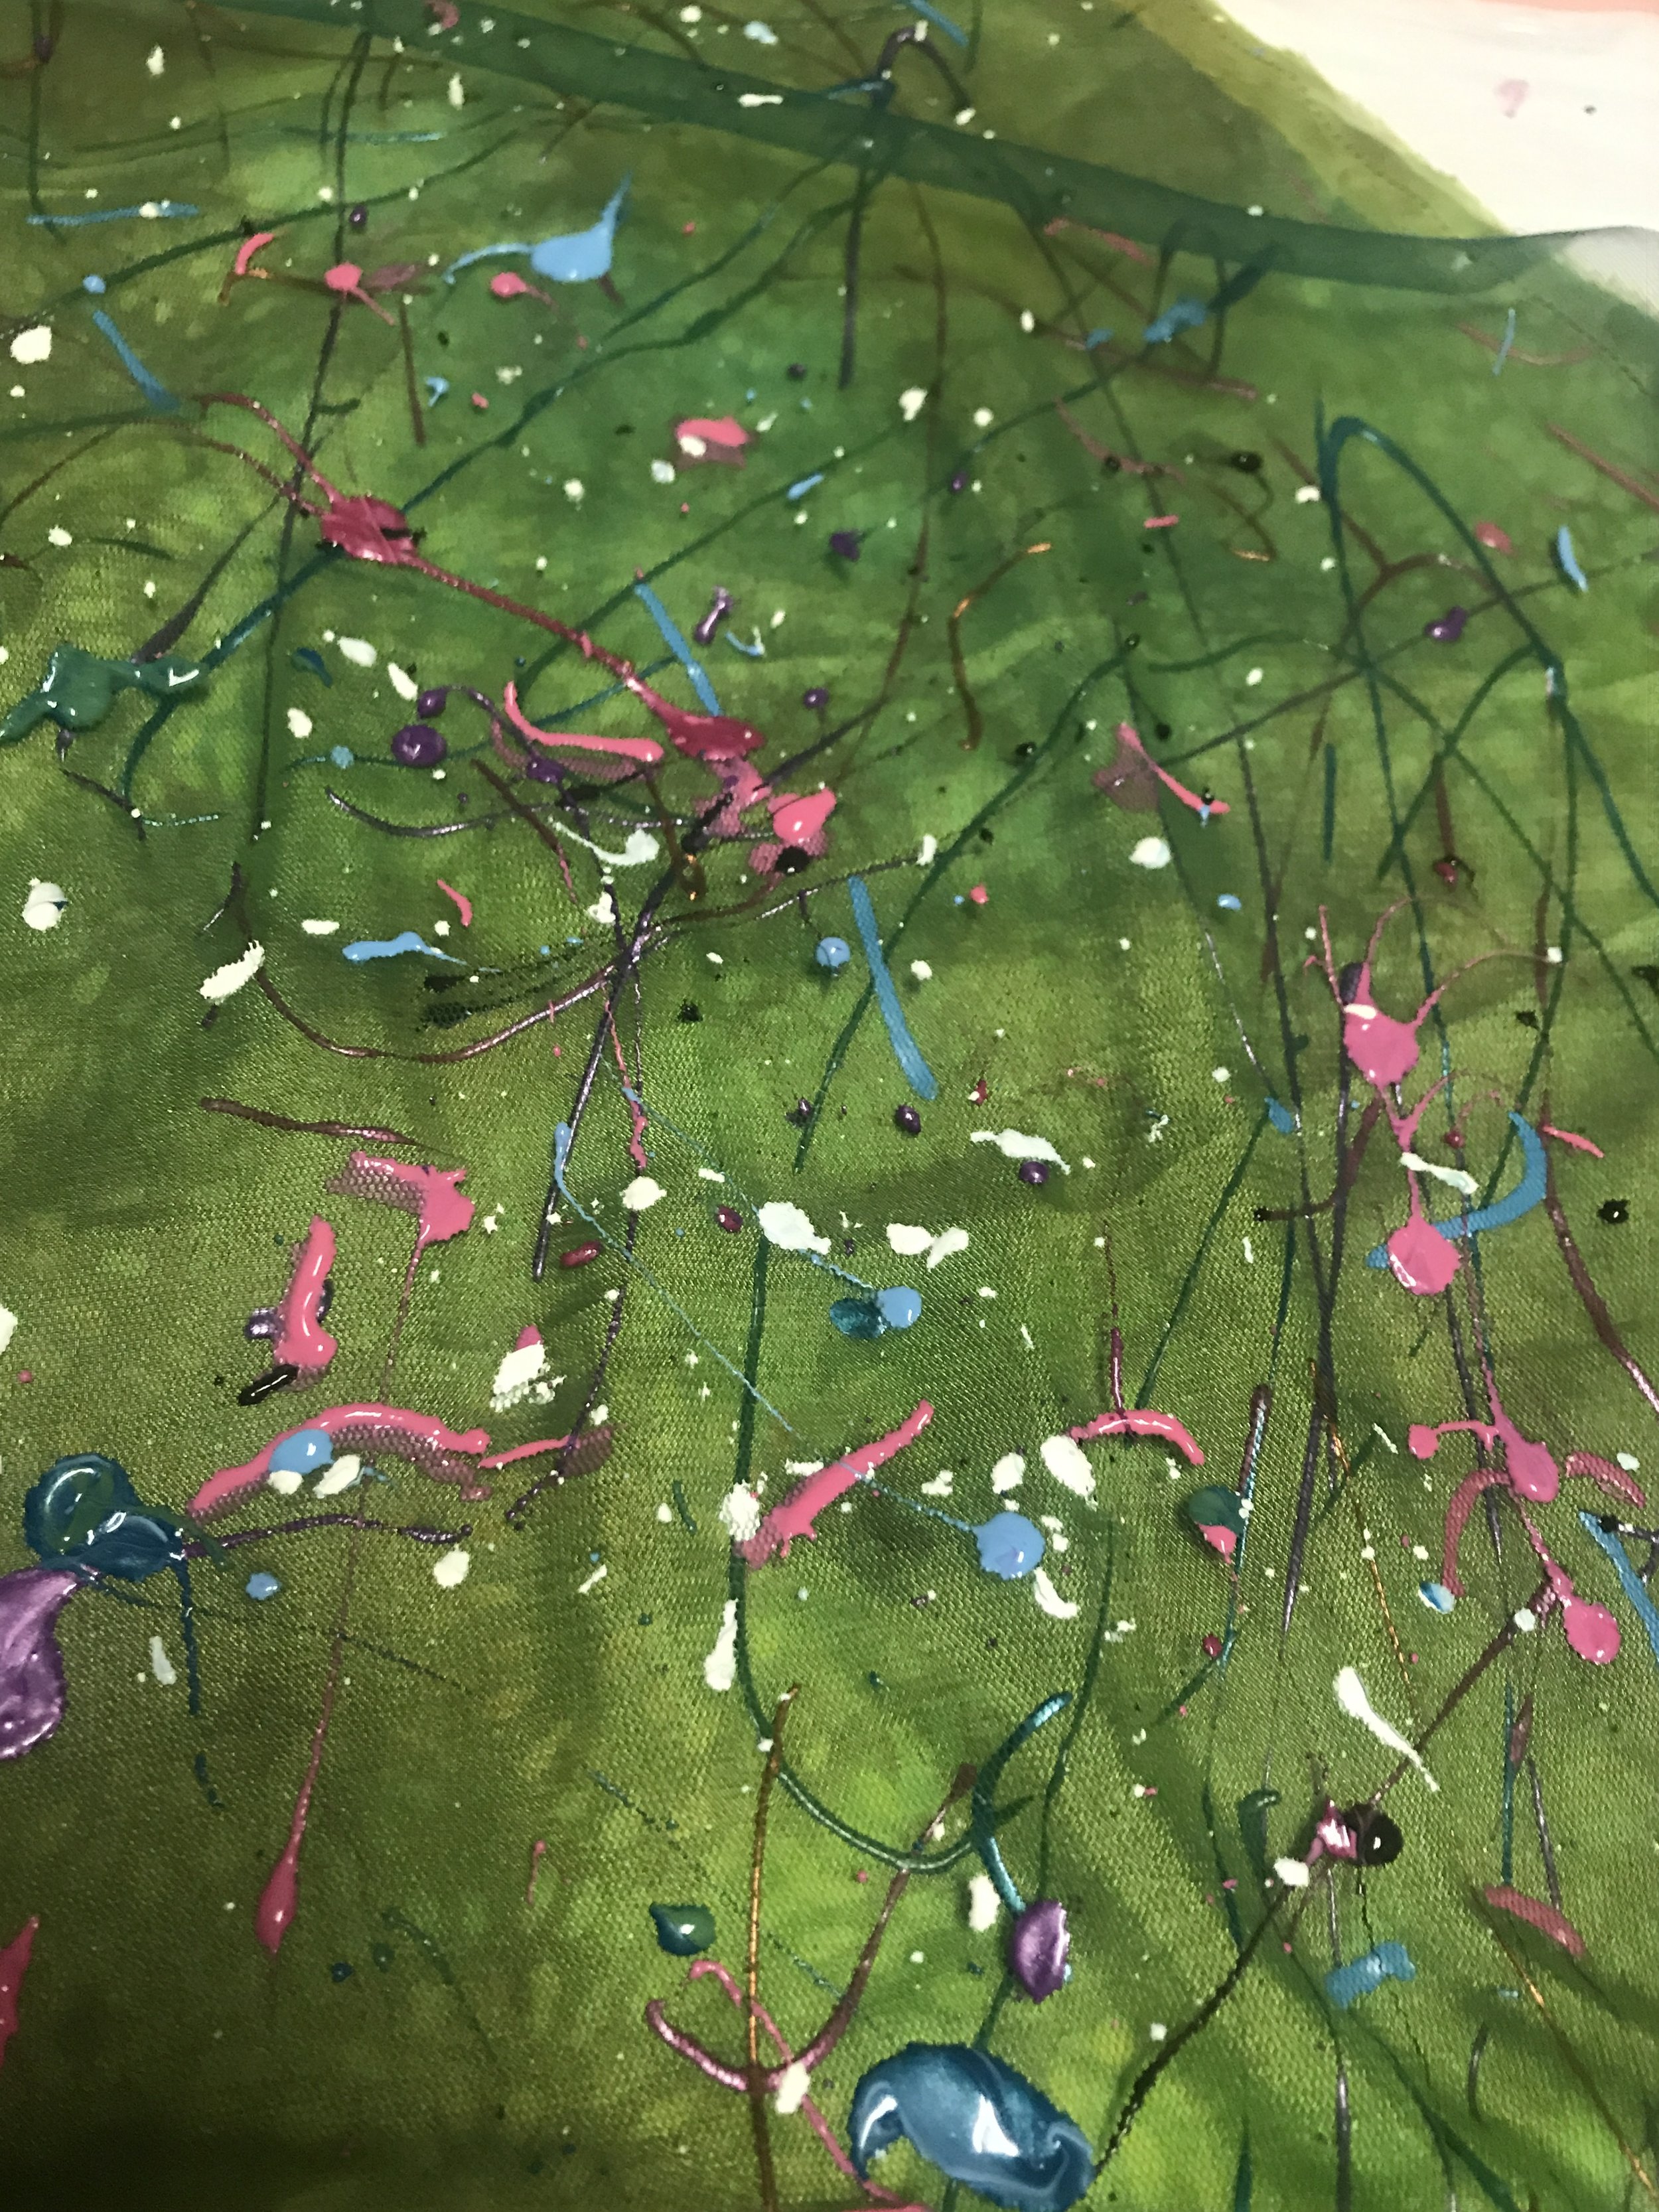
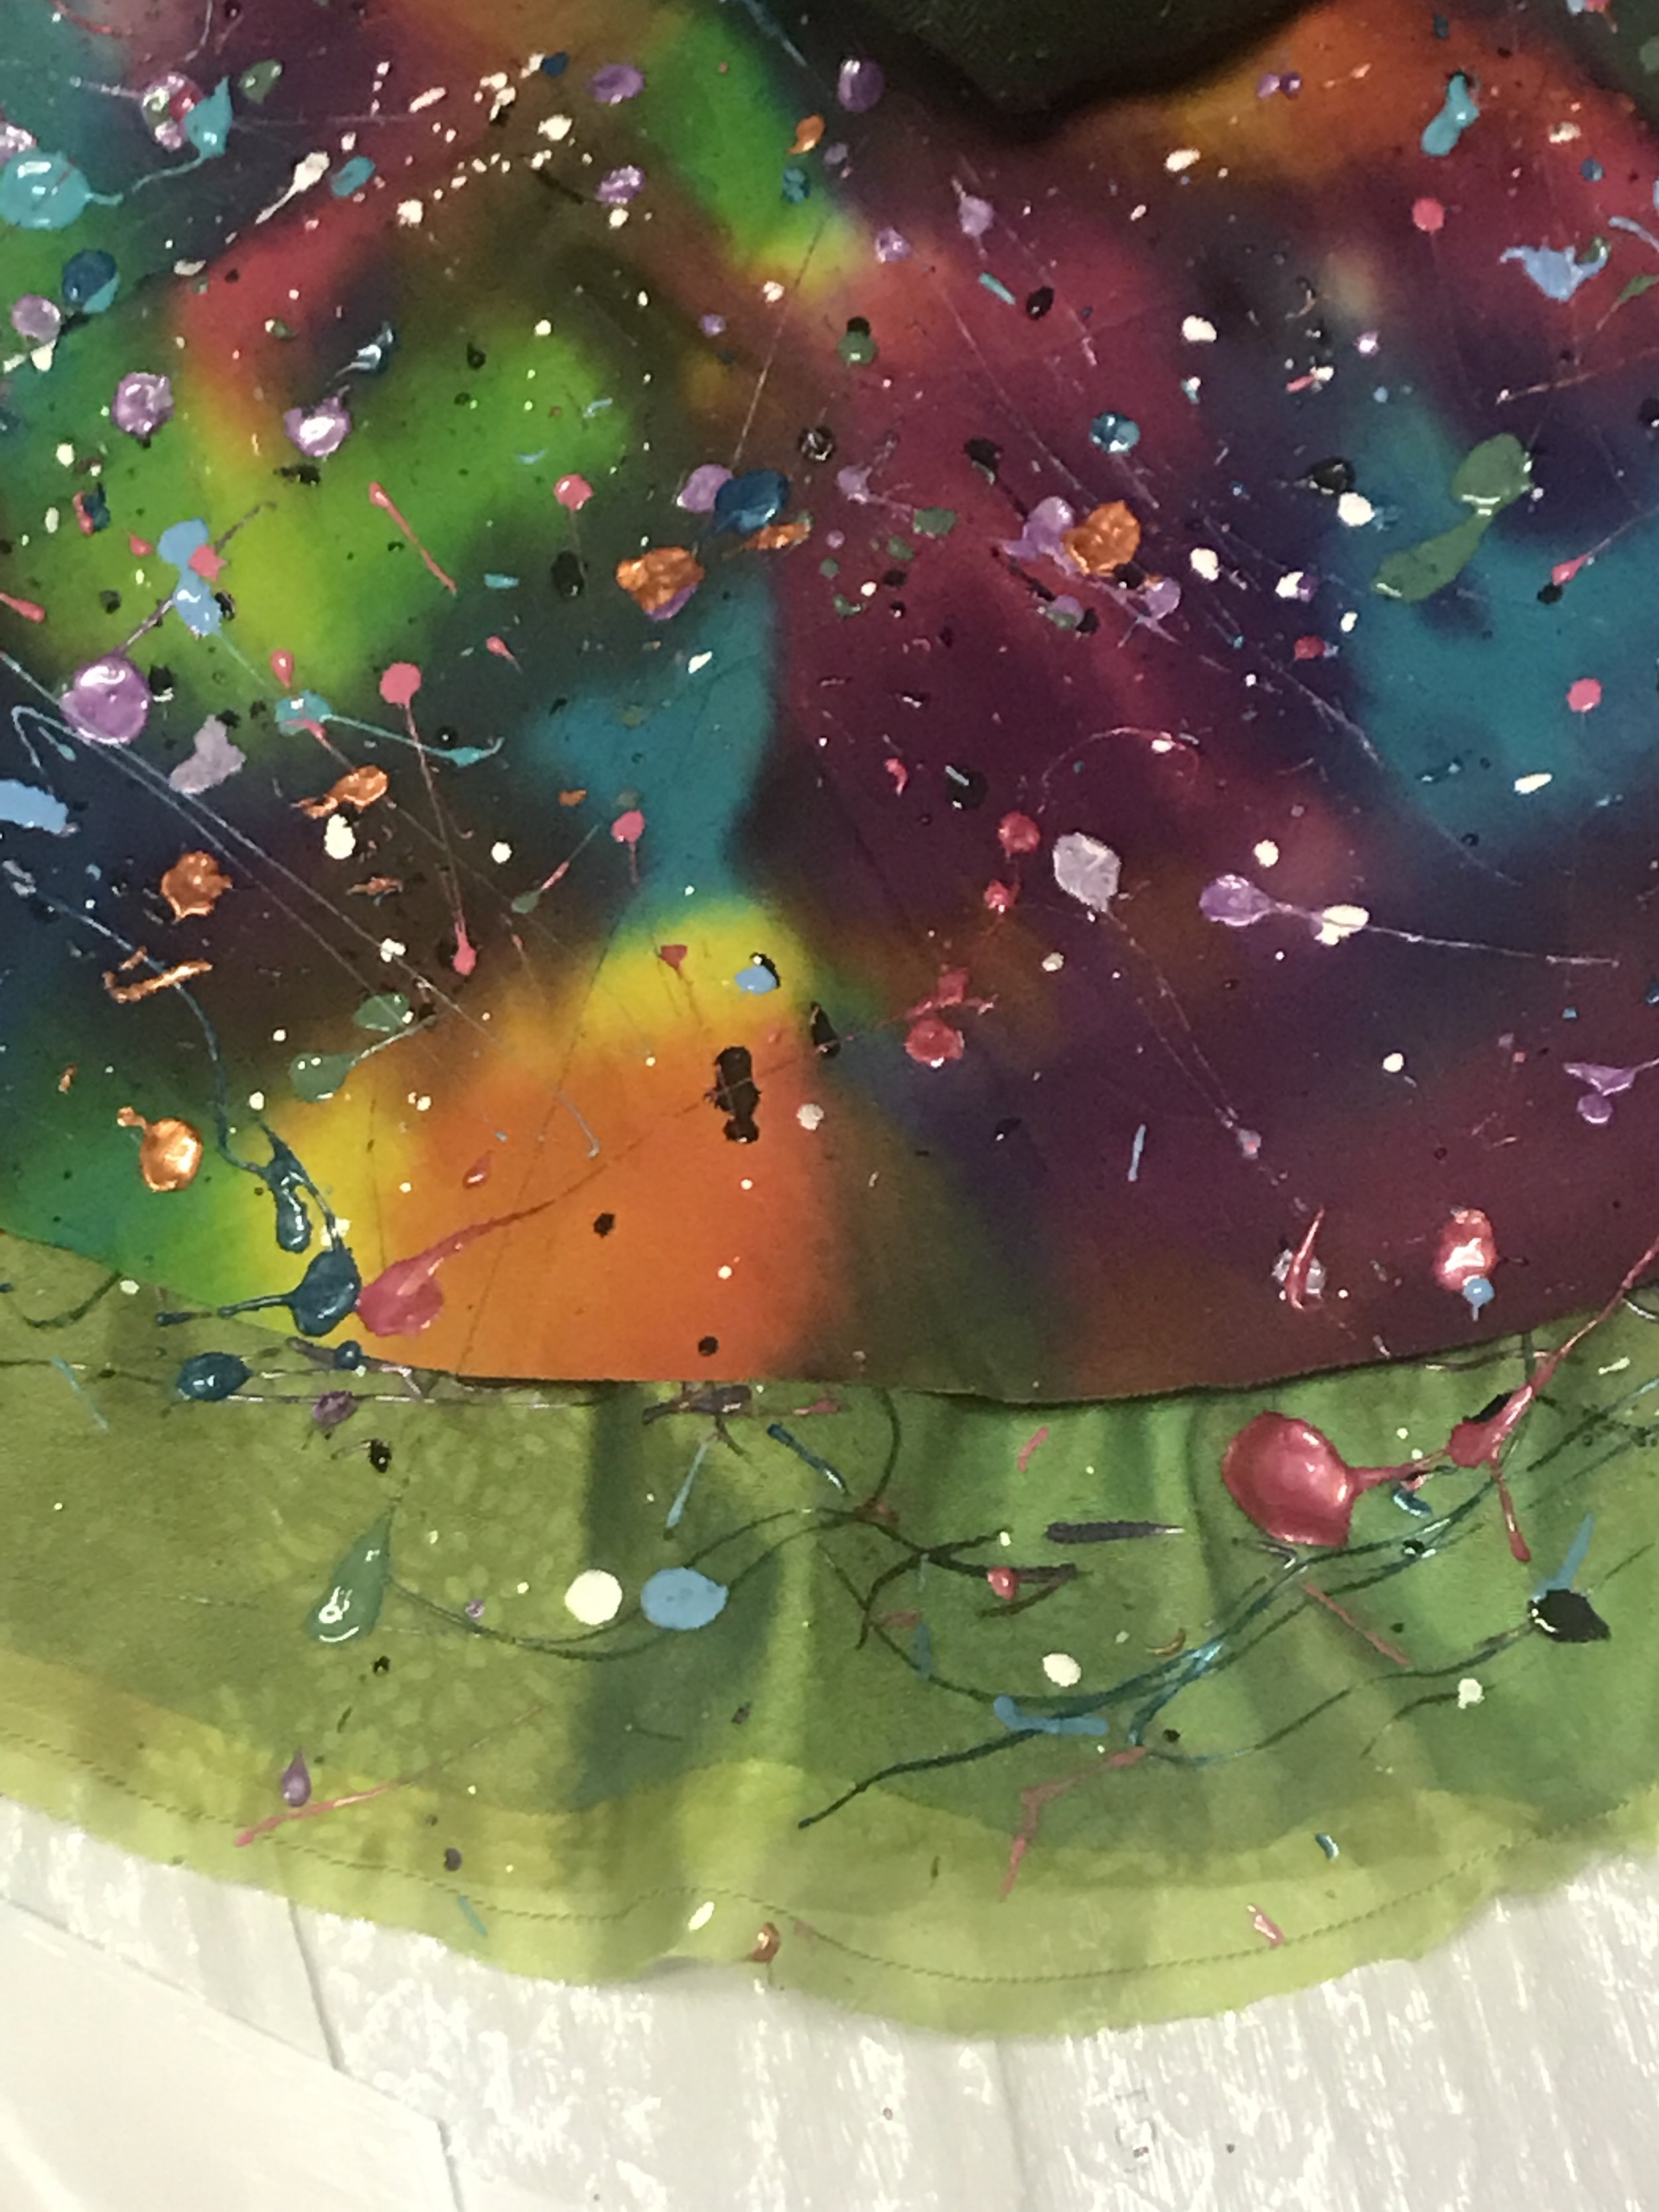

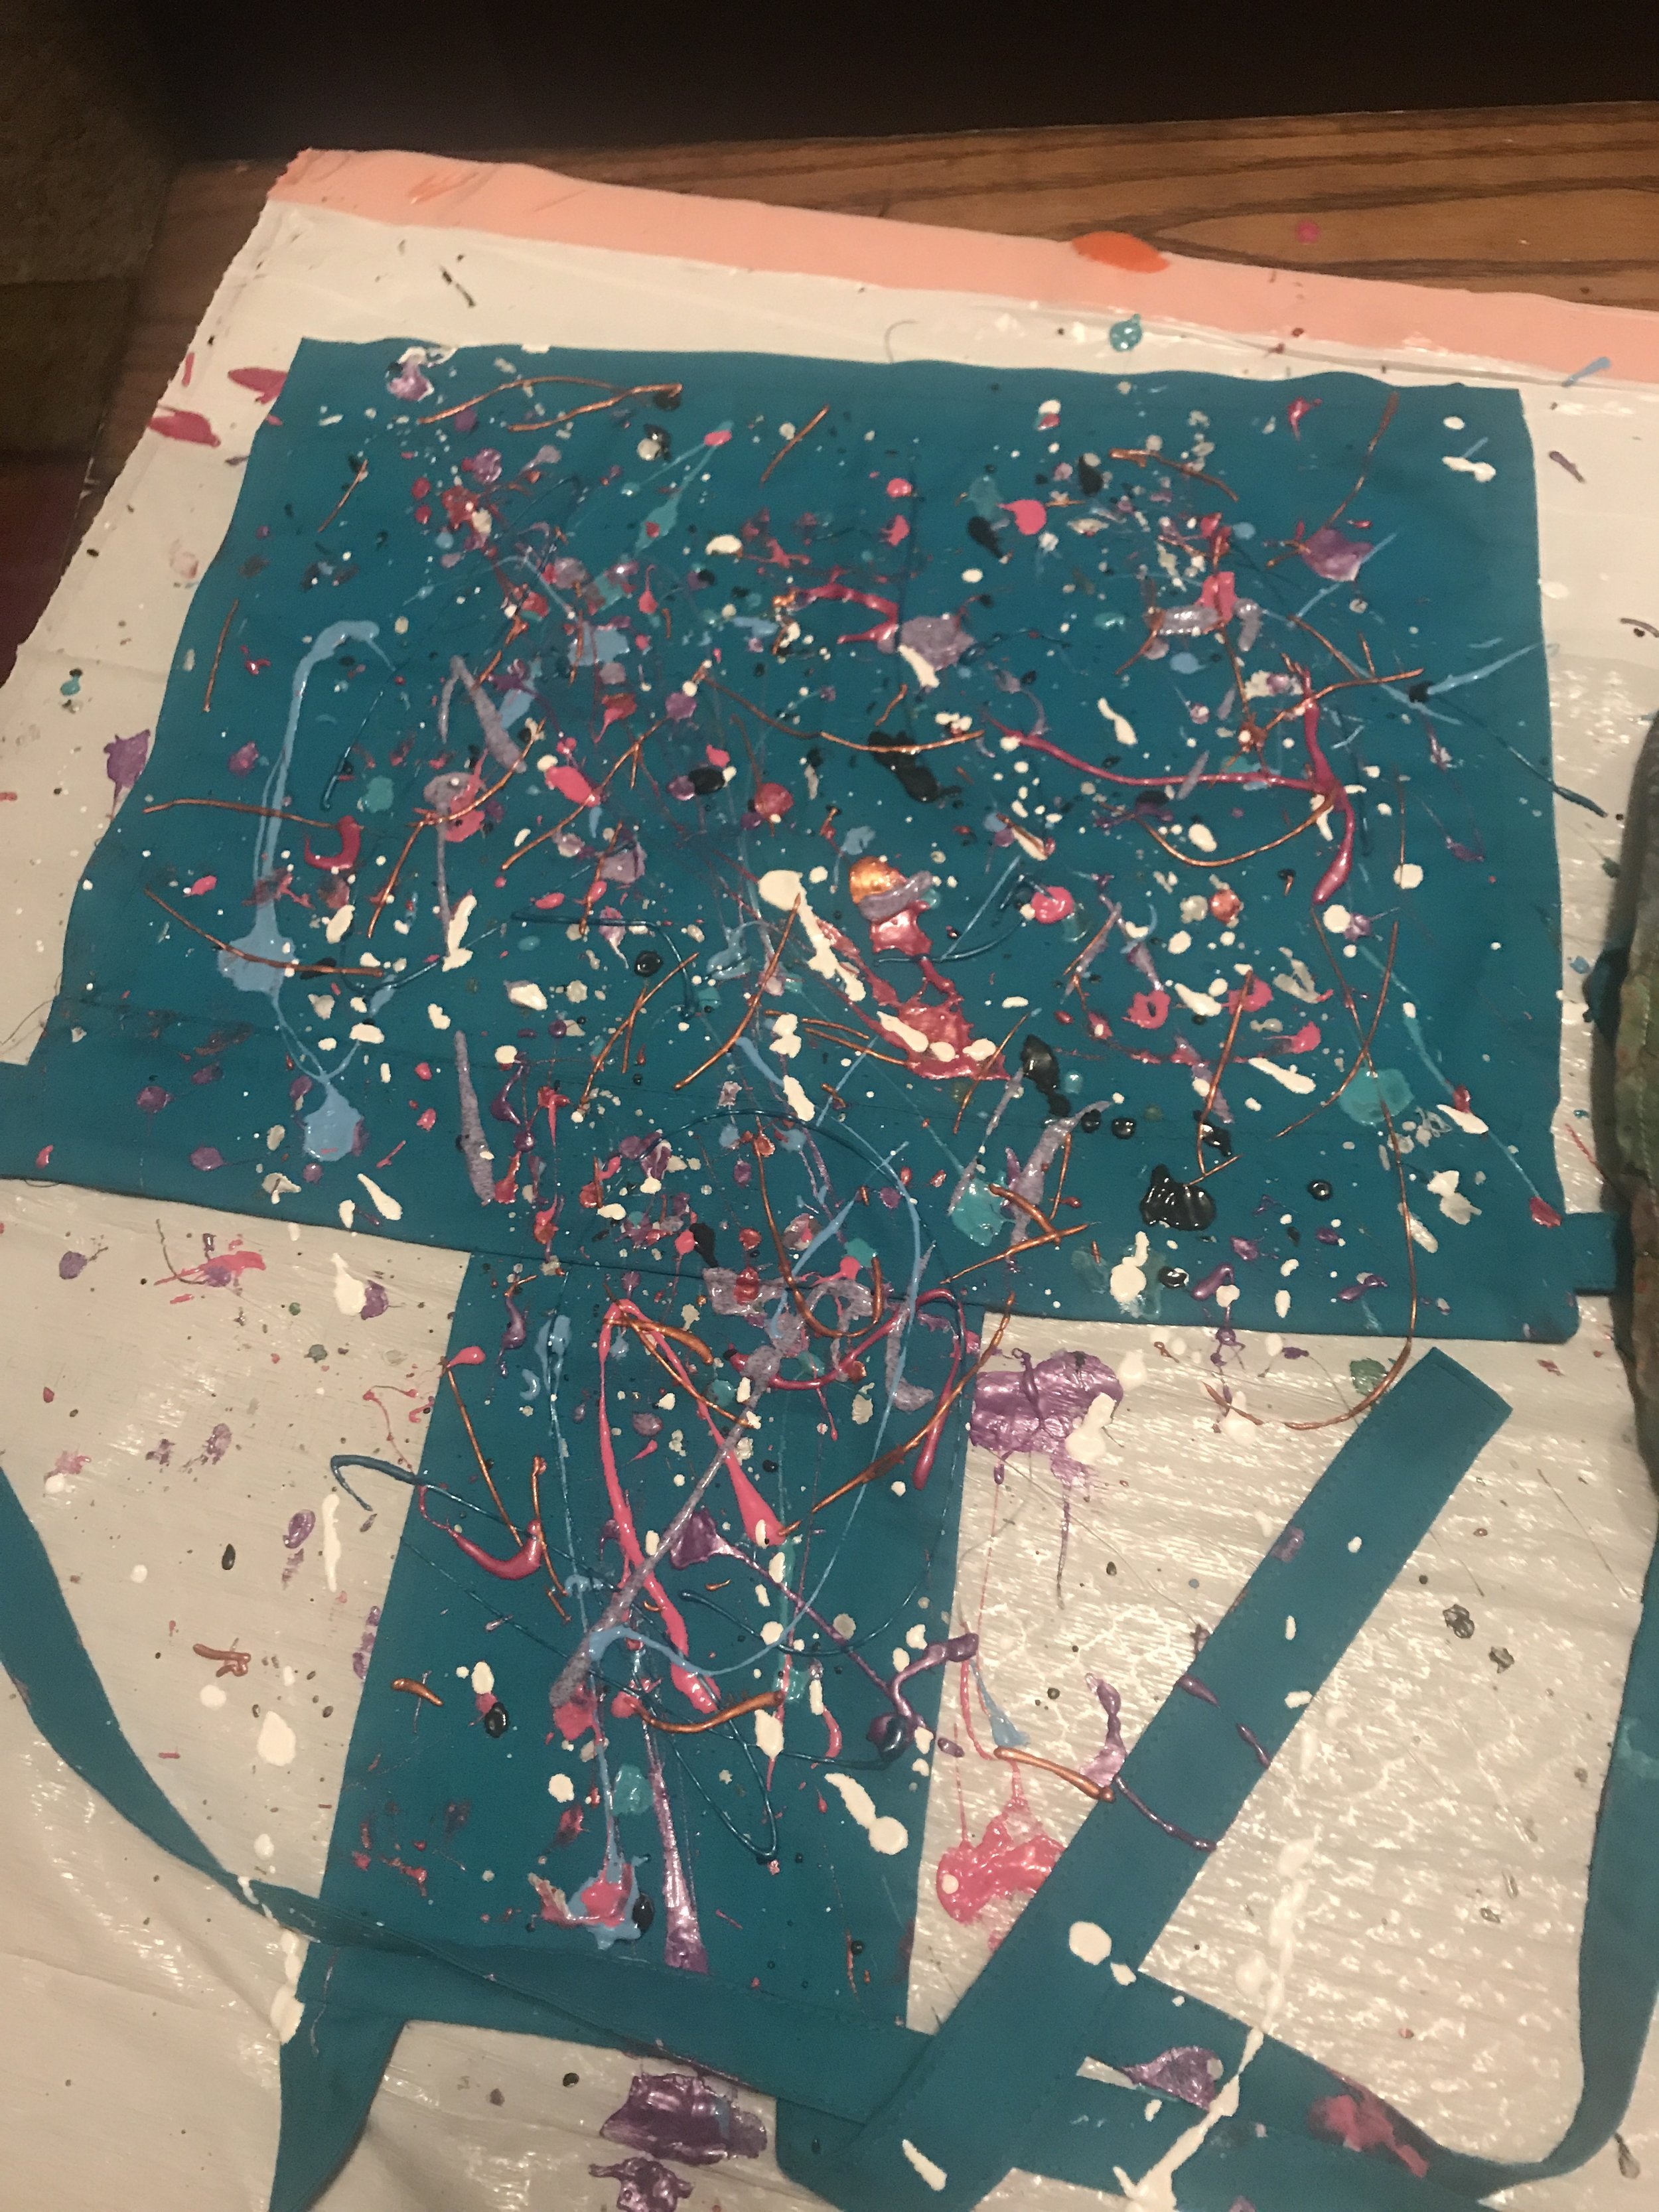
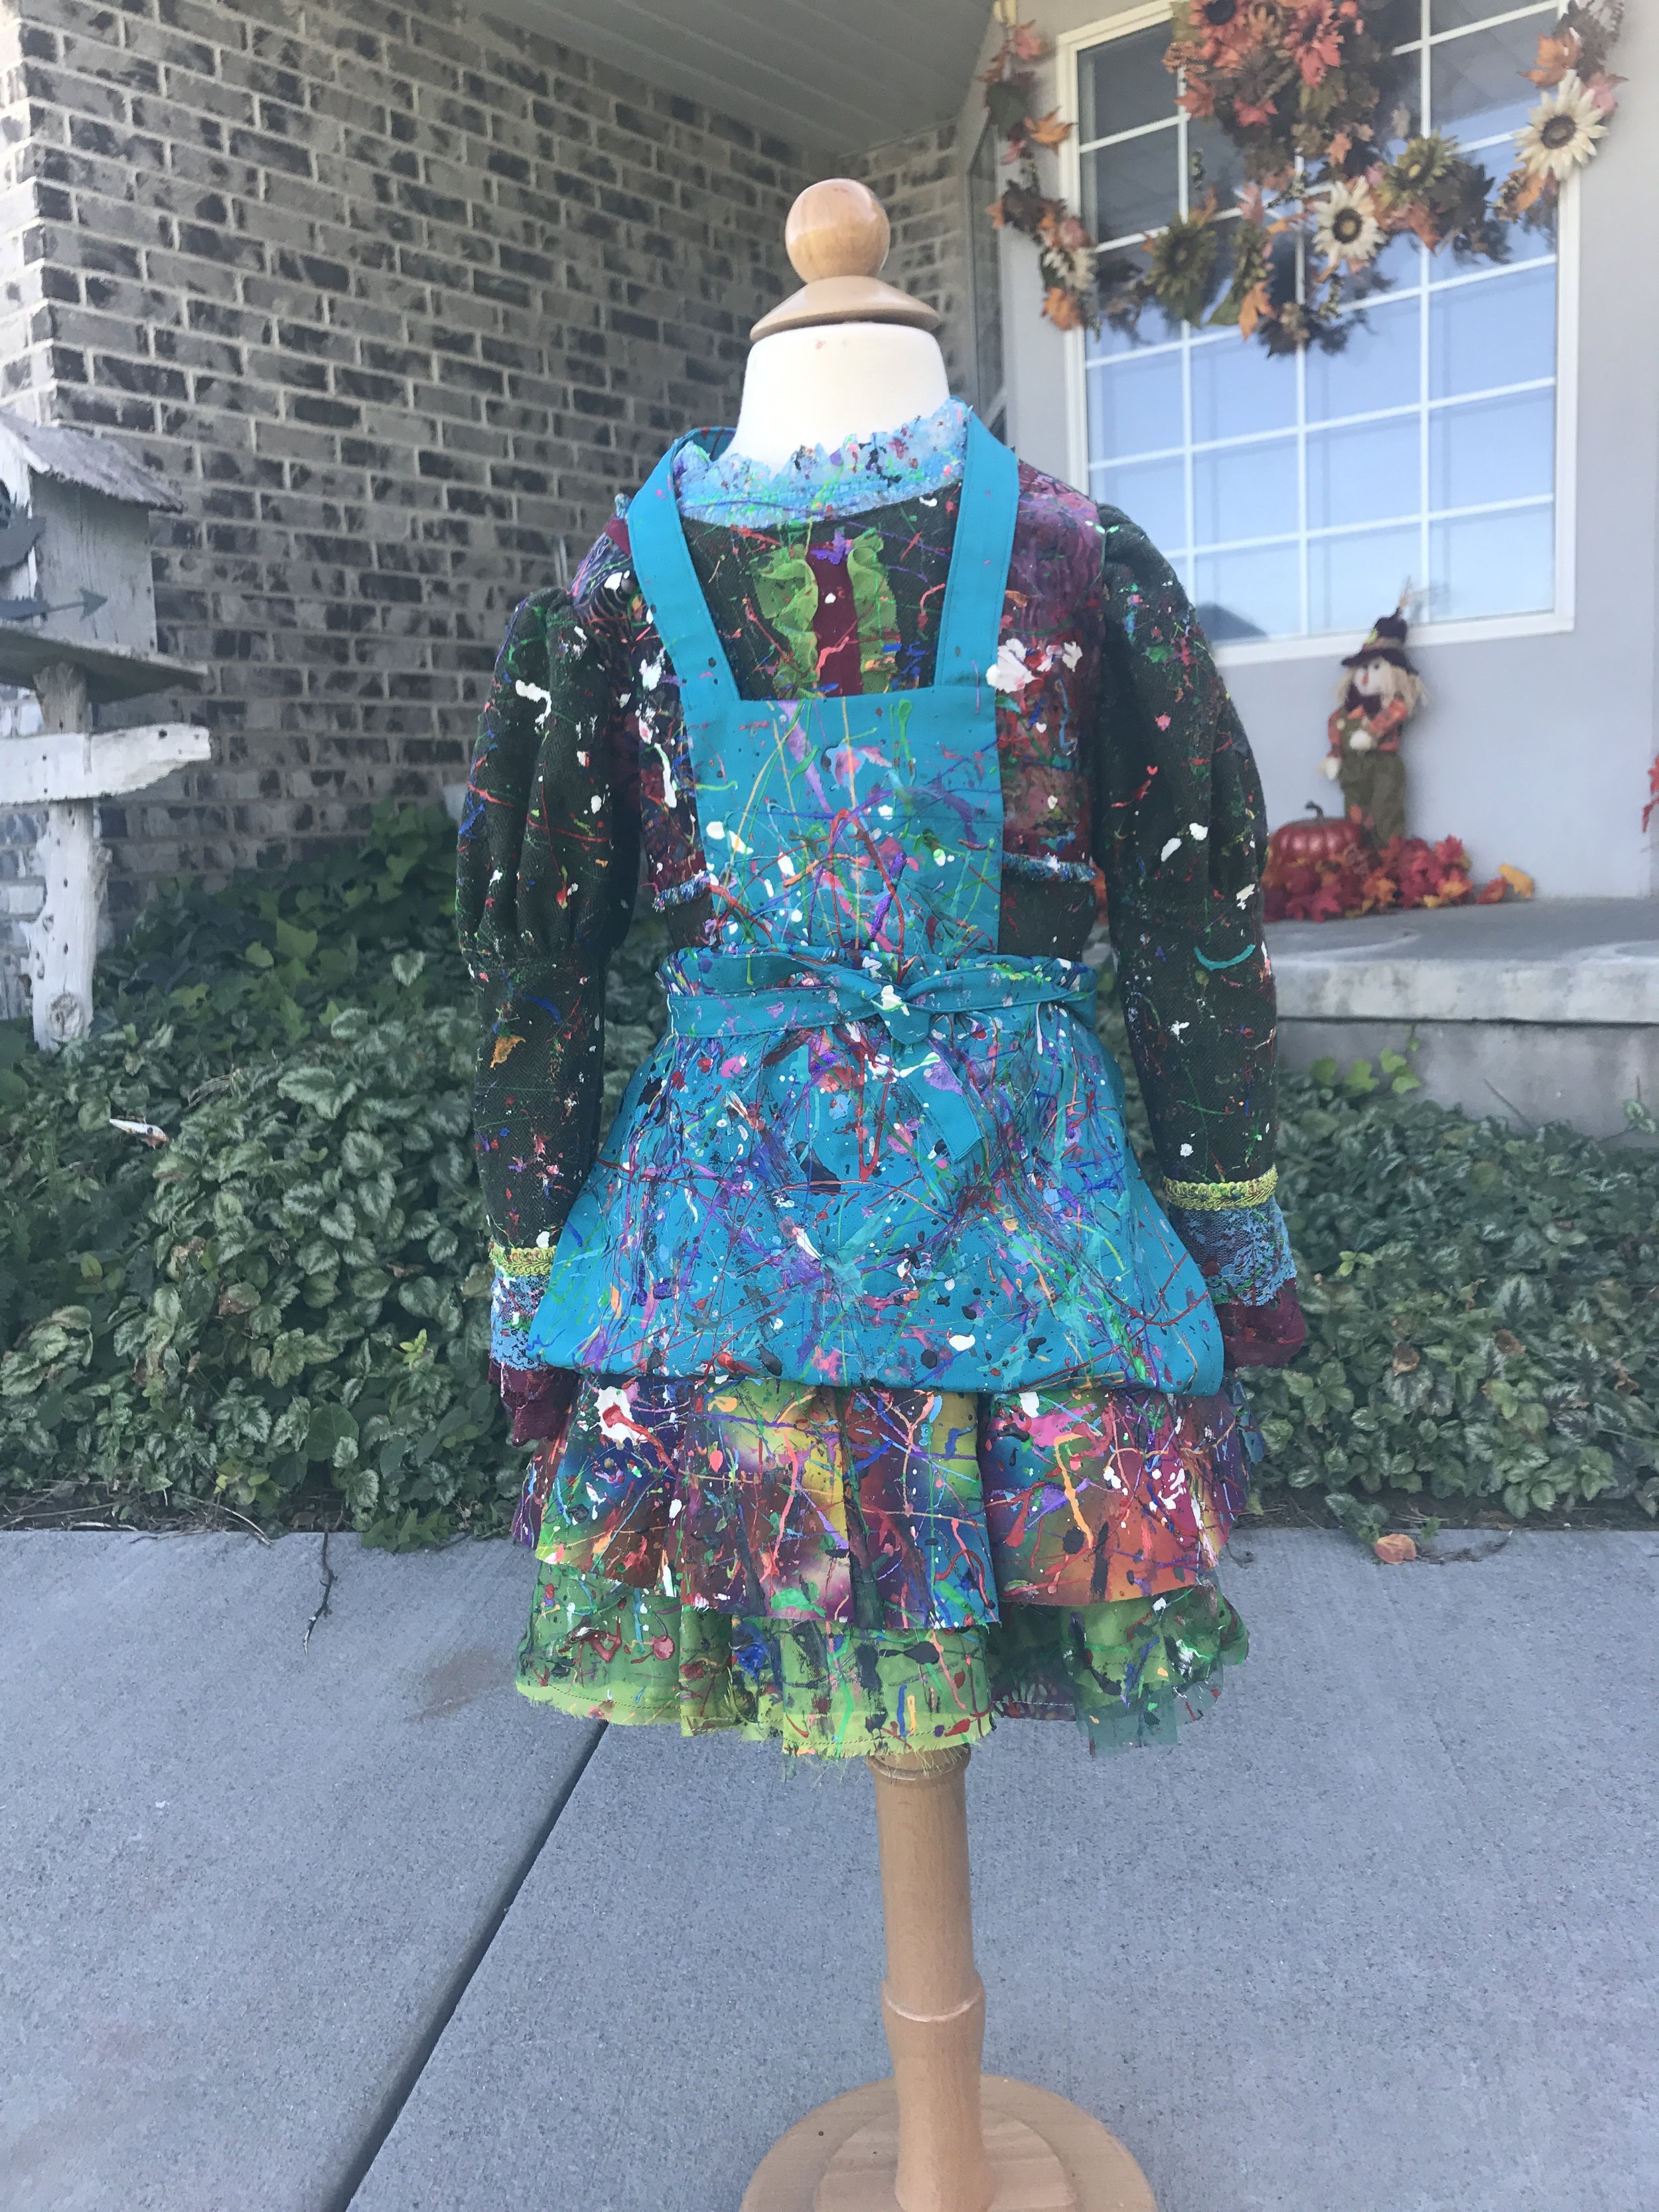
Once your dress is all finished you are now able to splatter away. I used many different techniques as I wanted an array of different splatters all over my dress. So I drip, dotted, swirled, splattered, and drizzled. This is a fun part to have your daughter help you with and it really was my favorite part of designing the dress. I was able to just let loose and have fun and see where the paint hit the fabric to create a one of a kind masterpiece.
***Note** Because you are layer paint on paint I suggest giving the paint 36-48 hours to cure mine was still at a tacky dry stage. I also did every single layer. You can choose just to do your top layer.
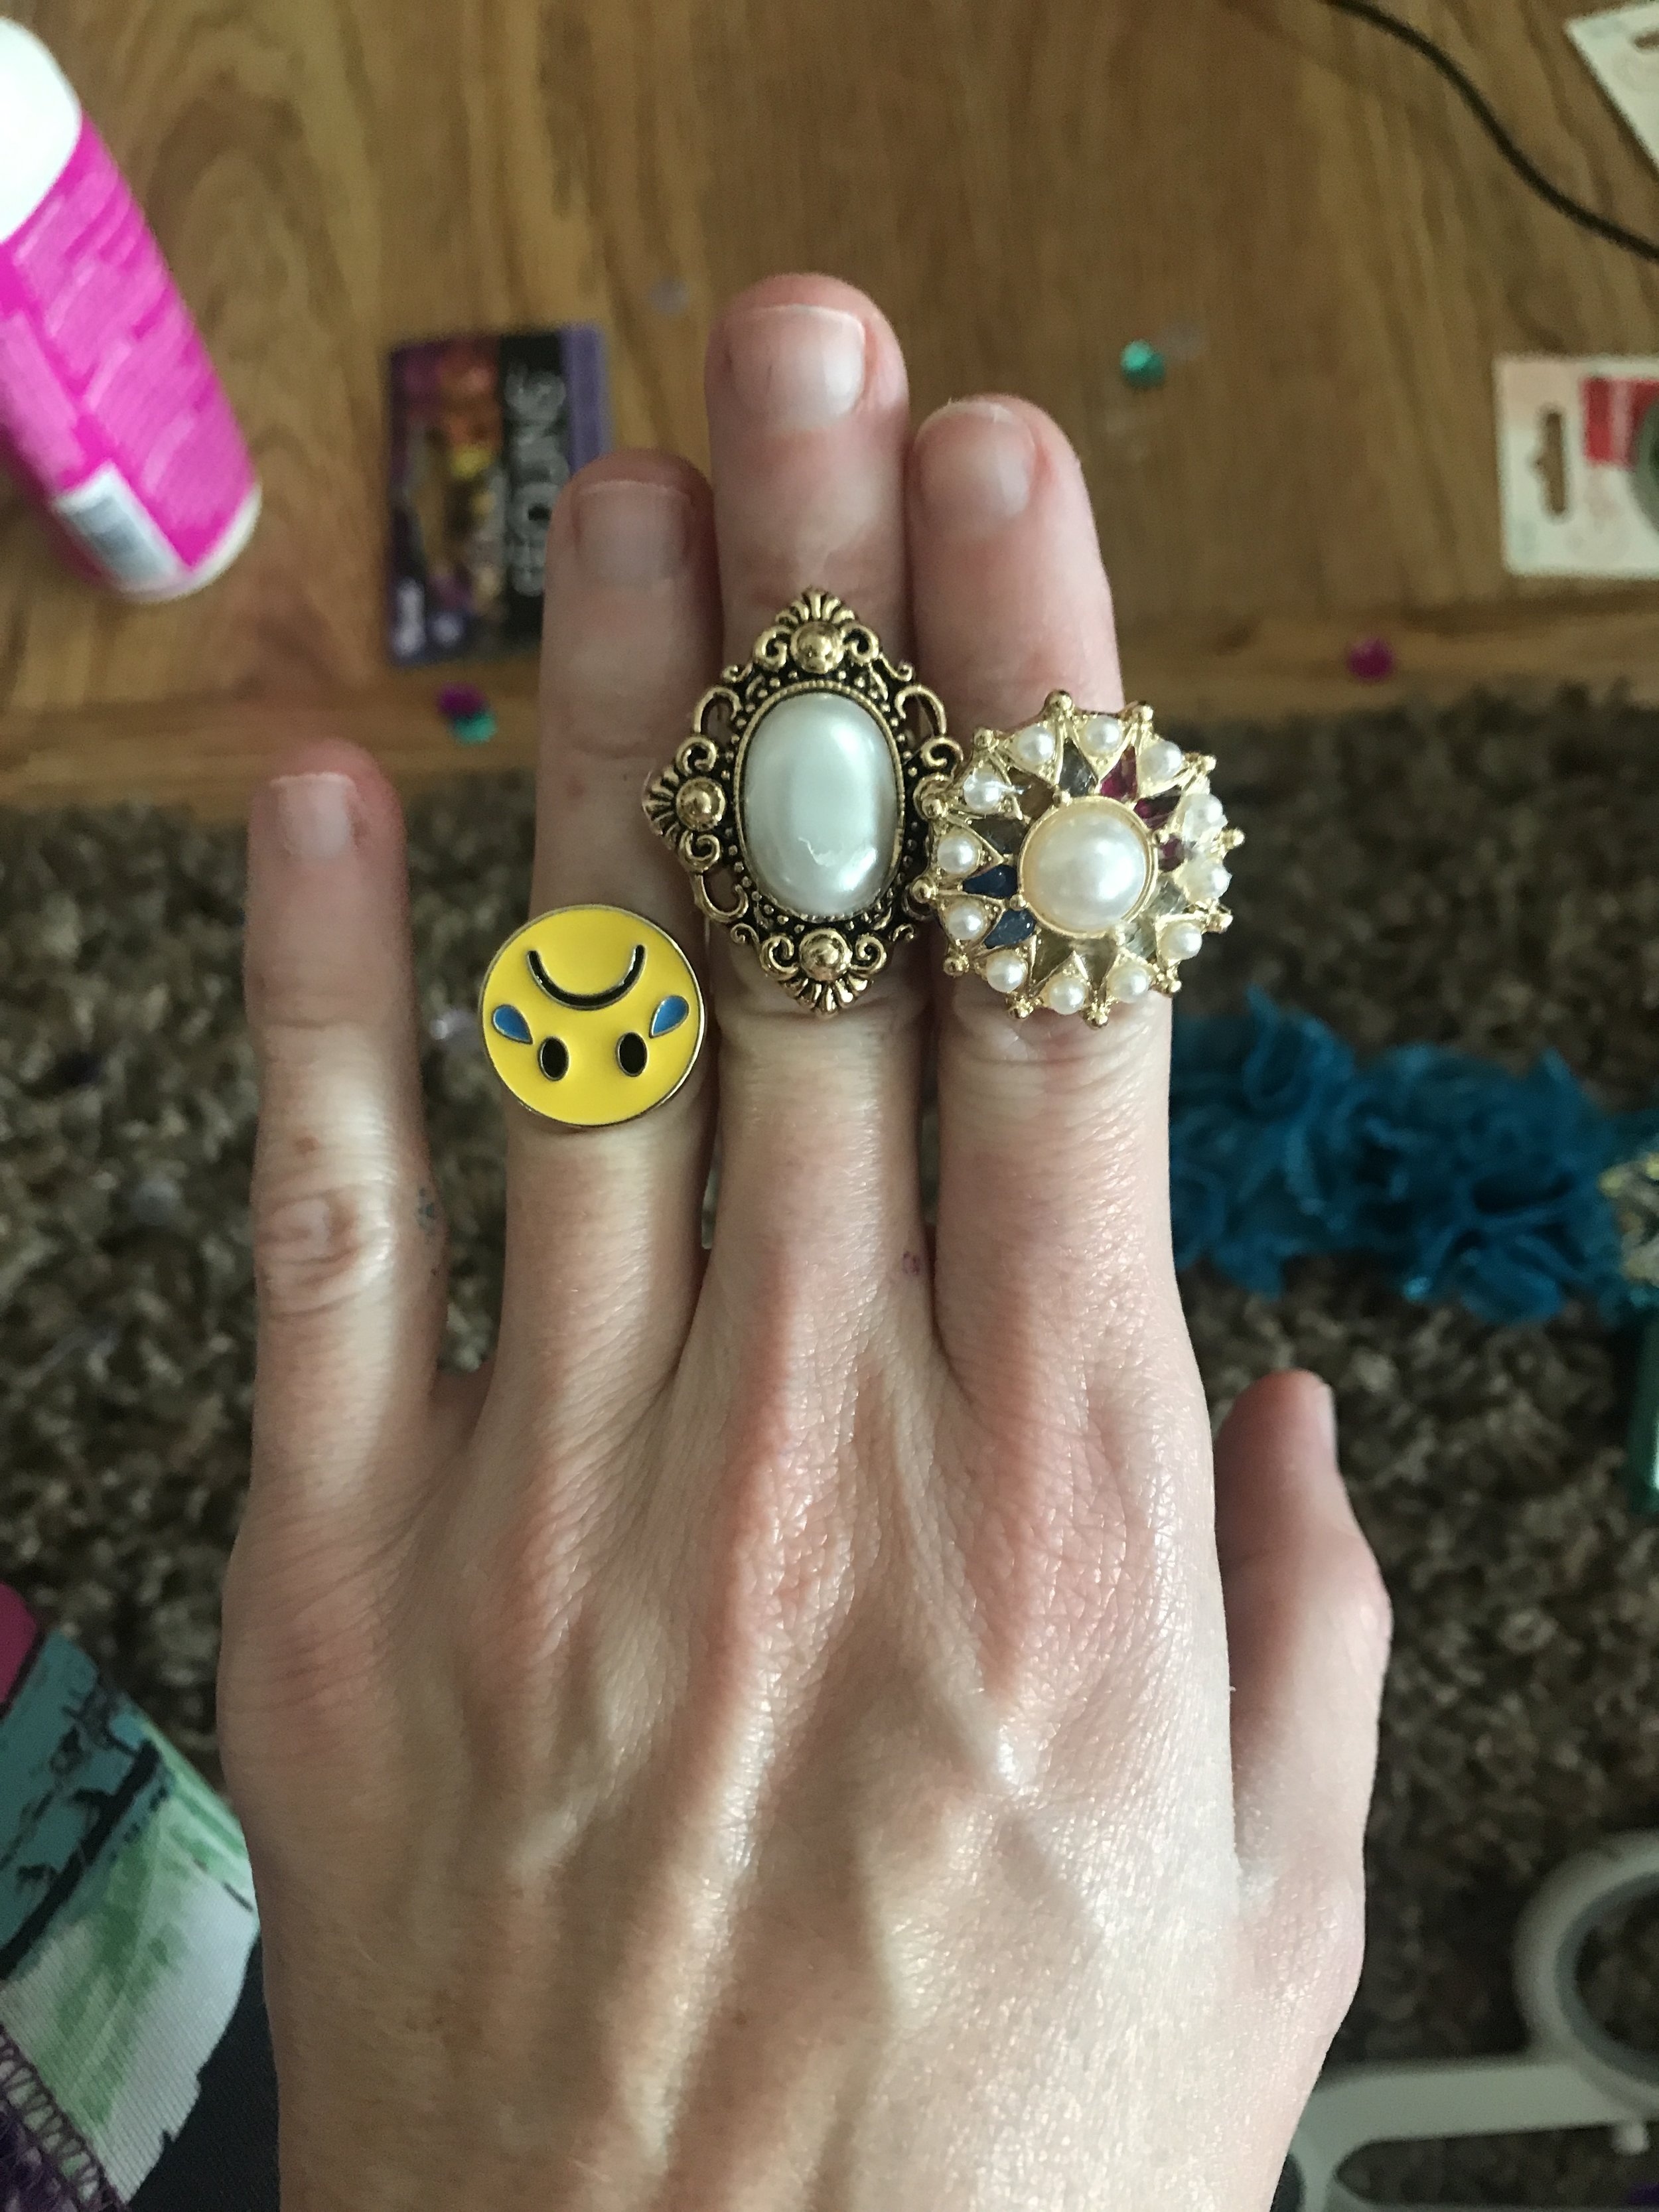
Jewelry: I took cheap Walmart kids adjustable rings and glued some vintage buttons and gems to the rings to give them a much needed face lift. Then the bracelet was $1 Walmart find that I took my extra paint and created my own unique design with. Then my other bracelet was just trim and I added a velcro piece then glued some buttons I found at Joann on sale.
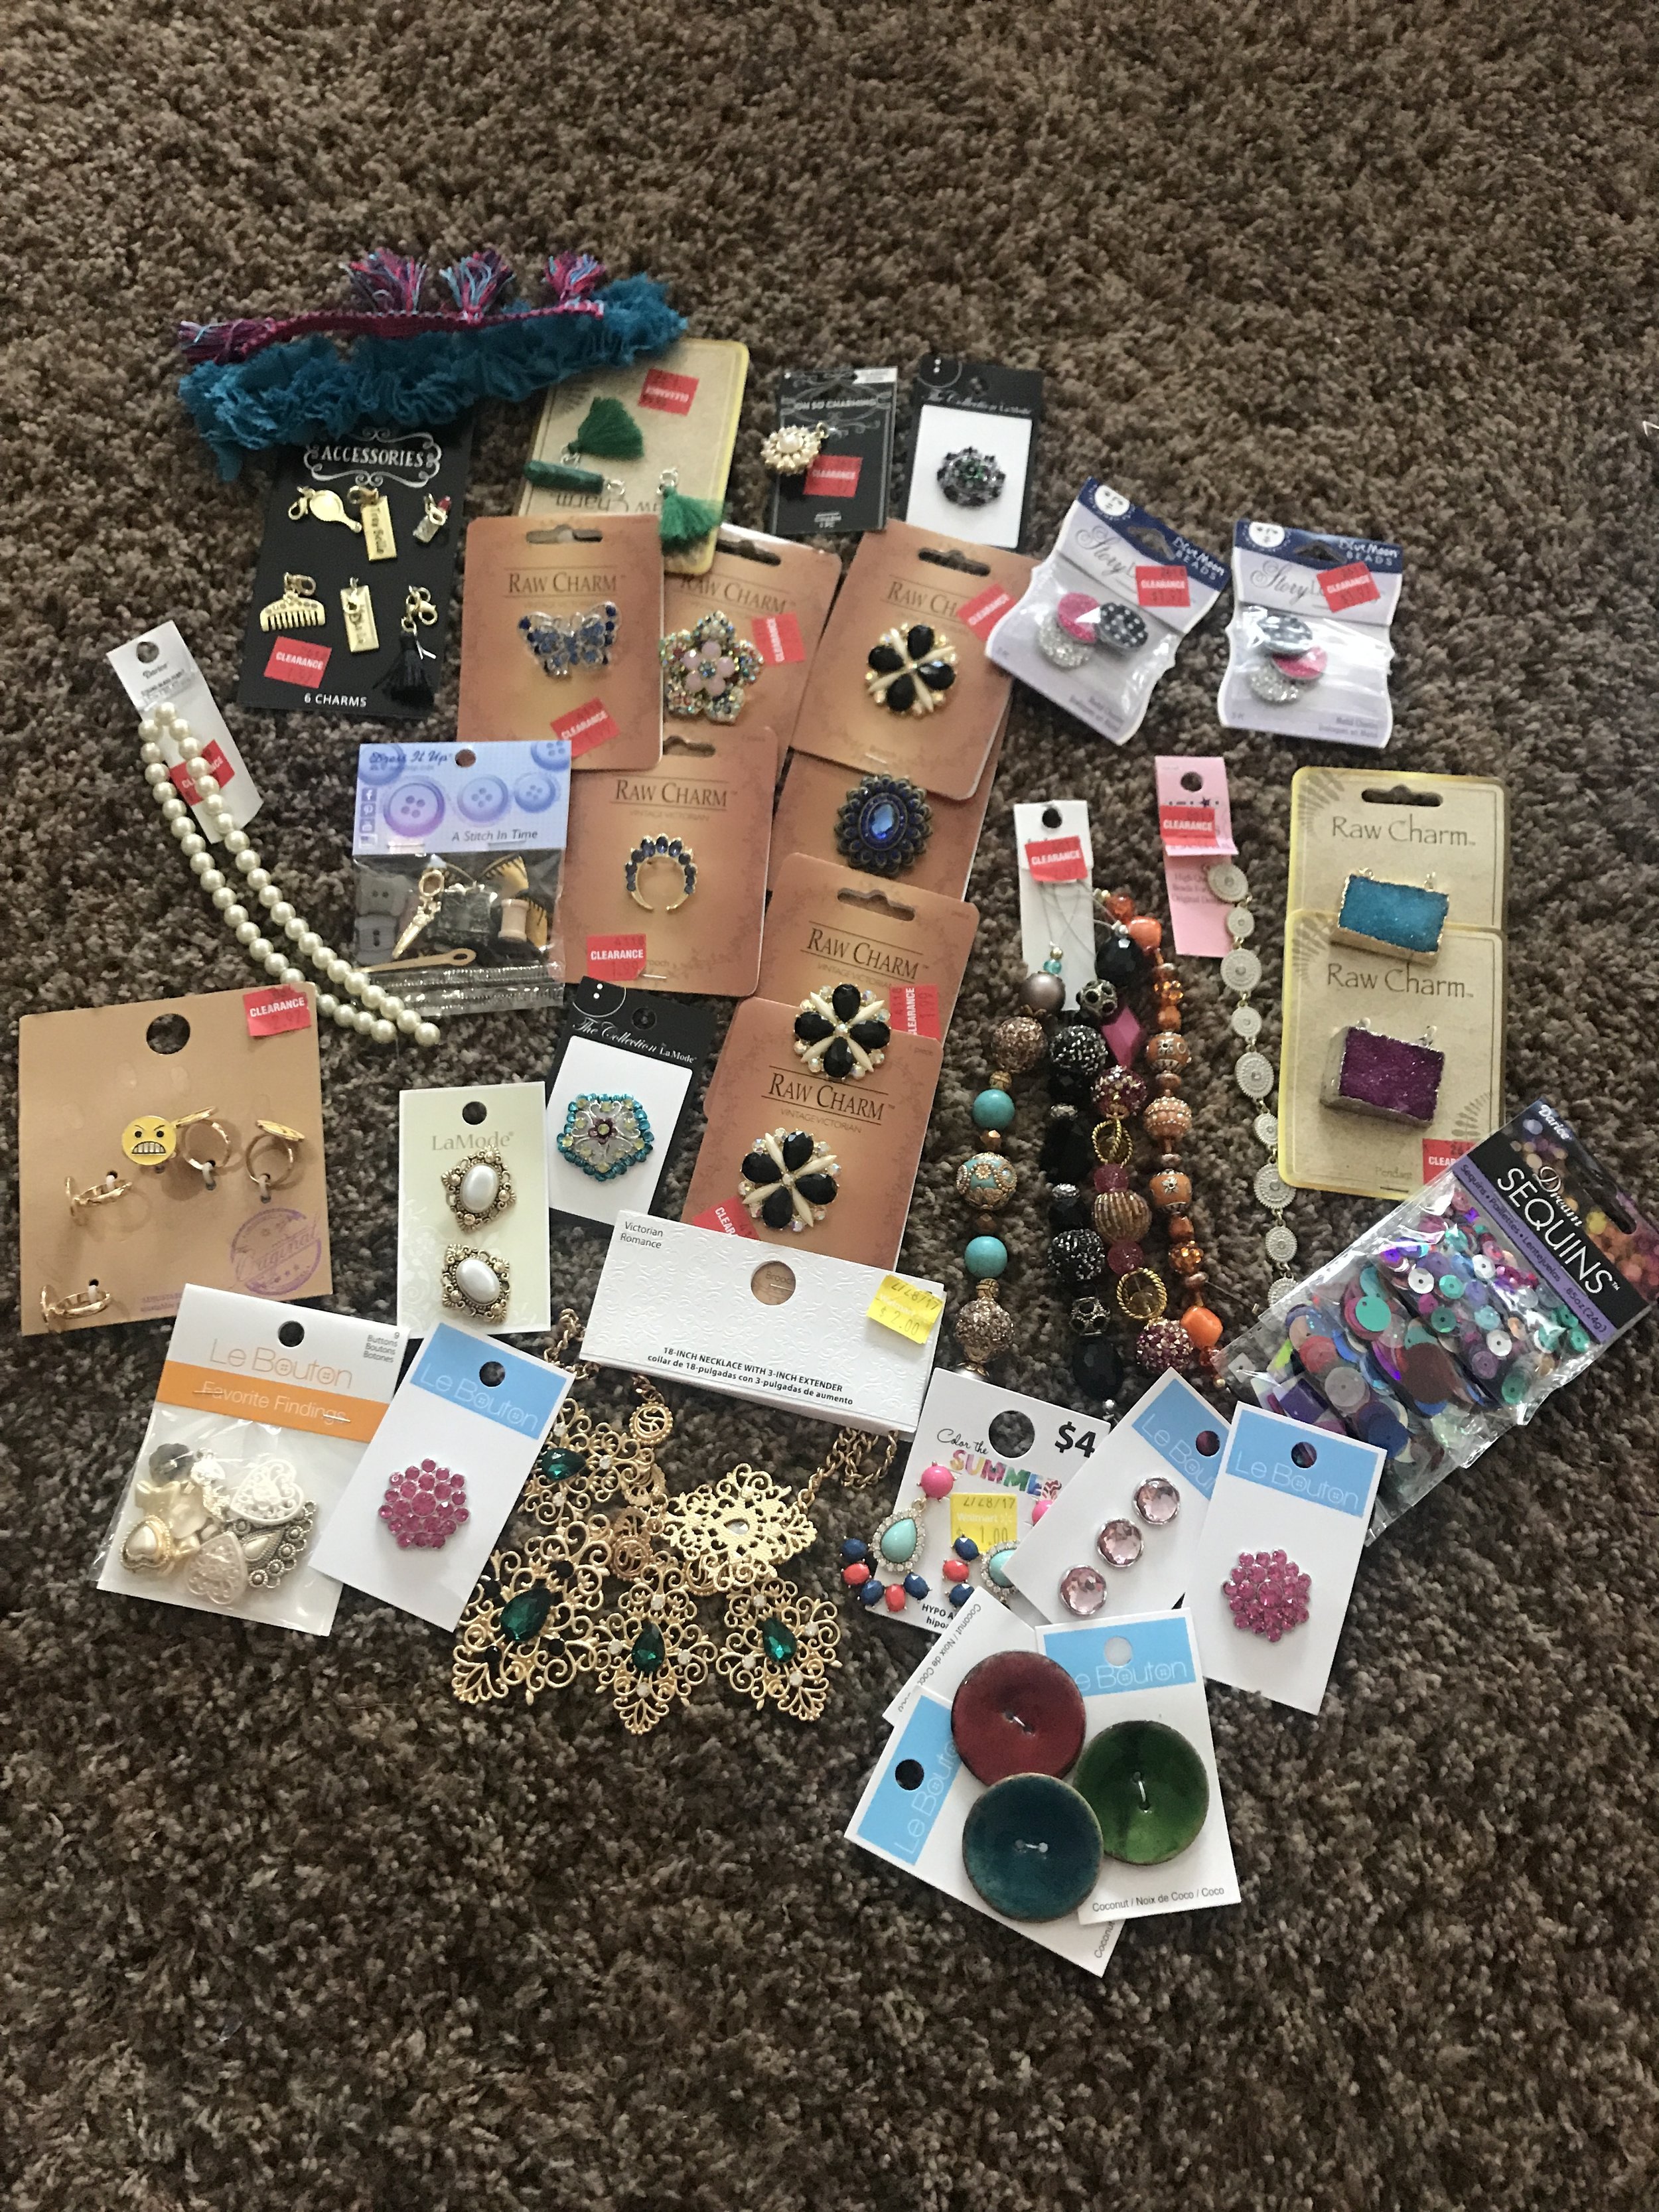


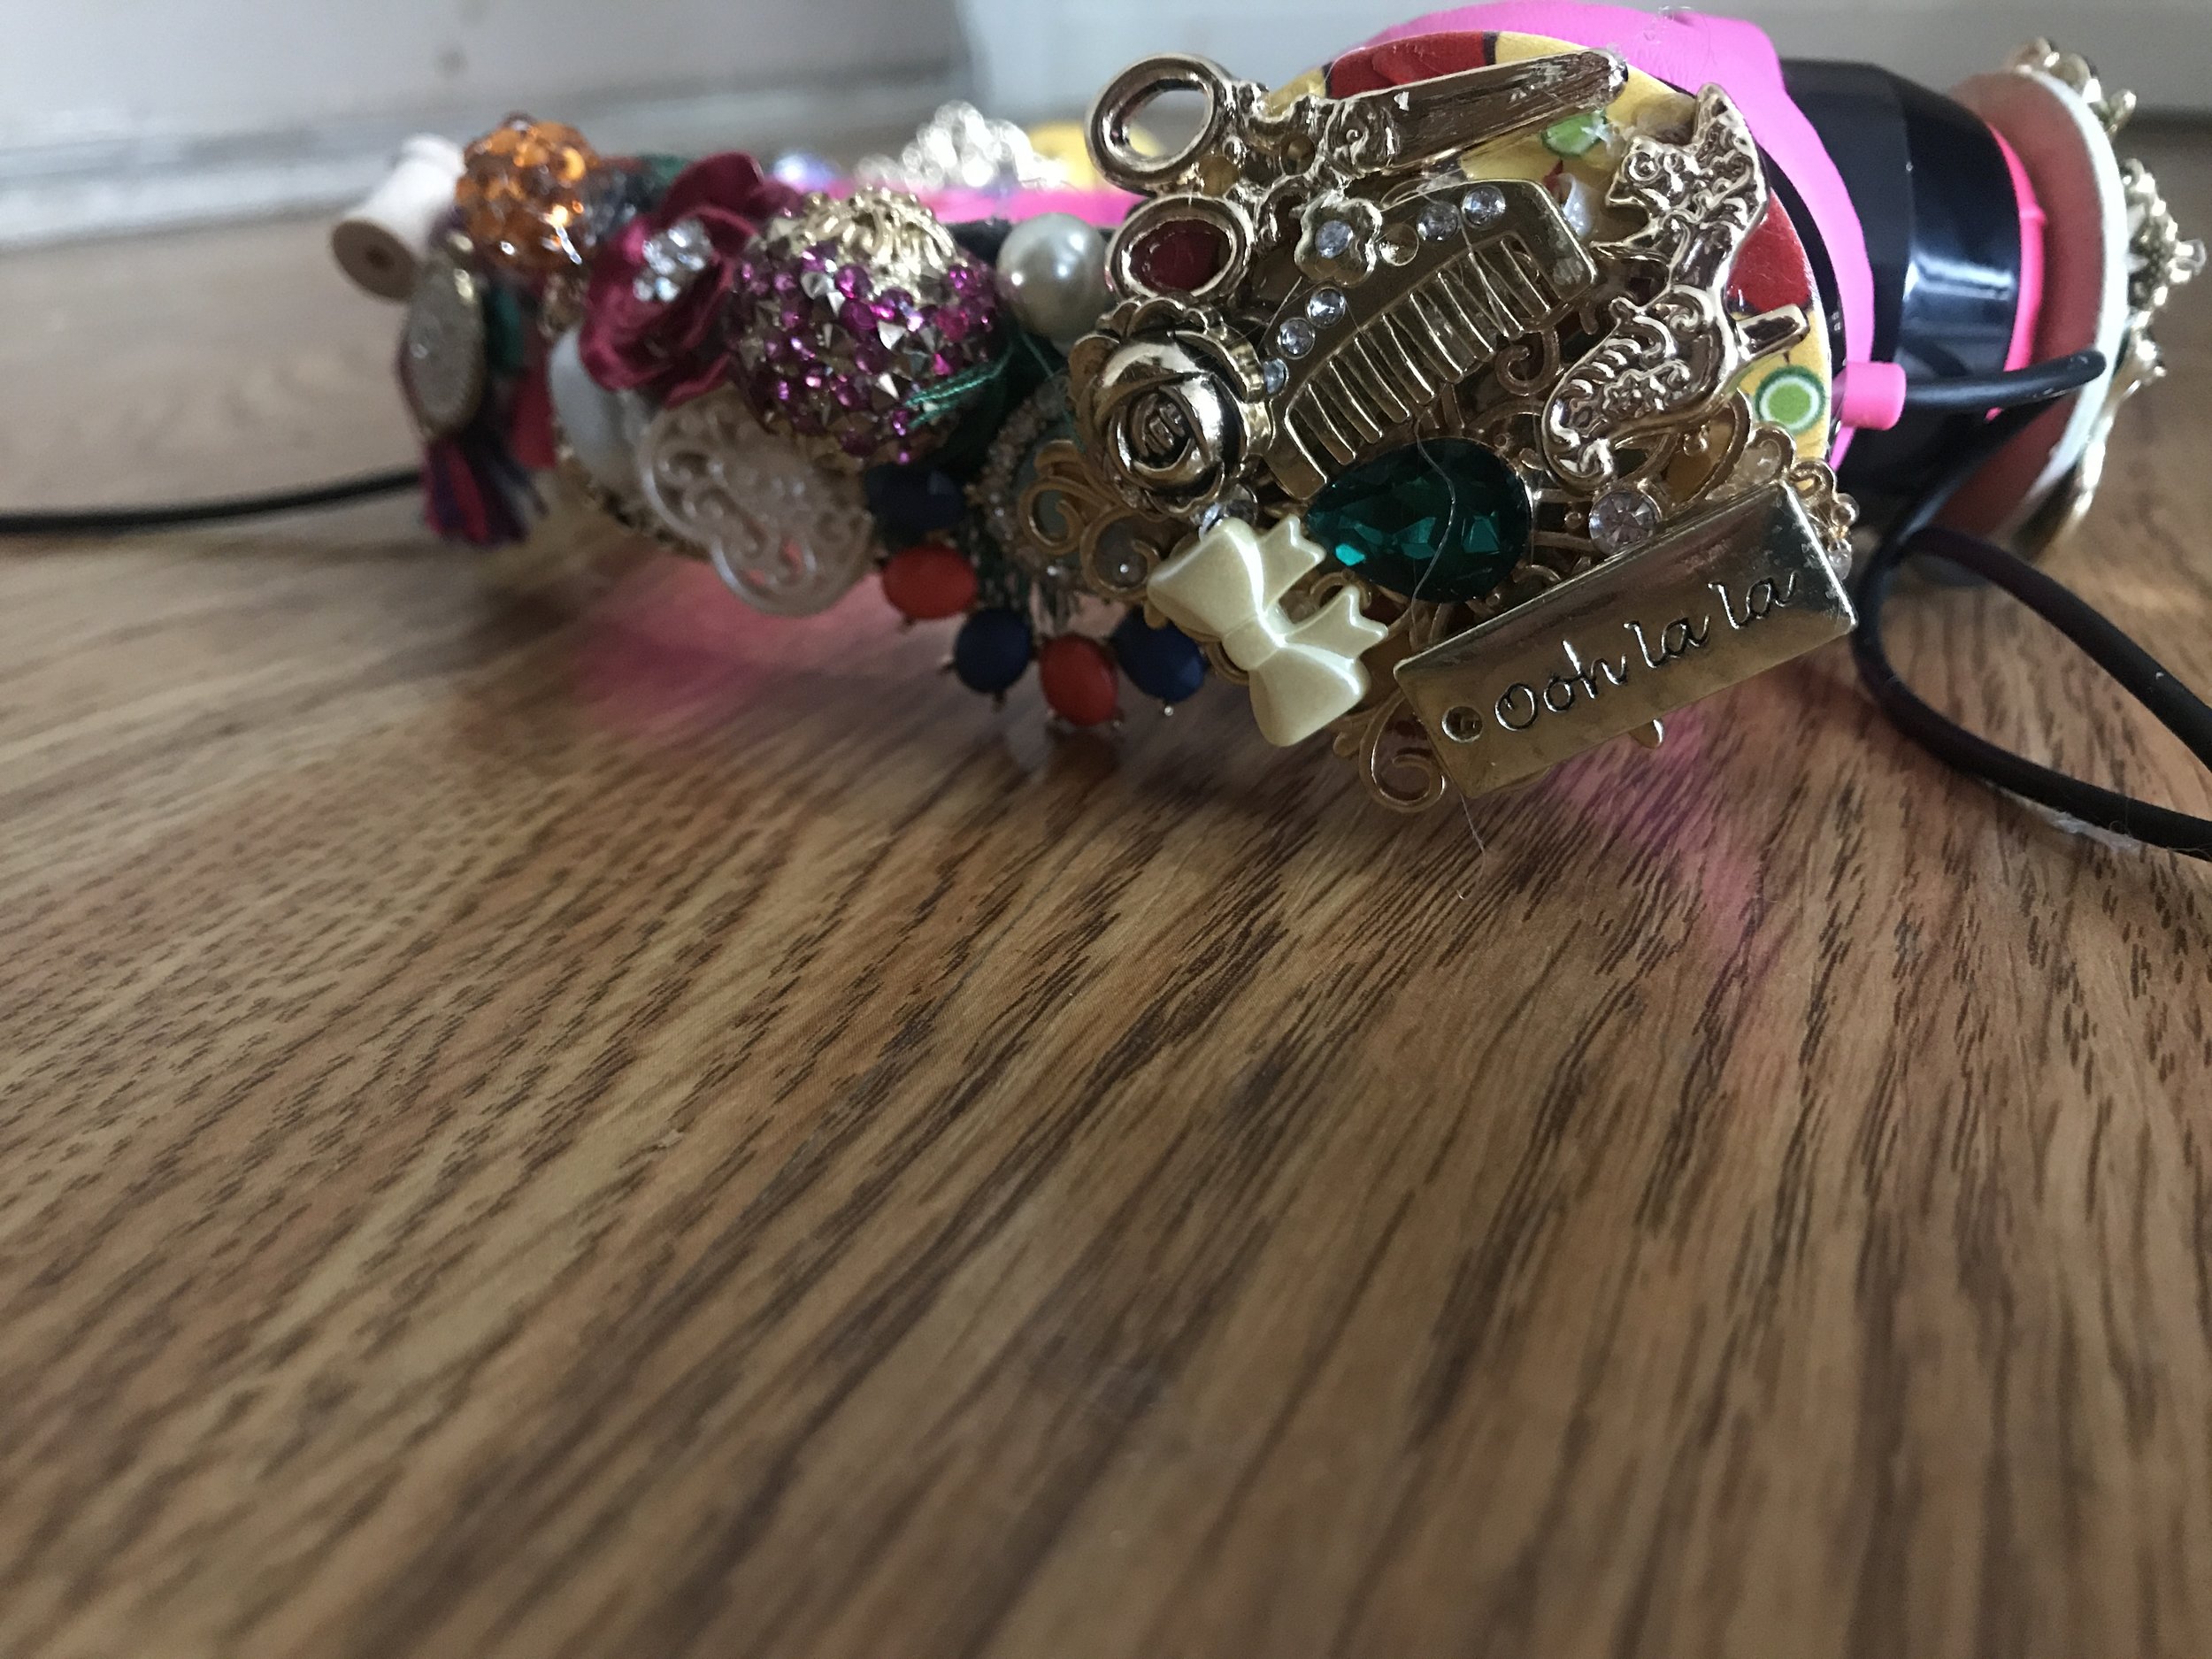
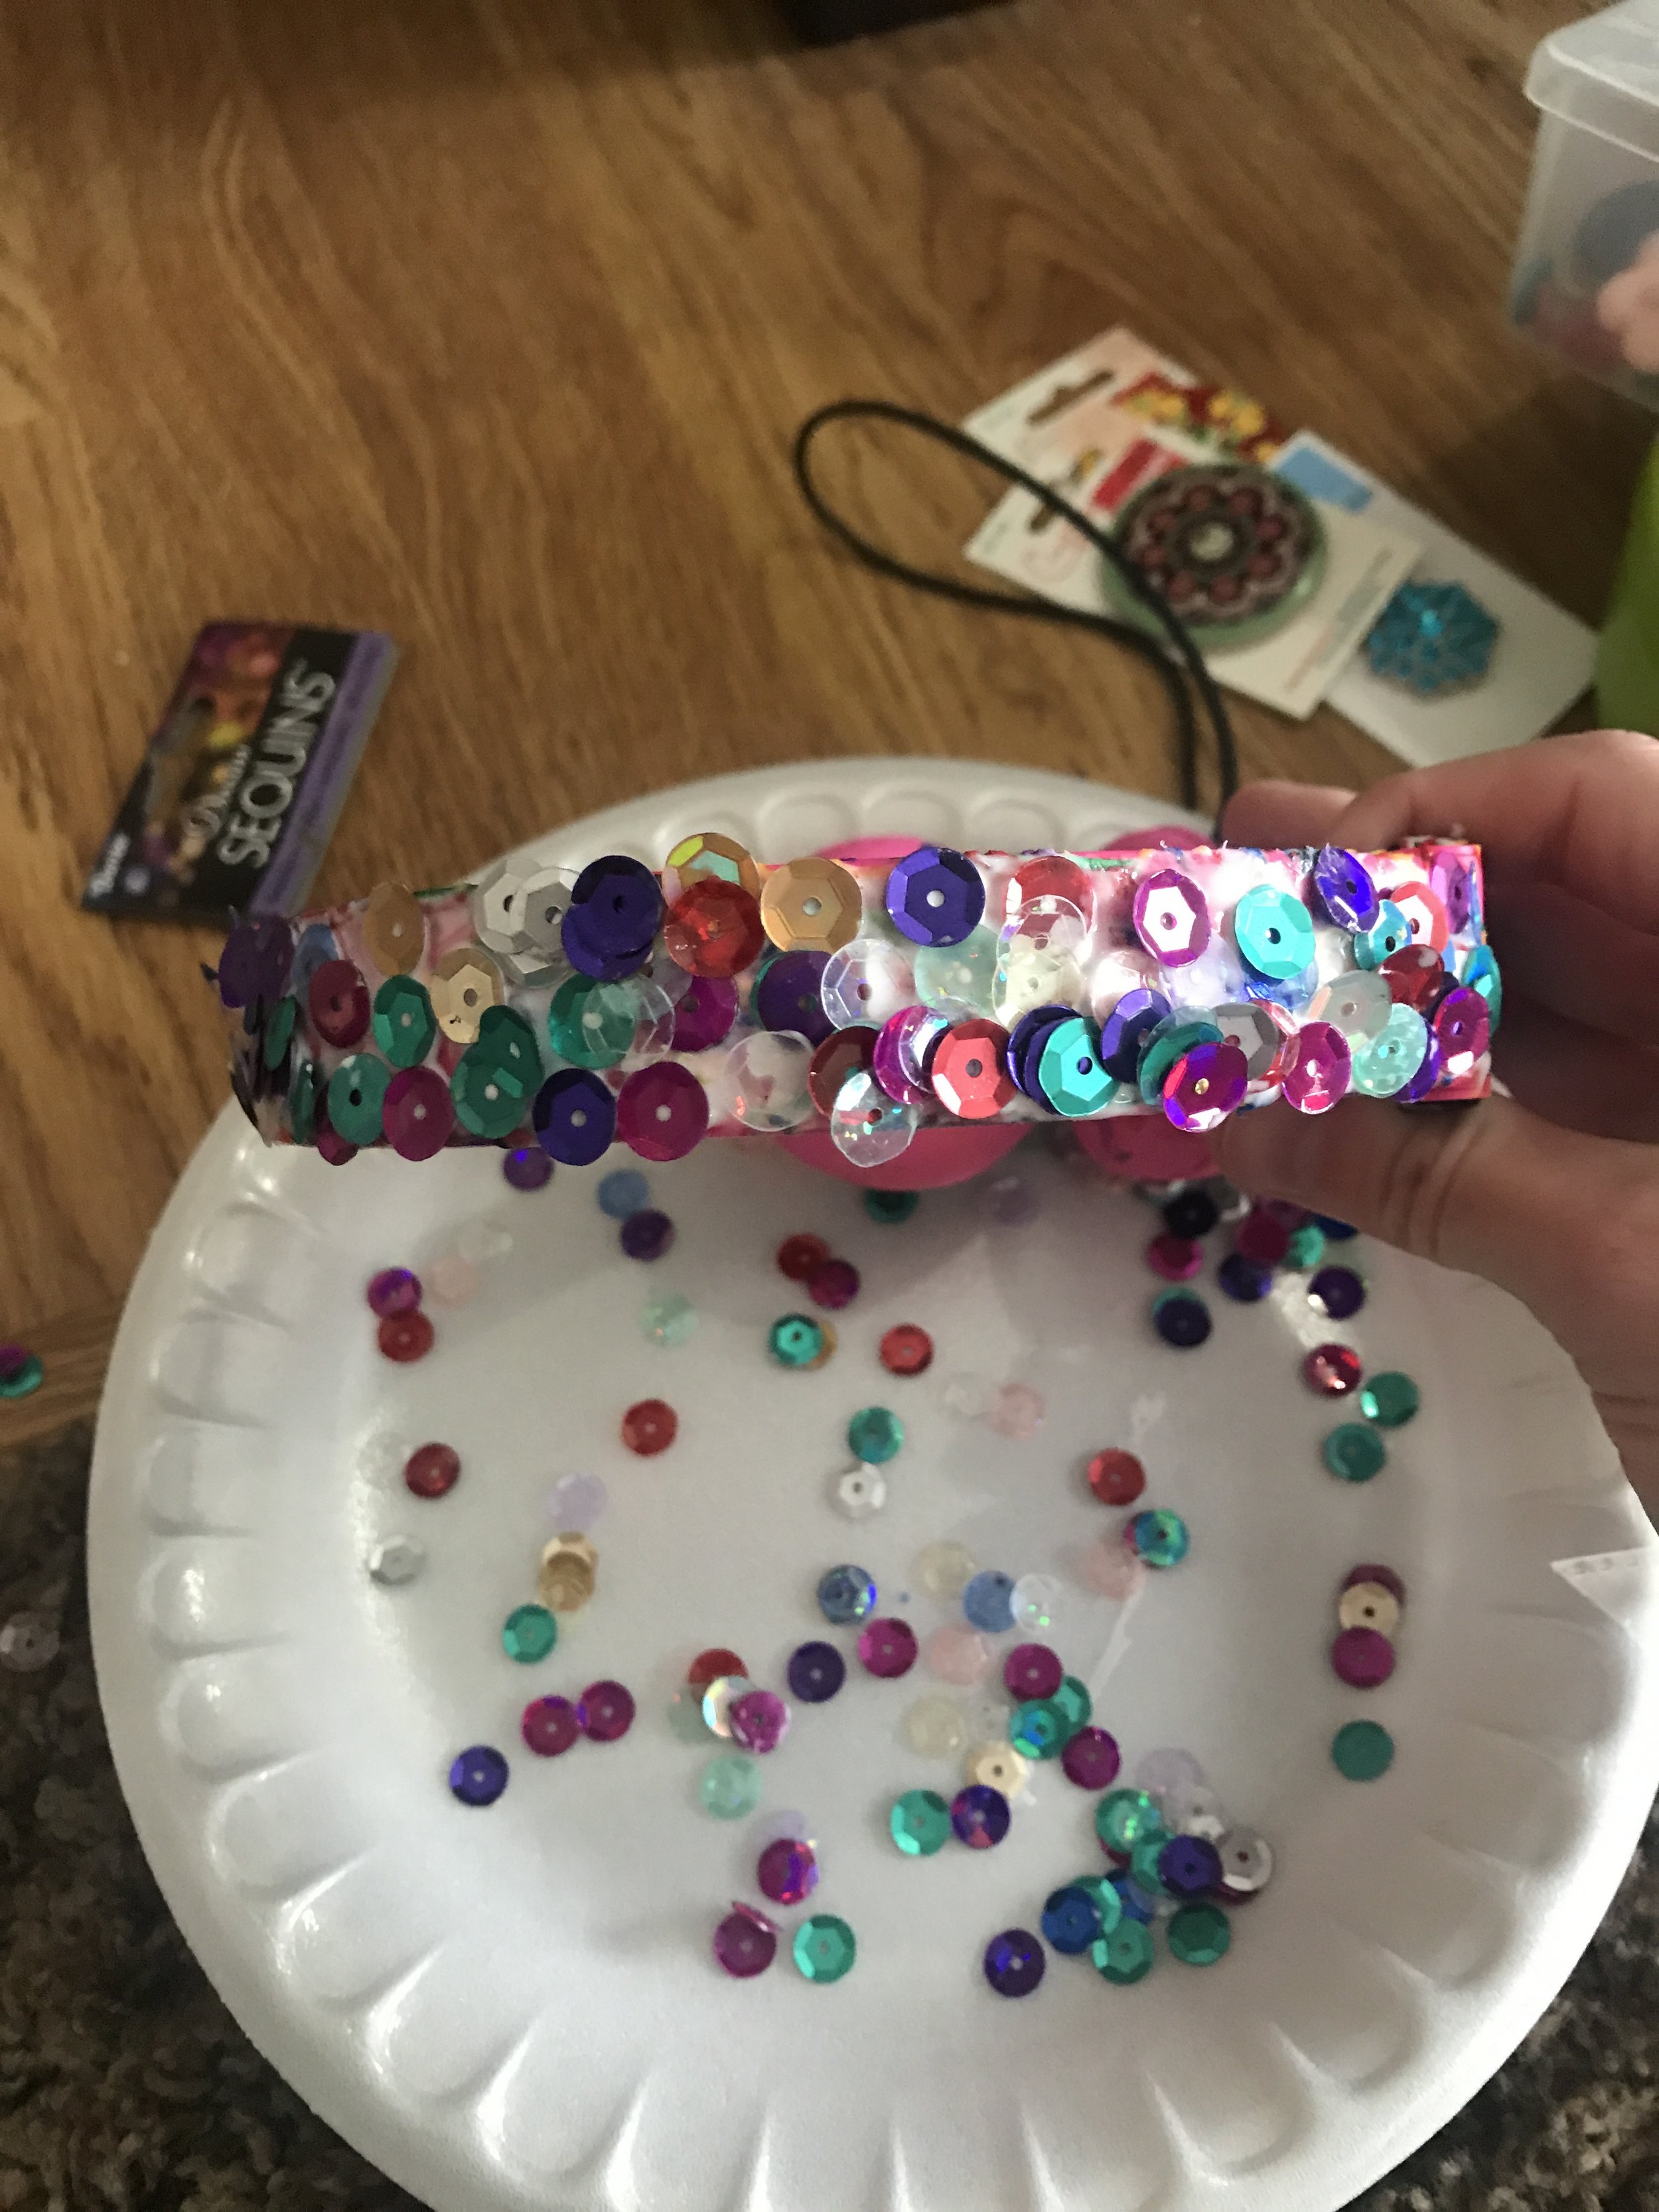
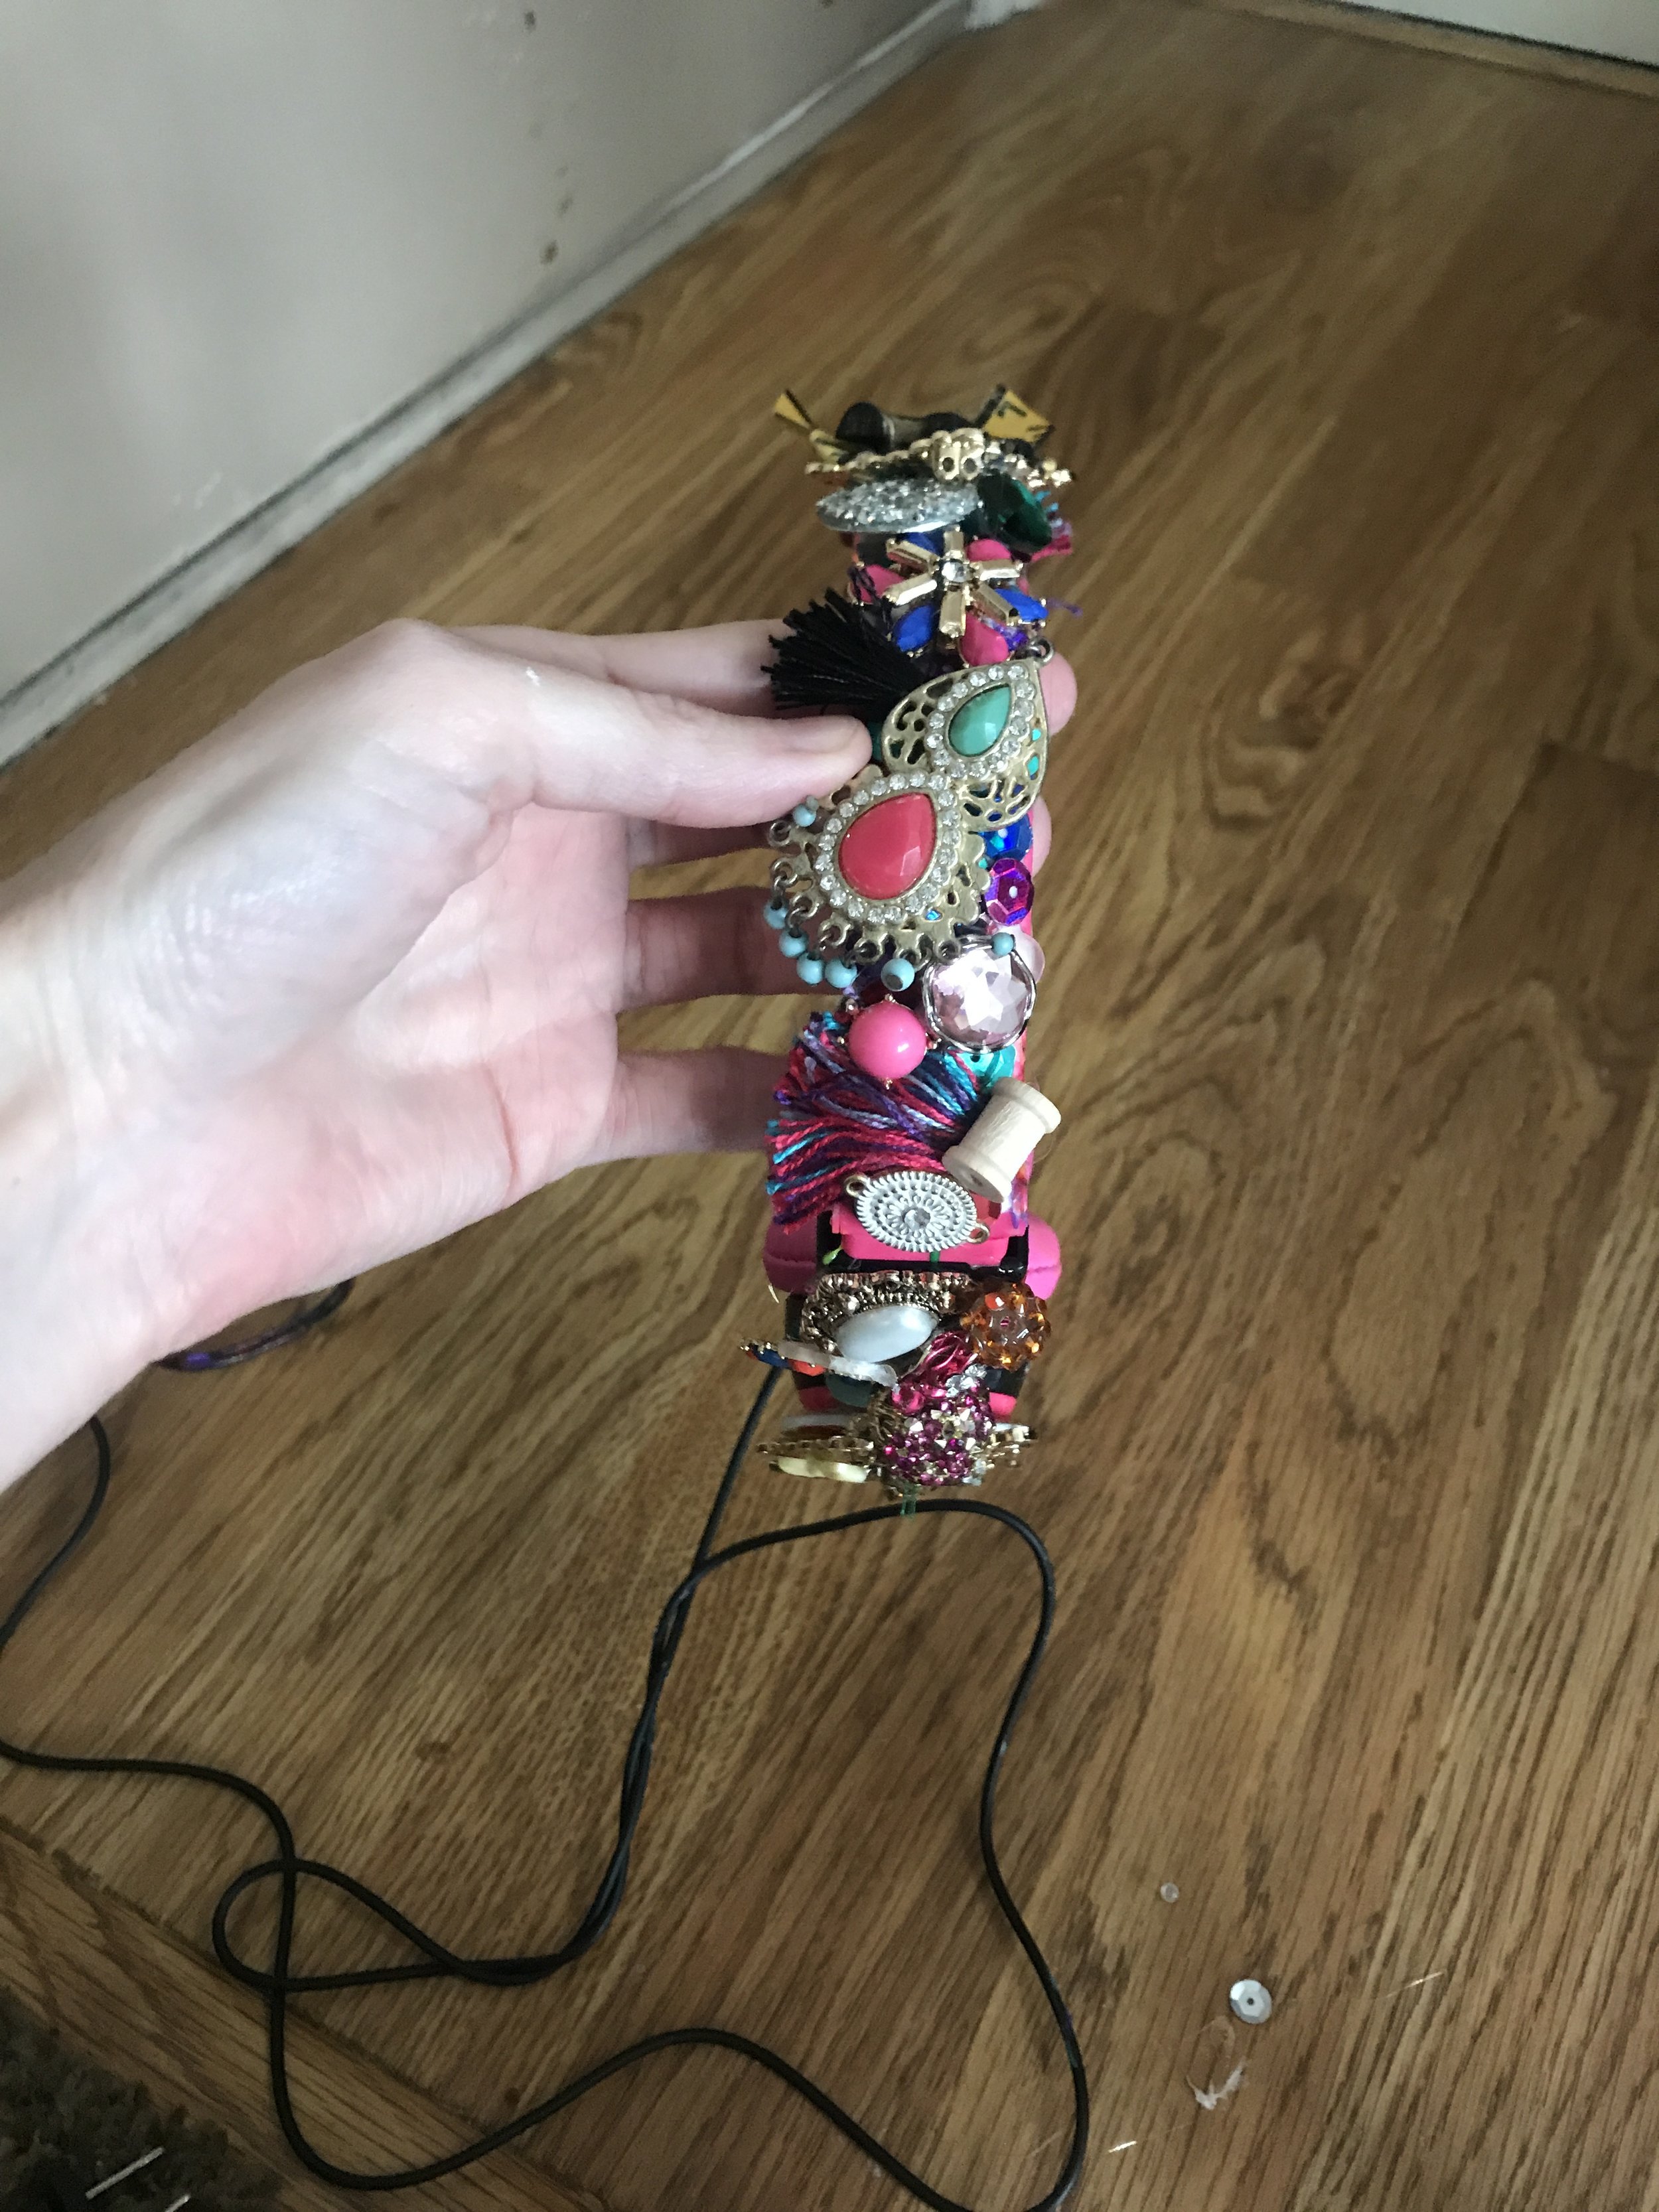
Headphones: I took some modpodge along the band and glued 2 layers of sequin to it before gluing my jewels, gems, buttons, and whatever else I found. I found super cute hairdresser jewelry on sale for $2 at Joann that was perfect for the side pieces. This is all what you like and the style you want to create. I tried my best to recreate certain elements from Dizzy’s headphones into mine but, then I found pieces on sale I loved and thought would be great accents within everything else.

There you have it!! You are ready to create your very own one of a kind Dizzy costume that your daughter will treasure and LOVE wearing!!
Xoxo
Nicole


In honor of Halloween and the creativity it brings out, we are featuring a new guest on the blog. Chance explains how he uses patterns, foam and household tools to bring some of your favorite characters to life. Whether costumes or cosplay, his techniques and tips can help you kick your next project up a notch!