
Costume Series: The "Frog Prince"
/I've got a pretty awful track record with Halloween costumes.
It's not the ideas. I'm pretty good at forming those months in advance and declaring them proudly until... oh... mid October. When I realize I have 2 weeks, no time, no plan and no money for a pre-made costume.
Take two years ago, for example. Kaelyn was 2 months old, and I was all jazzed for my first "family costume": the 3 bears.
My usual late-October panic was starting to set in when I happened to pass a toy aisle in my local discount store. There on the shelves was a perfect newborn-sized teddy bear.
"Hoorah! Why bother finding the perfect costume when I can MAKE one instead? And you, sir, will be my daughter's bear-suit." (Yes. I thought this was a genuinely good idea. Brilliant, even.)
My craft room became a scene out of a Pre-schooler's horror movie. Stuffing and fur were EVERYWHERE! Hours later, I emerged victorious with a bear-body-suit, complete with a velcro closure down the front and a bear-head-turned hood. Way to go, me!
But here's the funny thing about babies. Their proportions are in no way similar to a toy's. The darn thing didn't come close to fitting her. And went in the trash. Immediately.
So burned was I by this "first Halloween" experience, that I decided to plan Everett's first Halloween costume well before his birth. I had my second chance, and I was NOT about to blow it!
August: Costume Idea Decided
Early September: Costume Materials Collected
Late September: **Crickets**
...
Mid October: "OH {insert choice of expletive] NOT AGAIN!"
So Sunday, when the babies were asleep, I sat down with my materials and a glass of wine and did this:

Ribbit!
"So what am I looking at here?"
This is my little froggie, a costume mash-up of two of my favorite Peekaboo Pattern Shop patterns: the Hangout Hoodie and the Classic Footed Pajamas (affiliate links). The construction couldn't have been simpler! Here's how I did it:
1. I sewed the PJs as instructed, minus the neck binding. This went by SO.FAST. It was my first time ever sewing with a zipper, and I had zero troubles. (I was so intimidated by them before, now I just feel silly!)
2. I cut out the hood (1 main, 1 lining), hood binding, and fabric for Frog Eyes. As it turns out - the toe pattern piece from the pjs made a pretty perfect sized pattern piece for eyes! (Or ears. I've now done both)
3. Sewing the eyes: In my case, I needed to cut 6 pieces to make my "eyes": 2 each of "eye lid", "whites", and "iris" (cut from felt, to keep things simple!). Once the eyeball side was assembled to my liking, I sewed them right sides together with their respective eyelids.

The quality of these cell phone pictures are tragic, but hopefully they suit for demonstration purposes! Left: My "eye" pieces, front and back. Right: Sewn, RST, flipped and top-stiched.
4. Now for a place to sew these eyeballs! I sewed my hood pieces per the pattern instructions, then took aside the hood in the main fabric (ONLY! leave the lining untouched!) with my rotary blade and ruler...
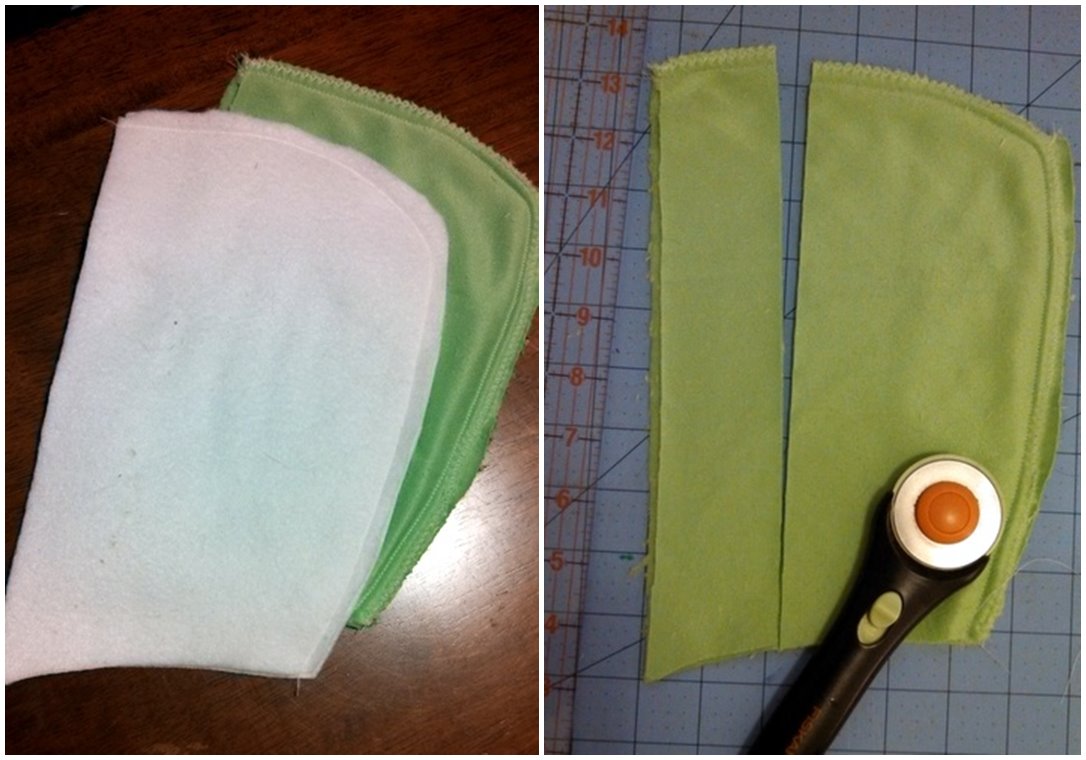
I cut about a 2 inch wide strip from the front of the hood. If you're sewing larger sizes, you may want to cut a wider strip so the eyes rest on top of the head.
5. I then basted the eyes in place to the main hood, being sure to keep them facing the right direction. Satisfied with placement, I re-attached the 2 inch wide hood-strip.

Ta-da! It's starting to look froggy around here!
6. Then I took my two hoods (the now froggy-ish one, and the lining) and sewed them right sides together along the front edge only . (Don't forget, we have to turn it right side out again!)

bye-bye, yucky exposed seams!
7. Returning again to the Hangout Hoodie instructions, I sewed my hood binding along the front edge of my frog/head/hood.
8. Now to attach it to the neck of the pjs sewn in step 1! Make sure you have right sides together, and stitch her up!

9. I took this opportunity to add embellishments. For instance, a "twinkle" in the eye so they looked less like ears, and a froggie tongue on one side of the pjs, and the fly/snack it's trying to catch on the other. Here's the result!


And because every frog prince needs a princess, I threw his big sis in there for a few photos too :)

"Yeah. No way am I kissing my 'Frog/Brother'."

"How about we hug instead?"
I'm glad Everett's first costume was a success! The possibilities for hood-embellished costumes are endless! Which would you make?
Happy Sewing! :)

Becca DuVal is a lifestyle photographer based outside of Richmond, Virginia. She juggles life with two kids, two rescue dogs, and her super-fine husband. She's a hard-core DIY-er who loves sewing, crafting, and tackling home decor projects far outside her skill level.
Blog | Facebook | Twitter | Instagram | Email: becca@beccaduvalphotography.com


