
Halloween Treat Bag by Charming Doodle
/I received a complimentary copy of this pattern in exchange for an objective 3rd party review.

Trick or treat! It's that time of year again, when every sewing mama is scrambling to get the last minute details added to perfect their custom made kiddie costumes. If you're going to work that hard on a costume, you really shouldn't send those cuties out with a dollar store plastic pumpkin or a Walmart bag to collect candy in, right??? OK, I am guilty of it myself...my oldest is 8...has never had a cool treat bag, but all that is going to change this year thanks to the new pattern by Charming Doodle called the Halloween Treat Bag.
There's a chance to win a copy and a snazzy discount code at the end of this post.
~~~~~~~~~~
I'm not a fan of working with felt, so I was very happy to see that you can actually use a variety of fabrics for the pattern. I chose to make mine out of quilters cotton woven fabrics. The pattern includes fabric requirements, recommendations, and a list of all supplies you will need to complete the project. It has instructions for all of the baskets pictured above (monster, cat, fairy princess, strawberry and Jack O Lantern) and it includes a handy printing guide so you only print the pages for the pieces you need for your selected design.


I decided to leave the face off my pumpkin because I thought maybe I would use it for fall decor past Halloween and into Thanksgiving. I was thinking I would put a bowl down inside with a glass frog for some fresh flower arrangements, or maybe fill it with some cinnamon scented pine cones. I did that last year with a real pumpkin, but alas, the pumpkin rotted too quickly! As you can see, it also makes a nice apple basket for healthy snacks to leave out for the kids!


If you're one of those brave families that leaves all the candy on the porch while you go out and take your own kids trick or treating, this basket would be the perfect thing to leave it in. Of course, you'll have to make an extra one because your kid will want to take it too!

I thought the instructions were clear and concise. The pattern printed beautifully, and you'll only need to use 1 piece of tape putting it together, so very simple there. You do have to do a lot of cutting for this pattern between the outer, lining and stabilizer, but you can fold your fabric over and cut a couple at a time if you use something lightweight like I did. I did find working with the Peltex a little difficult, and found myself struggling to manage the bulk of the pumpkin while attaching the round bottom to the outer shell. I have never really worked with ultra stiff stabilizers before though, so I'm mainly chalking that up to inexperience, but you should know that one step is a bit of a doozie. Just take your time, and use a walking foot if you have one. If I make another one, I may use a lighter weight stabilizer or even fusible fleece to make it a bit easier on myself and my machine.

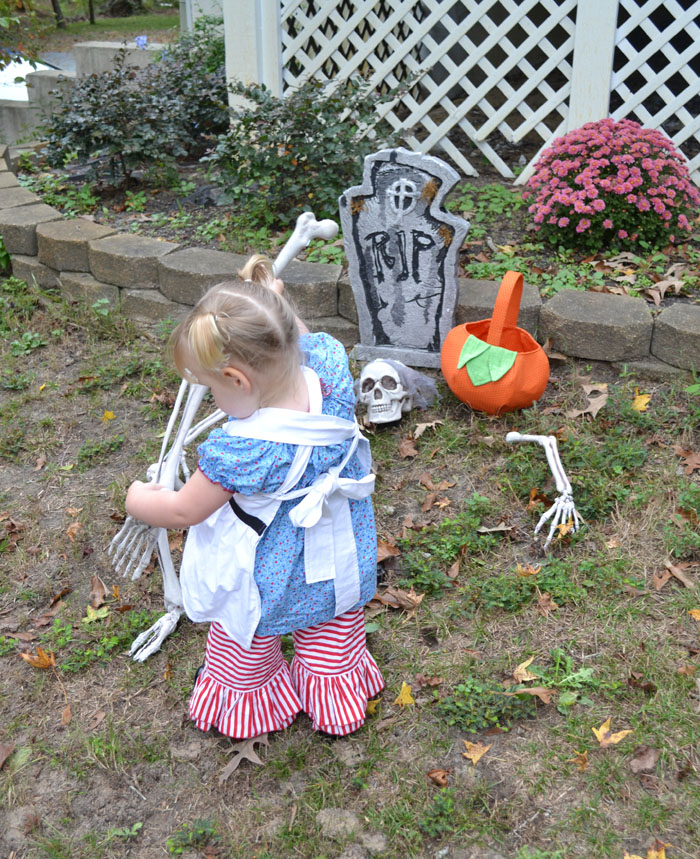
As you can see, my little girl loved her pumpkin treat bag.

She thought it was perfect for collecting fall leaves from the ground.

And now she's all ready for the big day!
I'm sure she is going to FLIP OUT when she realizes people are giving her candy at every stop! This should be a fun Halloween!

Pattern Revolution readers can use the code REVOLUTION to receive the pattern for only $5 now through Halloween: http://www.etsy.com/shop/CharmingDoodle or enter to win a copy below!


