
The Grace Dress by Boo! Designs
/Today we take a look at the Grace Dress by Boo Designs - OMG, the cuteness, I am adding this pattern to my must make list NOW!
We have Serena and Melissa here to show off two different variations... be warned, by reading the following you are going to AWWWWWWW out loud!
----------------------------------------------
Sewing made easy, sign me up! Easy pattern, spelled out clearly, and options is what the Design Your Own 'Grace Dress' spells! This pattern is for an intermediate sewer but I think it could possibly be closer to a beginner because it was easy and I didn't have any questions putting it together. I like to think I'm an intermediate sewer but some things trip me up. - This pattern is sized from a 12 month up to a girls' size 6.
- There is an option for a tunic top as well as dress lengths.
- 5 different skirt options for all sorts of wear.
- 2 different strap options.
- Directions to leave back open for tunic or close it up.
These days with 2 kiddos around the house I like to choose a quick sew rather than a week long project. It seems every time I sit down at my machine I hear 'MOMMY', so a quick sew is perfect for me. This tunic top took me from start to finish about 1.5 hrs. I did a size 2 for my little, the fit is great and with a bit of room to grow, I like having a little extra room and it not be too tight, toddlers are finicky with garment fit. The large buttons are the perfect touch to add a different color and make the top pop, this is my favorite part!
- This pattern is sized from a 12 month up to a girls' size 6.
- There is an option for a tunic top as well as dress lengths.
- 5 different skirt options for all sorts of wear.
- 2 different strap options.
- Directions to leave back open for tunic or close it up.
These days with 2 kiddos around the house I like to choose a quick sew rather than a week long project. It seems every time I sit down at my machine I hear 'MOMMY', so a quick sew is perfect for me. This tunic top took me from start to finish about 1.5 hrs. I did a size 2 for my little, the fit is great and with a bit of room to grow, I like having a little extra room and it not be too tight, toddlers are finicky with garment fit. The large buttons are the perfect touch to add a different color and make the top pop, this is my favorite part! There are only 3 pattern pieces to cut out and if you choose not to do the strap ruffle there are only 2 pieces to cut out. The fewer pieces the better! With this pattern you can get creative and if you struggle with being creative there is a page of inspiration ideas and a list of different options. The pattern illustrations are fabulous, the best I've seen in any PDF pattern yet! I'm a visual learner so this makes it easy peasy.
 - This pattern is sized from a 12 month up to a girls' size 6.
- There is an option for a tunic top as well as dress lengths.
- 5 different skirt options for all sorts of wear.
- 2 different strap options.
- Directions to leave back open for tunic or close it up.
These days with 2 kiddos around the house I like to choose a quick sew rather than a week long project. It seems every time I sit down at my machine I hear 'MOMMY', so a quick sew is perfect for me. This tunic top took me from start to finish about 1.5 hrs. I did a size 2 for my little, the fit is great and with a bit of room to grow, I like having a little extra room and it not be too tight, toddlers are finicky with garment fit. The large buttons are the perfect touch to add a different color and make the top pop, this is my favorite part!
- This pattern is sized from a 12 month up to a girls' size 6.
- There is an option for a tunic top as well as dress lengths.
- 5 different skirt options for all sorts of wear.
- 2 different strap options.
- Directions to leave back open for tunic or close it up.
These days with 2 kiddos around the house I like to choose a quick sew rather than a week long project. It seems every time I sit down at my machine I hear 'MOMMY', so a quick sew is perfect for me. This tunic top took me from start to finish about 1.5 hrs. I did a size 2 for my little, the fit is great and with a bit of room to grow, I like having a little extra room and it not be too tight, toddlers are finicky with garment fit. The large buttons are the perfect touch to add a different color and make the top pop, this is my favorite part! There are only 3 pattern pieces to cut out and if you choose not to do the strap ruffle there are only 2 pieces to cut out. The fewer pieces the better! With this pattern you can get creative and if you struggle with being creative there is a page of inspiration ideas and a list of different options. The pattern illustrations are fabulous, the best I've seen in any PDF pattern yet! I'm a visual learner so this makes it easy peasy.
Hello Pattern Revolution Peeps! My name is Melissa. I am the girl behind Emby Designs, which is named after my two princesses, Emma & Abby. (You can also find me here on Facebook.) I stay home with and homeschool my two beautiful princesses. My interest in sewing developed after having my oldest, but over the last few years my love for it has really grown. When I have time to sew for others I love to create beautiful things for other little girls to enjoy, too!
I was honored to once again be asked to do a review for Pattern Revolution. Up this time is BOO! Designs and the Design Your Own Grace Dress. The size range on this one is 12M-6y. (Need a size larger than this, don't bail just yet. Keep reading!) It is rated as an intermediate pattern. Design your own, what is this you ask? Well, this pattern has a few different options for you to choose from. You choose which options you like best, put them together and you've designed your own Grace Dress.
What kind of options you ask? That's a good question, too! So, here's what you get to choose from:
- 2 bodice/strap options-1 bodice has flutters on the straps and one doesn't,
- 2 lengths to choose from-tunic and dress, and
- 5 skirt options
- Vanilla (simple skirt using selvage width & no side seams),
- Border (for using those awesome fabrics with borders along the selvage edges & no side seams),
- Play Date (great everyday twirl & has side seams where pockets can be added!),
- Party (ultimate full twirl skirt),
- Princess (2 tier skirt using selvage widths)
The dress has a fully lined bodice with the skirt seam enclosed in the bodice & lining and the back closes with two buttons. Oh, and the pattern lists all measurements in both inches and centimeters (or yards and meters for fabric requirements).
Here is my youngest, age 6, wearing the size 6. She normally wears a size 6 in RTW clothing.


The bodice is a bit too big on her, hence the shirt underneath. (And the hunt for a white shirt for these pictures led me to one conclusion...she needs some white shirts!) I must admit, this was my fault for not paying more attention to the measurements given in the pattern. In this pattern, her chest measurement actually falls into the size 2 range so the bodice is way too big! So ladies, PLEASE don't be like me here. Compare your child's chest measurement to that of the pattern and choose your bodice size accordingly. The pattern DOES include a page on getting the right fit. It shows you how to cut your different pieces when your child falls into one size for chest measurement and into another size for height measurement. (And here is where you are glad that you didn't bail if you needed a larger size. I believe this size 6 bodice would easily fit my 8 year old and since the skirt pieces are simple rectangular cuts, it would be pretty easy to size that part up to get the length you need. So, if you need a size larger than a 6, be sure to check on the measurements first because this might still work for you.)
Now if you recall, I mentioned pockets before on the play date skirt. The pattern does include pattern pieces for inseam pockets and instructions on sewing them. WAHOO!!! I don't know about your girls, but mine LOVE pockets. I love that I can add pockets to this beauty and I'd say my girly was pretty happy with them, too!


(haha, windy much?)
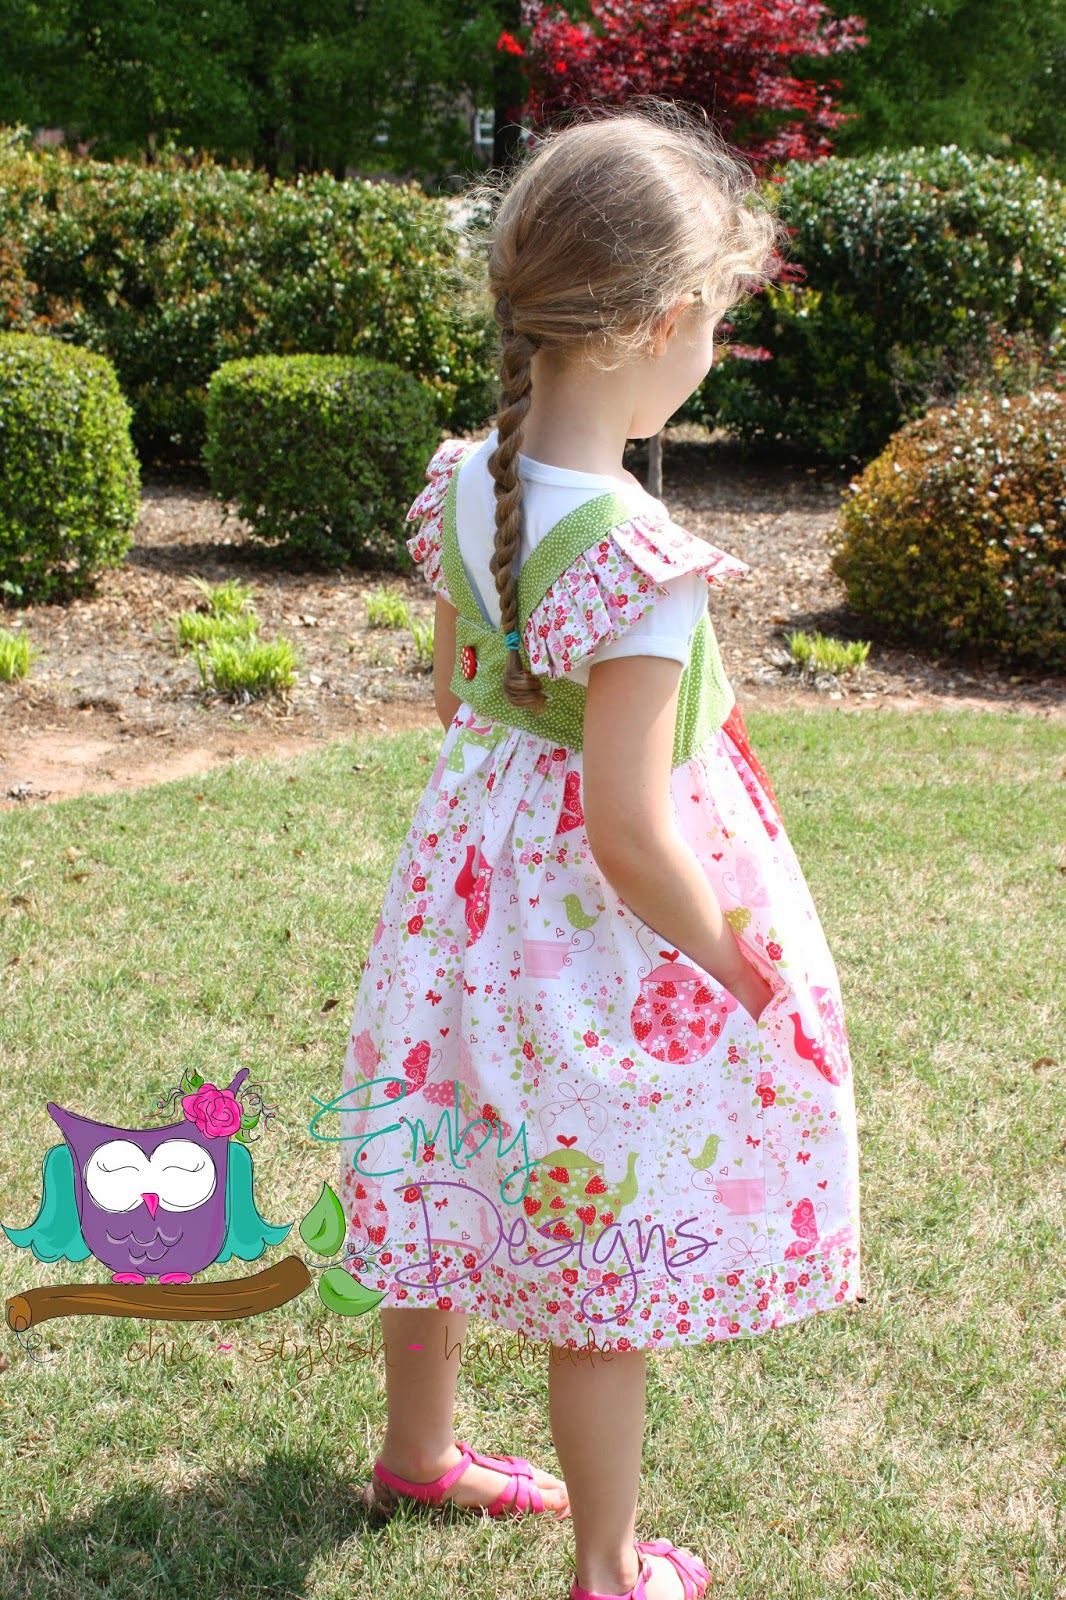

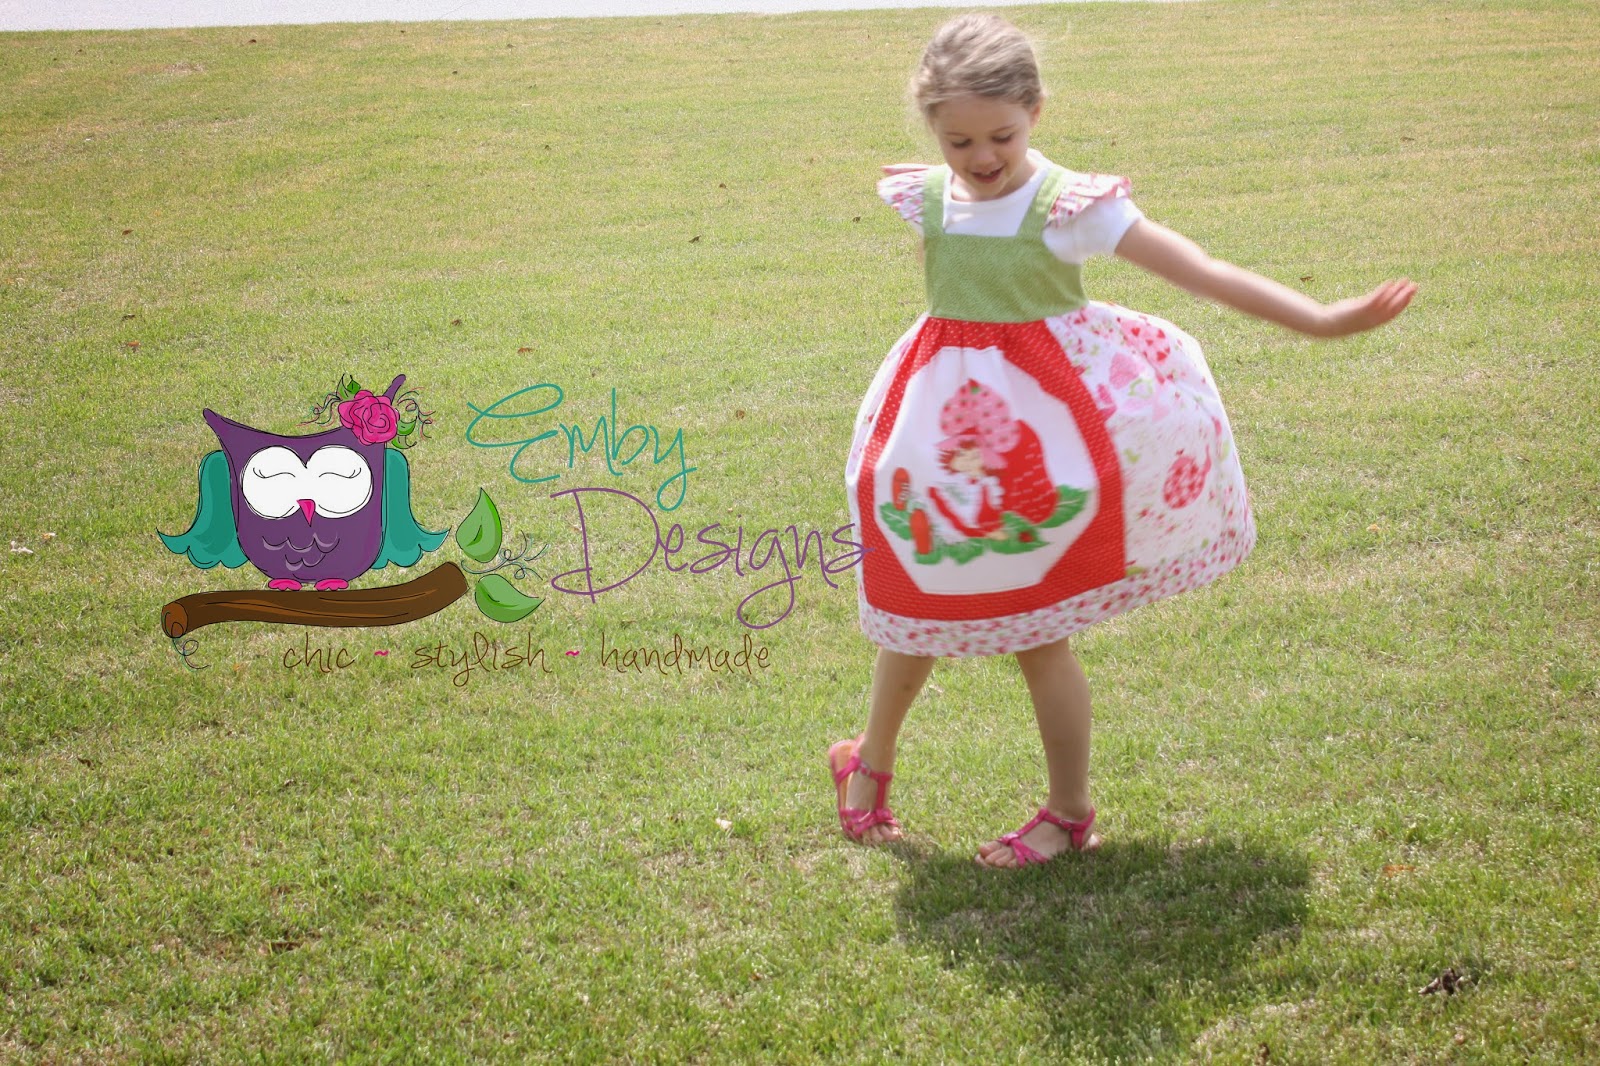
For the skirt on my dress I opted for the Play Date skirt, because I wanted those pockets. The pattern has a section for each of the skirt options describing construction of them. I tweaked the pattern a bit because I wanted to use this adorable SS panel that was given to me by another sewing mama (thanks again Nicole!!) This was really easy though because all of your skirt pieces (as well as your strap pieces) are listed in a chart for you. They aren't actual pattern pieces since they are simple rectangular cuts. (This means not much printing and taping ladies! If you hate that part as much as I do, you are doing the happy dance right now.) As you can see below, even though it isn't the fullest skirt option, it still has pretty good twirl factor.
Let's talk about attaching the skirt to the bodice. I will say, this was the one part of the pattern that I didn't care for. See, the pattern has you attach the skirt to your bodice piece, which is one long piece that wraps around to the back so there are no side seams, before you attach the straps or the bodice lining. So, you take your bodice piece and attach the skirt. Then you attach the straps to the bodice piece. Next you attach the bodice lining then flip and enclose the skirt hem. Having the skirt attached already for some of those steps just caused me aggravation because of all the extra fabric I was having to manipulate. So, next time I use this pattern I will do it the way I am more comfortable with. For some reason my skirt was wanting to bunch up on me like the lining wasn't big enough, which made no sense to me because it was exactly the same width as the bodice just like it was supposed to be. This was the only part of assembly where my seam ripper (and sailor) had to come out. Here's a closer shot of the back and you can see how the bodice piece at the button/buttonhole arean't nice and smooth like they should be. (After numerous attempts at getting this just right, I gave up.)

In regards to the pattern difficulty level, I'd say assembling that bodice and enclosed skirt seam are the most difficult parts. There are also two buttonholes that need to be made on the back of the bodice and I know some REALLY don't like buttonholes. If you are fine with buttonholes and good with enclosing that skirt seam then you are good to go with this pattern. If you aren't familiar with enclosing a skirt seam, the directions are very simple to follow with great illustrations along the way to help you. I may not have personally cared for the order in which things were assembled with that part, but that is my personal opinion on it. It isn't that the pattern is poorly written there. I found the entire pattern to be very well written and all the illustrations very helpful and clear.


I would recommend this pattern and feel that even if you don't consider yourself "intermediate" level that as long as you read carefully and follow the instructions that you could still sew this one.


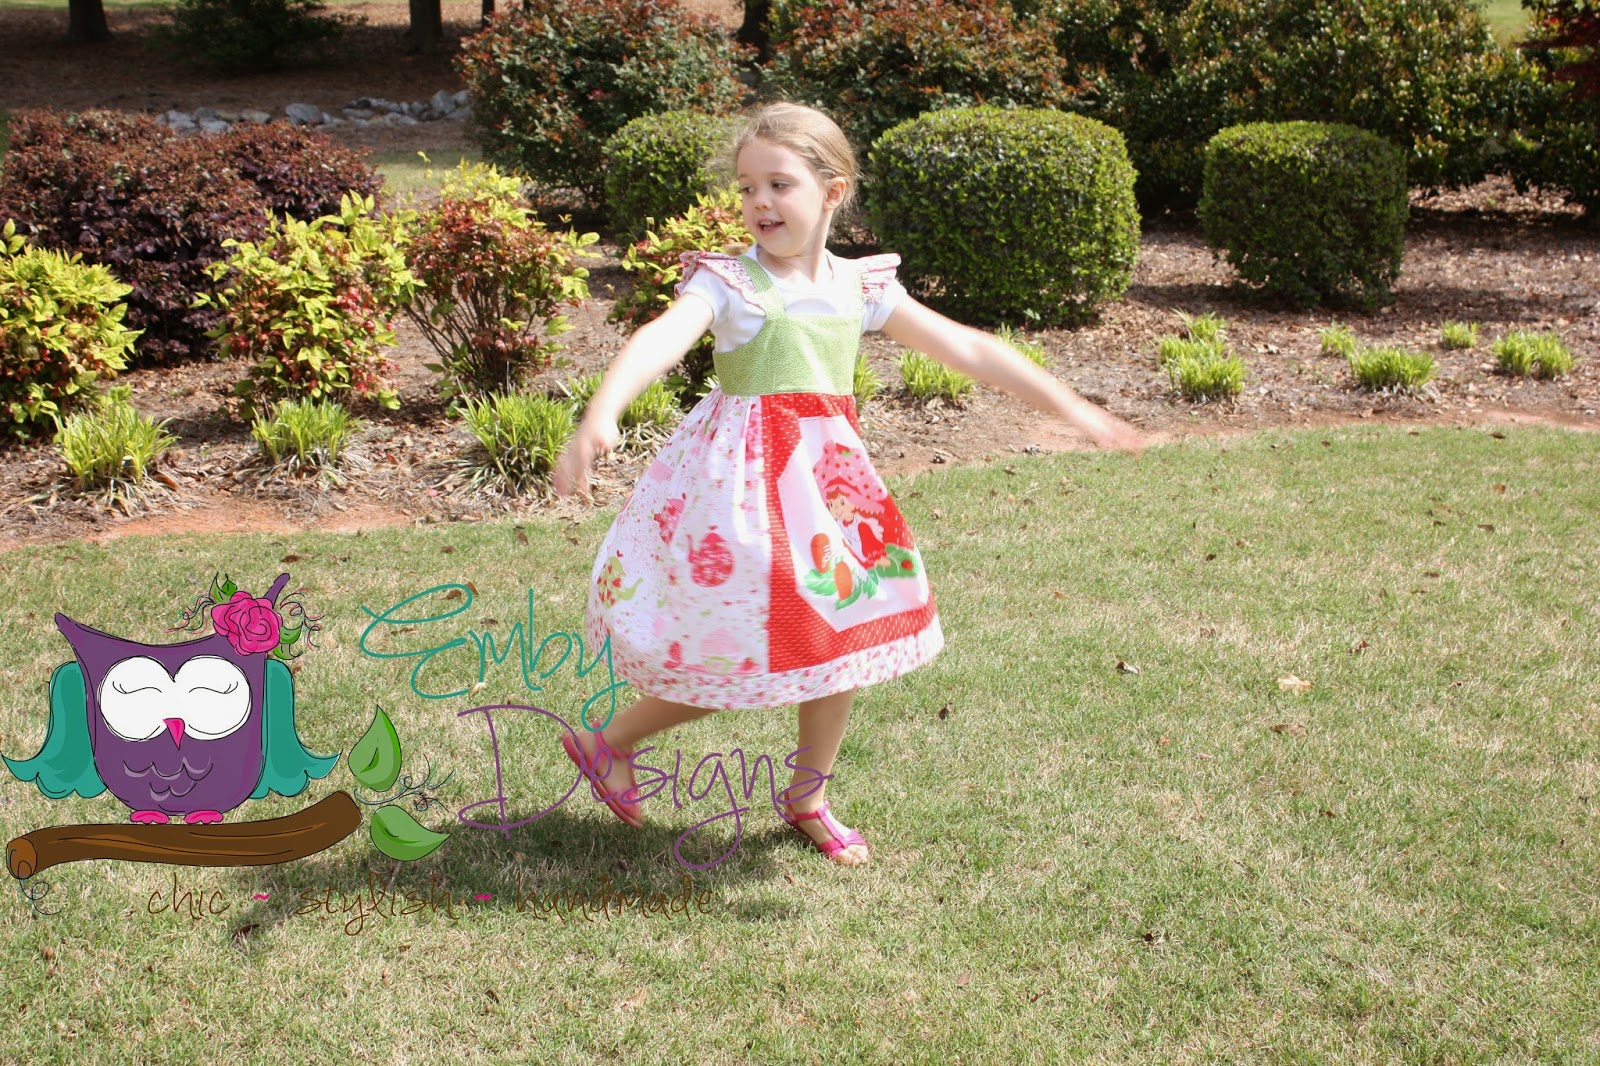
I enjoyed making this dress and do see myself making more for sure. I will also try this bodice on my oldest, too. I'll leave you with one last photo showing how much my girly loved her dress.


