
New Year, New Uses: Mash Up Janie -Bay
/As we close out our Mash Up week, I hope you have been inspired to look to your stash and try out some new creative endeavors of your own. Start simple and grow from there, or just dive in whole hog and come what may!
Today, Jane has a great tutorial to mash up the Little Lizard King Janie Lou and the Brownie Goose Bay Dress. The tutorial is important because not all pattern pieces match one another which can make a 'mash up' seem daunting. But, she takes out the guess work and shows you what to match and how. Resulting in this stunning Janie-Bay.... I want, I want!!!
----------------------------

Hello...Jane here from Not Sew Plain Jane. I am definitely a designer who loves to mix colors, textures and fabrics, but when I think of the innocence of a little child sometimes I want to create something that is exudes simpleness and sweetness. For me, there are two patterns that do just this...the Little Lizard King Janie Lou and the Brownie Goose Bay.


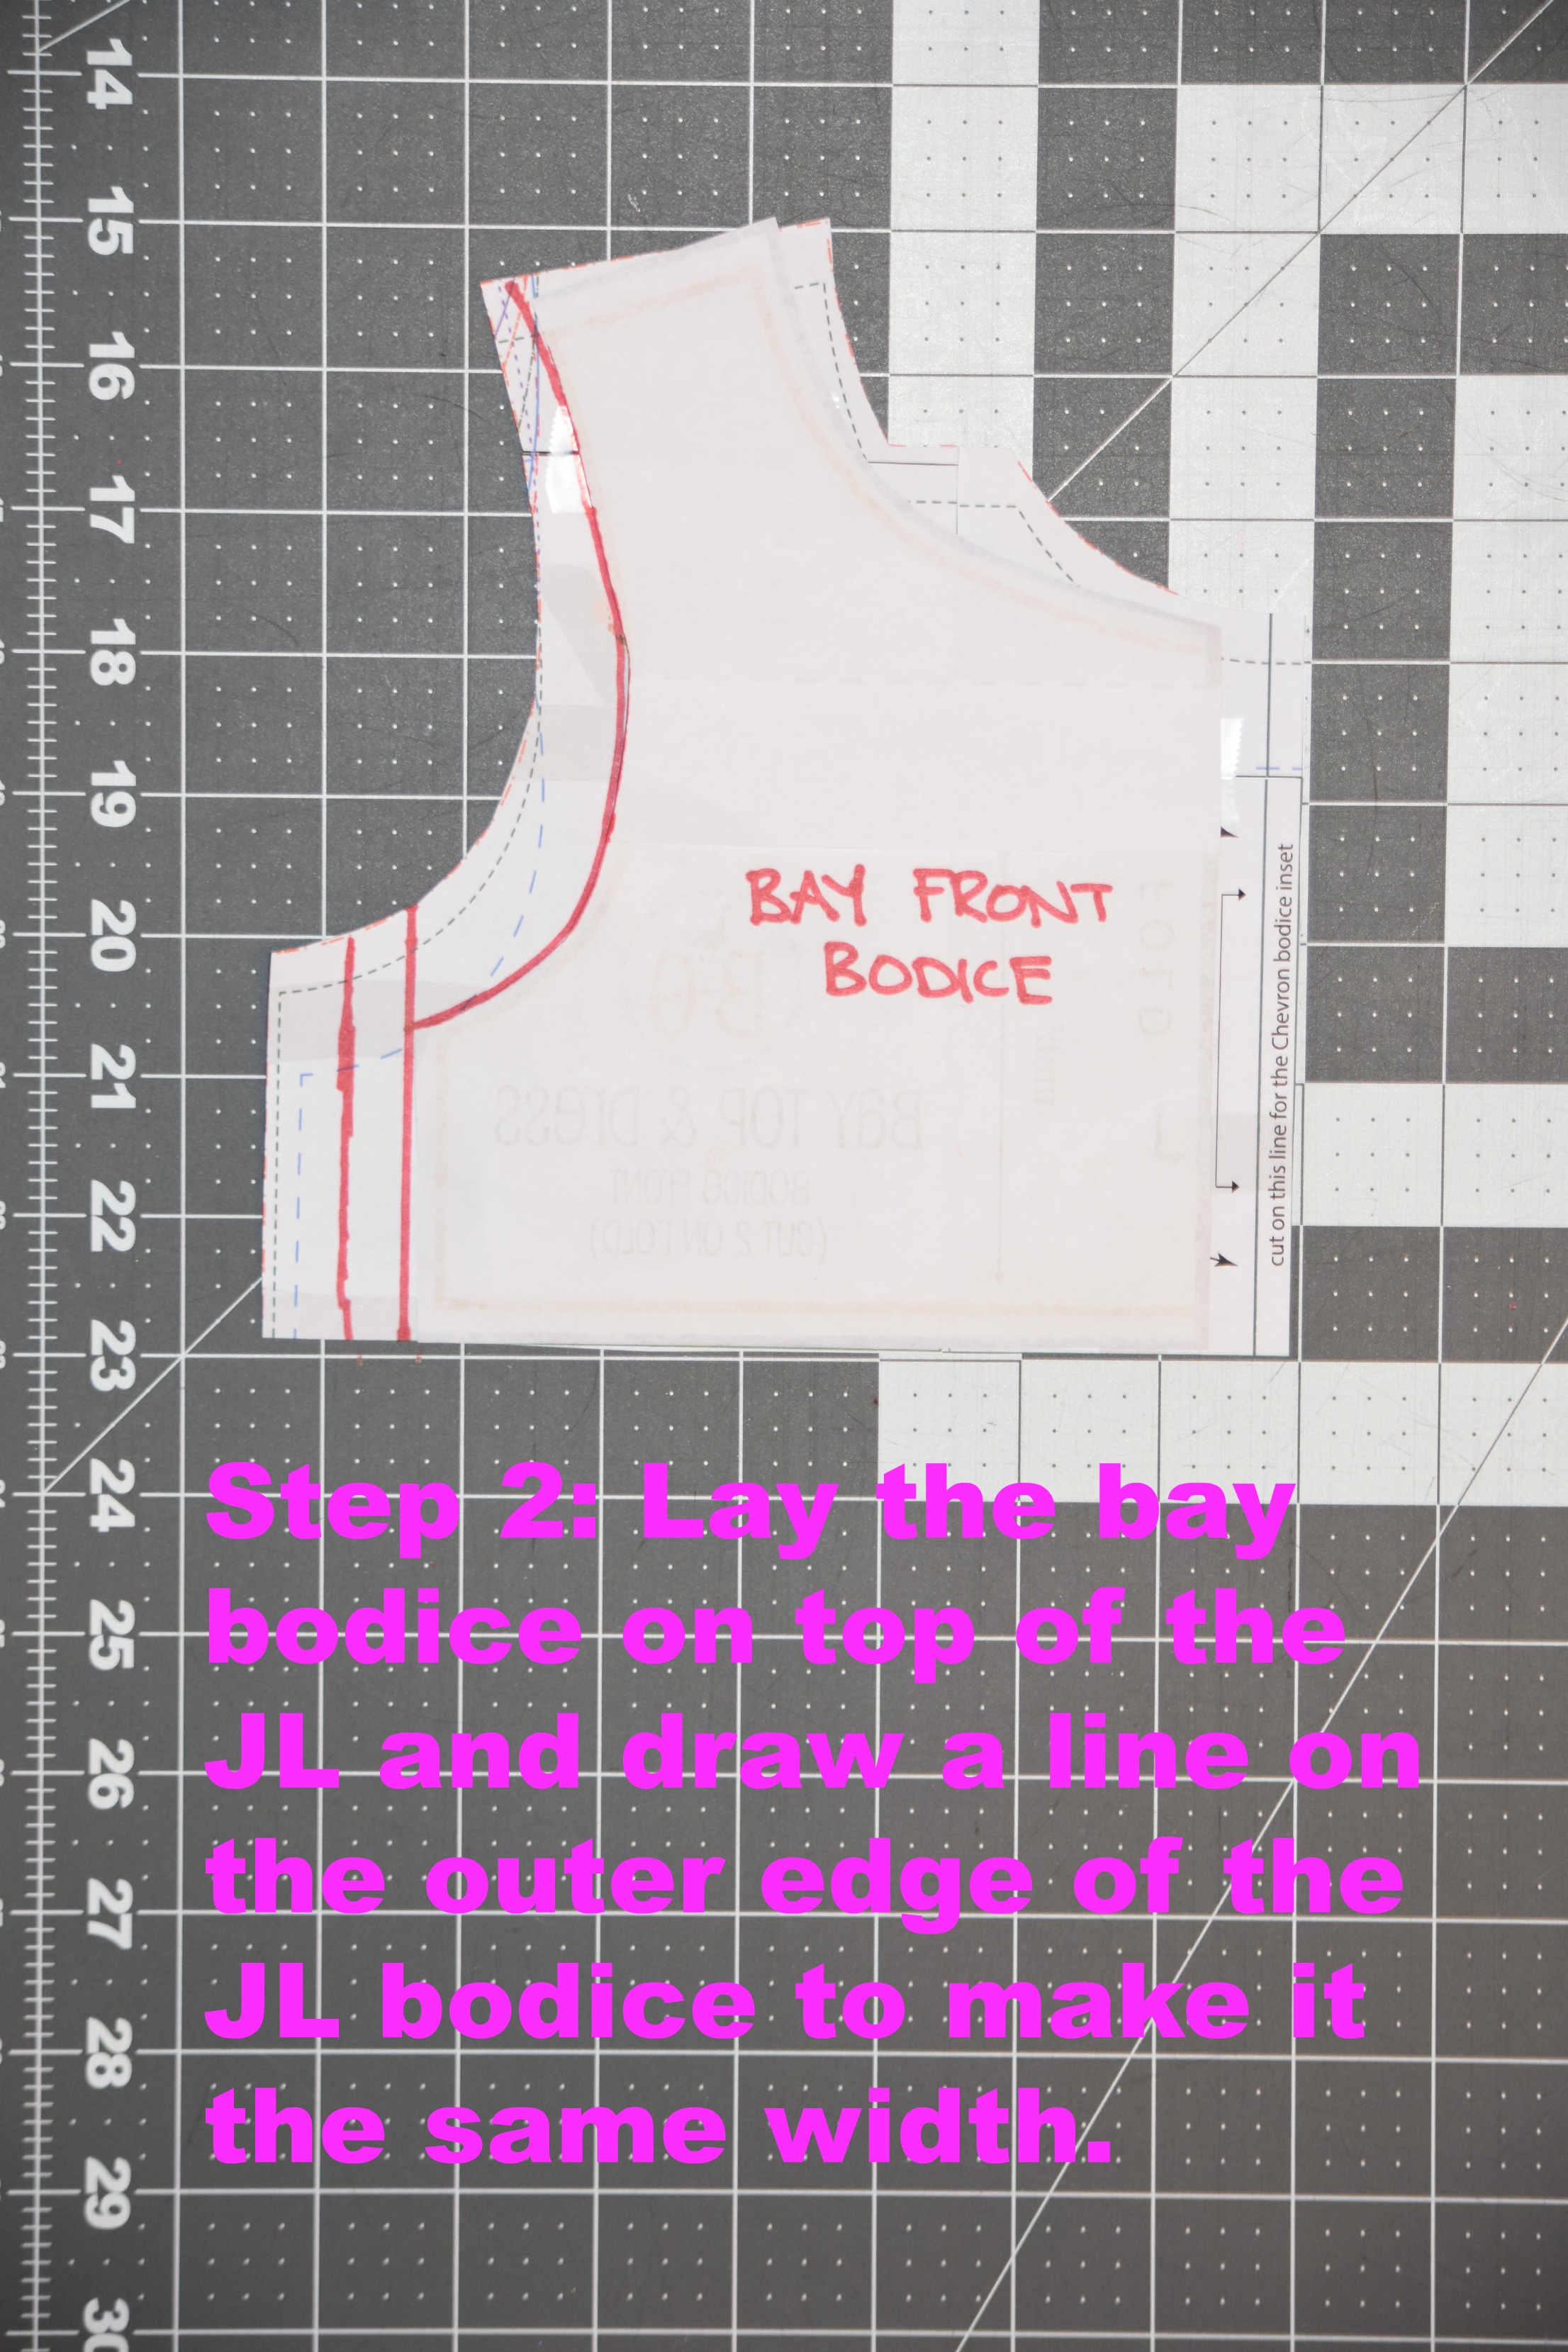
I knew going into it that this mash up wouldn’t be extravagant, but I couldn’t wait to see the simplicity of these two designs together. To start, I cut out the Janie Lou front bodice and the Bay front and back bodice pieces. I knew I would be using the chevron front for the Janie Lou so I went ahead and taped the Janie Lou outer bodice piece and inner bodice pieces together. This allowed me to compare the Janie Lou and Bay front bodice pieces. The Jane Lou bodice is wider than the Bay so I laid the Bay piece on top of the Janie Lou and centered the shoulders.

I then drew a line to cut off the excess width from the outer edge of the Janie Lou bodice. The curve of the armscye was also different so I followed the outer edge of the Bay armscye (as shown in step 2).
Now that the outsides of the bodice were matched up I had to focus on the inner side of the bodices. The Janie Lou inner shoulder need to be trimmed just a little in width to finish matching up the shoulders. So, I drew a line matching the shoulders and rounded it out to the chevron bodice inset point (this can be seen in step 3).

The Janie Lou bodice was still a little wide so I trimmed the inner chevron bodice piece by a quarter of an inch. At this point I was able to follow the directions for the front chevron panel of the Janie Lou and then assemble the pattern using the directions from the Bay.

I am absolutely in love with the results...pure sweetness from the front and the back!


